TIG welding aluminum is mostly a control problem: the oxide skin resists fusion, the base metal carries heat away quickly, and then the puddle can become fluid very fast. A reliable weld starts with a clean joint, AC set for enough cleaning, the correct filler for the alloy, and enough current to establish the puddle without lingering in one spot.
Quick Answer
For most shop aluminum, use AC TIG, start around 75% EN balance, shield with 100% argon, and clean the joint immediately before welding. Set maximum amperage as a starting limit, then control the puddle with your foot pedal, filler timing, arc length, and travel speed as the workpiece heats up.
Key Takeaways
- Aluminum oxide melts near 3,600°F, while the aluminum beneath it melts near 1,200°F, so cleaning and AC oxide-removal action both matter.
- On a modern inverter, about 75% EN is a useful AC-balance starting point; increase or decrease cleaning only as the joint requires.
- Modern inverter AC TIG generally works better with ceriated or lanthanated tungsten than with traditional pure tungsten.
- ER4043 and ER5356 are not universal substitutes. Select filler from the actual base alloy, service conditions, strength needs, and finish requirements.
- For many flat-position aluminum TIG jobs, 100% argon at roughly 15–20 cfh is a practical starting range.
Why TIG Welding Aluminum Is Different
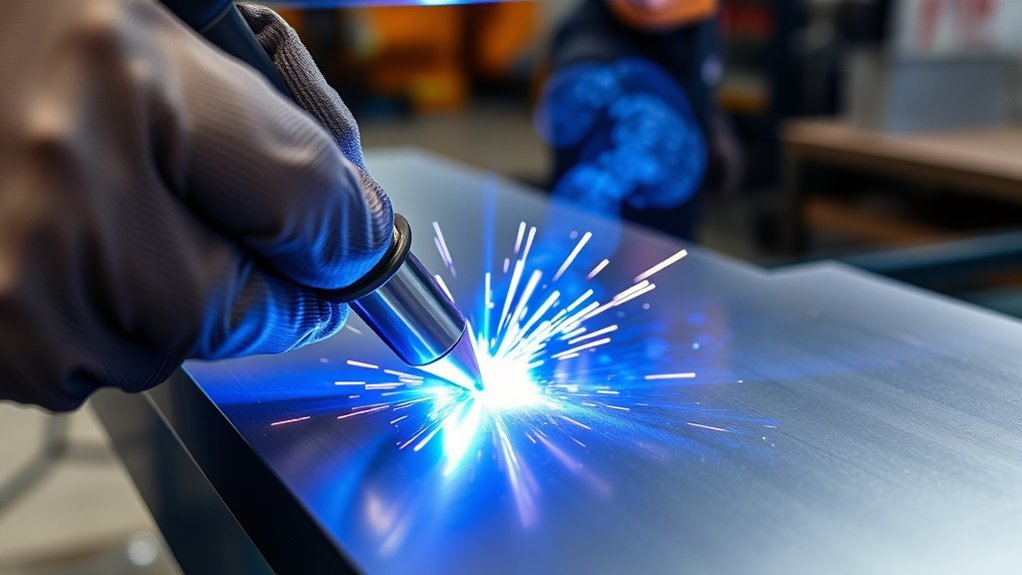
TIG welding aluminum differs from welding steel mainly because of its oxide layer and rapid heat transfer. According to Miller’s AC balance guidance, aluminum oxide typically melts near 3,600°F while the aluminum underneath melts near 1,200°F.
That means the base metal can already be molten while an oxide film still interferes with the puddle. Standard shop TIG therefore uses AC because the electrode-positive portion of the cycle helps remove surface oxide, while electrode-negative provides most of the useful heating and penetration into the work.
Cleaning still comes first. AC cleaning action is not a substitute for removing grease, cutting fluids, dirt, moisture, and excessive oxide before striking an arc.
Aluminum also conducts heat away from the weld zone rapidly. Early in a weld you may need substantial current to form the puddle, but as the whole part heat-soaks, that same pedal position can suddenly produce an oversized puddle or burn-through.
Filler selection matters just as much. The base alloy, joint design, required properties, corrosion exposure, anodizing, and service temperature can all affect whether a particular rod is appropriate.
In practice, successful aluminum TIG depends on clean material, suitable AC settings, steady torch control, correct filler, and active heat management. Understanding multi-process welders can also help when your work involves several metals or welding processes.
Warning: Welding exposes you to intense arc radiation, hot metal, fumes, electricity, and shielding gases. Use suitable welding PPE and ventilation. OSHA requires ventilation controls that keep welding fumes and vapors below hazardous levels, with additional precautions for confined spaces. See OSHA welding and hot-work ventilation requirements.
Set AC Balance and Frequency
AC balance determines how much of each cycle is spent on electrode-negative penetration versus electrode-positive cleaning. For clean aluminum on many modern inverter machines, about 75% EN is a useful starting point, not a universal final setting.
More EN puts more of the cycle into the workpiece and reduces heat on the tungsten. More EP increases oxide-cleaning action but also heats the tungsten more and can widen the etched zone.
Miller notes that older or dirtier aluminum may require settings closer to 65% EN, while very clean material may tolerate settings nearer 80% EN. The goal is to use only as much cleaning as the joint needs.
AC frequency controls arc shape rather than surface cleanliness. Higher frequency generally produces a narrower, more focused arc, while lower frequency spreads the arc over a wider area.
- Start near the machine manufacturer’s recommended AC balance or around 75% EN on clean aluminum.
- Use more cleaning action only if oxide or peppering remains after proper mechanical preparation.
- Increase AC frequency when you need a tighter arc in a corner, fillet, or narrow joint.
- Lower AC frequency when a broader, softer arc and wider bead profile are useful.
For many modern machines, roughly 100–180 Hz is a useful working range to explore, although the available range and ideal setting depend on the power source and joint. Frequency above 100 Hz generally tightens arc focus.
A machine with adjustable AC balance and frequency controls gives you more freedom to shape the arc instead of trying to solve every problem with amperage.
Dial In Aluminum Amperage
Set aluminum TIG amperage high enough to establish the puddle promptly, then control the actual current with the pedal or remote. The familiar rule of roughly 1 amp per 0.001 inch of aluminum thickness is best treated as a starting maximum, not a fixed operating current.
For example, 1/8-inch material may suggest a machine setting near 125 amps, while 1/4-inch material may suggest about 250 amps. Joint geometry changes the requirement: a T-joint can pull heat away faster than an edge or outside-corner joint.
As the part becomes hotter, ease off the pedal. Holding the same current from the cold start to the end of the weld is a common reason a bead grows wider and eventually washes out or burns through.
| Condition | Amperage guidance |
|---|---|
| Thin base material | Use a lower maximum and fine pedal control |
| General rule | About 1 amp per 0.001 in as a starting maximum |
| 1/4-inch plate | About 250 amps as an initial reference |
| T-joint | May need more initial heat because of heat sinking |
| Part already heat-soaked | Back off the pedal to keep the puddle consistent |
Do not use the amperage formula as a procedure specification. Alloy, fit-up, joint type, tungsten size, machine waveform, part mass, position, and travel speed can all move the useful current up or down.
This is also why a machine’s low-end control and remote-amperage response can matter as much as its headline output. Understanding multimode welding capabilities can help you choose equipment that fits both aluminum and other shop work.
Choose the Right Filler Metal
Choose aluminum filler from the actual base alloy and the finished joint requirements, not simply from a rule that says 4043 is for repairs and 5356 is for structural work. ER4043 and ER5356 are not interchangeable for every aluminum alloy.
ESAB’s 4043-versus-5356 guidance notes that both can be suitable for some common alloys such as 6061, but the correct choice depends on the application.
ER4043 is an aluminum-silicon filler with good fluidity and relatively low crack sensitivity in many suitable applications. It can also produce a smoother-looking weld, but it has lower ductility and shear strength than 5356.
ER5356 is an aluminum-magnesium filler with greater shear strength and ductility and usually gives a closer color match after anodizing. However, ESAB advises against 5356 for sustained service above 150°F because of its magnesium content.
- Identify both base alloys before choosing filler whenever possible.
- Check a recognized filler-selection chart for that alloy combination.
- When both 4043 and 5356 are permitted, compare strength, ductility, crack sensitivity, service temperature, corrosion needs, and post-weld anodizing.
- Use a filler diameter that lets you feed metal into the leading edge of the puddle without chilling it excessively or melting the rod before it reaches the pool.
The existing welding rod guide can help explain broader electrode and filler considerations, but aluminum filler still needs to match the specific alloy combination.
For code work, load-bearing fabrication, pressure components, or critical repairs, follow the approved welding procedure rather than choosing rod solely from a general-purpose recommendation.
Clean Aluminum Before Welding
Cleaning aluminum is part of the welding procedure, not a cosmetic extra. Remove oil and other hydrocarbons first, then remove oxide with tools reserved for aluminum, and weld soon afterward.
ESAB’s aluminum preparation guidance specifically recommends degreasing before oxide removal. It also warns against contaminating the joint with dirty shop rags, oily compressed air, or tools previously used on other metals.
Use a suitable aluminum cleaner or appropriate solvent for grease and residue. Acetone is commonly used for light contamination, but heavily oily material may need a more effective approved degreaser.
Never use chlorinated cleaning solvents around welding heat or arc radiation. Their vapors can break down into highly toxic compounds.
The same cleanliness principles apply to shielding and filler handling. Choosing the right shielding gas matters, but good gas cannot compensate for oil, oxide, moisture, or cross-contamination on the joint.
Remove Oxide Layer
Remove the oxide after degreasing because brushing an oily surface can smear contamination across the joint. Aluminum oxide is far more heat-resistant than the aluminum beneath it, so leaving a heavy oxide layer makes puddle formation harder and less predictable.
- Remove oil, grease, cutting fluid, and dirt with a suitable cleaner.
- Wipe the surface dry with clean, lint-free material.
- Brush the weld area with a stainless steel brush reserved only for aluminum.
- Clean the joint faces as well as the visible top surface.
- Handle the prepared area cleanly and weld promptly.
If the material is heavily oxidized, cast, weathered, or previously exposed to salt or oil, it may need more extensive mechanical preparation before normal brushing is effective.
Use Stainless Brush
A dedicated stainless steel wire brush is a practical way to remove aluminum oxide without introducing carbon-steel contamination. Reserve that brush for aluminum only and store it where it cannot pick up grinding dust or shop debris.
Use light, controlled strokes rather than high pressure. Aggressive power brushing can smear the soft aluminum surface instead of cleaning it effectively.
Brush the joint shortly before welding. A freshly prepared surface begins oxidizing again as soon as it is exposed to air, so cleaning hours or days before the weld defeats much of the purpose.
Replace or clean a contaminated brush. Once a brush has been used on steel or dirty material, it should no longer be considered an aluminum-only preparation tool.
Prevent Surface Contamination
Keep contamination away from the joint from the moment cleaning starts until the weld is complete. Fingerprints, cutting oil, moisture, grinding residue, dirty filler rod, leaking gas connections, and a dipped tungsten can all create defects.
- Keep cleaned joint surfaces free of oil, dirt, and moisture.
- Use tools and abrasives dedicated to aluminum.
- Keep the filler rod clean and inside the shielding envelope as you feed it.
- If the tungsten touches the puddle or filler rod, stop and reprepare it before continuing.
A clean surface will not guarantee a good weld by itself, but it removes one of the biggest variables in aluminum TIG and makes AC balance, amperage, and technique much easier to judge.
Use the Hot-and-Fast Bead Technique
“Hot and fast” does not mean holding maximum current throughout the weld. It means using enough initial heat to establish a clean puddle promptly, then moving steadily and reducing pedal pressure as the aluminum stores heat.
Miller’s aluminum TIG technique guide recommends watching puddle width and easing off the foot pedal as the workpiece heats. Too little heat can make the puddle disappear, while too much heat or slow travel lets it spread out of control.
Maintain a short, consistent arc. A long arc spreads heat over a wider area and makes the puddle harder to direct.
Push the torch forward rather than dragging it. Feed the filler into the leading edge of the puddle, then move the torch steadily instead of weaving excessively.
- Position yourself so your torch hand can move smoothly through the whole joint.
- Start the arc and bring the puddle in quickly without excessive dwell.
- Keep the tungsten close without touching the work.
- Add filler at the leading edge of the puddle.
- Move at a steady pace and reduce pedal input as the part heat-soaks.
- At the end, taper current rather than abruptly leaving a deep crater.
The foot pedal is especially valuable because aluminum’s heat requirement changes during the same bead. Optional pulse options and frequency control can provide additional adjustment, but they do not replace basic puddle control.
Fix Burn-Through and Cracking
Burn-through and cracking have different root causes, so do not treat both simply by reducing amperage. Burn-through is mainly a heat-control and fit-up problem, while aluminum cracking can also involve filler chemistry, joint restraint, crater shape, and base-alloy selection.
Burn-Through
If the puddle suddenly grows, sags, or opens a hole, reduce pedal input and keep the torch moving. The workpiece may simply have become much hotter than it was at the start of the bead.
- Use less actual current once the part is heat-soaked.
- Increase travel speed if you are dwelling too long.
- Keep fit-up tight because gaps make thin edges easier to melt away.
- Maintain a short arc so the heat stays controlled.
- Use filler consistently; adding rod changes the puddle’s thermal balance.
Cracking
If a weld cracks as it cools, verify the base alloy and filler before changing machine settings. The wrong filler can create a crack-sensitive weld even when the bead looks good while it is hot.
- Confirm that the chosen filler is approved for the base-alloy combination.
- Make sure the joint allows enough filler addition instead of producing a filler-starved weld.
- Fill the end crater rather than stopping with a deep depression.
- Reduce unnecessary joint restraint where the design permits.
- For critical work, follow the qualified welding procedure instead of improvising a repair sequence.
Black pepper-like contamination in the puddle points toward a different problem. After confirming that the joint is properly cleaned, additional EP cleaning action may be needed. Conversely, excessive EP can overheat and erode the tungsten.
Porosity calls for another checklist: base-metal cleanliness, filler cleanliness, gas leaks, drafts, moisture, contaminated tungsten, and gas flow that is either too low or so high that it becomes turbulent.
Understanding machine controls such as the pulse features available on AC/DC TIG welders can help on demanding joints, but defects should be traced to their actual cause first.
Pick the Right TIG Welding Gear
For ordinary aluminum TIG work, start with an AC-capable TIG welder, a suitable torch and remote amperage control, clean tungsten, inert shielding gas, correctly selected filler, and aluminum-only preparation tools. Match every component to the current range you expect to use.
Modern inverter machines change the old tungsten advice. Miller’s AC TIG tungsten guidance recommends ceriated or lanthanated tungsten over pure tungsten for modern inverter AC applications. Pure tungsten remains associated mainly with older transformer-style equipment.
For aluminum repair, Miller recommends pure argon for most jobs, with about 15–20 cfh in the flat position. It notes that thicker work may benefit from an argon/helium blend and that excessive gas flow can create turbulence and contribute to porosity.
| Gear | Purpose |
|---|---|
| AC TIG welder | Provides AC cleaning and penetration control |
| Ceriated or lanthanated tungsten | Stable arc on modern inverter AC TIG |
| Shielding gas | Protects the puddle and hot tungsten from air |
| Foot pedal | Adjusts current as the workpiece heats |
| Correct filler metal | Matches alloy and finished-joint requirements |
A dedicated stainless brush, clean solvent-handling materials, helmet, gloves, protective clothing, and suitable ventilation complete the basic setup. Keep tungsten grinding equipment clean as well; grinding debris from other metals can become another contamination source.
A quality machine can reduce setup frustration, but buying more amperage does not replace correct preparation and technique. The same principle applies when evaluating welding equipment for long-term value.
Frequently Asked Questions
What Settings Do I Use to TIG Weld Aluminum?
For clean aluminum on a modern inverter, start with AC, about 75% EN balance, 100% argon, and enough maximum amperage to establish the puddle quickly. A rough amperage reference is 1 amp per 0.001 inch. Adjust frequency, pedal input, balance, and travel speed for the actual joint.
What Is the Rule of 33 in TIG Welding?
The Rule of 33 is an informal pulse-TIG starting point: about 33 pulses per second, 33% pulse-on time, and 33% background current. It is not the 1-amp-per-0.001-inch amperage guideline and it is not required for aluminum. Treat pulse settings as optional starting points that must be tuned to the job.
What Is the Proper Setup for TIG Welding Aluminum?
A practical aluminum TIG setup uses an AC-capable machine, clean ceriated or lanthanated tungsten on a modern inverter, 100% argon for most work, a remote amperage control, and filler matched to the base alloy. Degrease first, remove oxide with an aluminum-only stainless brush, and make a test weld before the finished joint.
What Are Common Mistakes in TIG Welding Aluminum?
Common aluminum TIG mistakes include welding dirty metal, using a contaminated brush or tungsten, choosing filler without identifying the alloy, using too much or too little cleaning action, holding one amperage as the part heats, running an unnecessarily long arc, and overlooking gas leaks, drafts, or turbulent shielding flow.
Conclusion
TIG welding aluminum becomes much more predictable when you control the variables in the right order. Clean and identify the metal, choose the correct filler, start with sensible AC settings, establish the puddle quickly, then reduce current as heat builds. Watch the puddle rather than chasing a single universal setting.
Sources
- Miller Electric — AC Balance Control for TIG Aluminum Welding: Supports oxide melting temperatures, AC cleaning action, and balance guidance.
- Miller Electric — Choosing Tungsten for AC TIG Welding: Supports modern inverter tungsten selection and AC-frequency behavior.
- Miller Electric — TIG Welding Aluminum for Repair: Supports argon flow, tungsten, filler, and aluminum repair setup guidance.
- Miller Electric — TIG Welding Aluminum for Beginners: Supports torch movement, puddle control, filler placement, and reducing pedal input as aluminum heats.
- ESAB — 4043 vs 5356 Filler Alloy: Supports filler-metal differences, strength, ductility, anodizing, crack sensitivity, and service-temperature considerations.
- ESAB — Aluminum Storage and Preparation: Supports degreasing before oxide removal, dedicated stainless brushing, contamination control, and solvent precautions.
- Occupational Safety and Health Administration — Welding, Cutting and Heating: Supports ventilation and confined-space welding safety guidance.