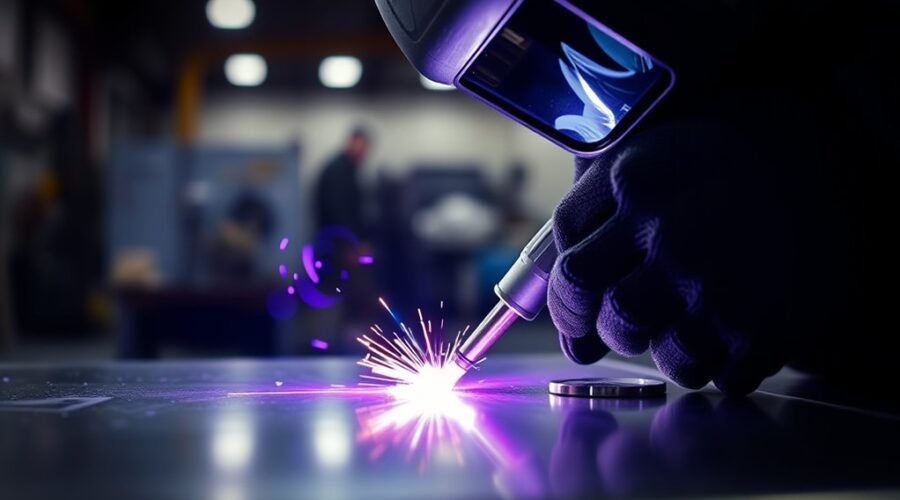
TIG welding, formally called Gas Tungsten Arc Welding (GTAW), uses a non-consumable tungsten electrode to create the arc while inert shielding gas protects the molten weld pool. It gives you unusually fine control over heat and filler metal, making it well suited to stainless steel, aluminum, carbon steel, titanium, and thin or appearance-critical work. Good results depend on clean metal, correct setup, a short arc, and coordinated torch and filler control.
Quick Answer
TIG welding uses a tungsten electrode, constant-current power source, and inert shielding gas to melt a joint; filler rod is added separately when needed. For beginners, use DCEN for most steels, AC for aluminum, match the tungsten to the machine and material, clean everything thoroughly, keep the arc short, and control heat with steady travel.
Last checked: September 28, 2026. Dates and figures were verified against official sources.
At a Glance
| Difficulty | Moderate to high for beginners because torch movement, filler feeding, and amperage control must be coordinated. |
| Tools Needed | TIG power source, torch, tungsten electrode, shielding gas and flowmeter, work lead, suitable filler rod, cleaning tools, and welding PPE. |
Key Takeaways
Key Takeaways
- TIG gives you separate control over the arc and filler metal, which is why it works well for precise and visually critical welds.
- Most steel and stainless TIG work uses DC electrode negative, while aluminum is commonly welded on AC.
- Modern AC/DC machines commonly use ceriated or lanthanated tungsten rather than relying on balled pure tungsten.
- Poor shielding, dirty metal, tungsten contamination, excess arc length, and incorrect heat input cause many beginner defects.
- A steady torch angle, short arc, clean filler rod, and controlled travel matter more than trying to copy a decorative bead pattern.
What Is TIG Welding?
)
TIG welding is an arc-welding process in which a tungsten electrode creates the arc without acting as the filler metal. The American Welding Society uses the formal name Gas Tungsten Arc Welding (GTAW).
An inert shielding gas, usually argon or an argon-helium mixture, flows through the TIG torch and protects the electrode and molten metal from the surrounding air. Filler metal can be added separately, or a close-fitting joint may sometimes be welded without filler.
Because the electrode and filler are independent, you can control heat and deposited metal separately. That makes TIG especially useful where bead appearance, heat input, joint access, or metallurgical quality matters.
Direct current electrode negative, or DCEN, is commonly used for carbon steel and stainless steel. Aluminum is normally TIG welded on AC because the electrode-positive portion of the AC cycle helps disrupt the oxide layer while the electrode-negative portion directs more heat into the work. Machines with adjustable output range and waveform control give you more flexibility when switching between materials.
How TIG Welding Works
TIG welding works by establishing an electric arc between the tungsten electrode and the workpiece. The arc melts the edges of the base metal into a small weld pool while shielding gas prevents excessive reaction with the atmosphere.
The torch carries the tungsten and directs the gas. A constant-current power source supplies welding current, and a foot pedal or torch-mounted control may let you vary amperage while welding.
When filler is required, you add a separate rod to the leading edge of the weld pool instead of feeding it through the torch. This separation is one reason TIG gives you such precise control over bead size and heat input.
AC and DC TIG modes serve different materials and applications. An AC/DC machine therefore provides broader AC/DC functionality than a DC-only TIG machine.
| Parameter | Function |
|---|---|
| Tungsten electrode | Carries the arc without serving as filler metal |
| Shielding gas | Protects the electrode and molten weld pool |
| Arc length | Affects arc focus, heat distribution, and gas coverage |
| Filler metal | Adds metal when the joint or procedure requires it |
Penetration and bead shape depend on several variables working together: amperage, arc length, torch position, travel speed, filler addition, joint design, and material thickness. Changing one setting often changes how the others behave.
TIG Welding Gear You Need
A basic TIG setup needs more than a power source and torch. You also need the correct tungsten, shielding gas, flow control, work lead, filler metal when required, cleaning tools, and protective equipment.
Choose a machine that can supply the current type your work requires. A DC-only unit can handle many steels and stainless steels, while aluminum work normally calls for AC capability. If aluminum is part of your plans, reliable AC output is an important capability.
Essential TIG Equipment
The core of the setup is a constant-current TIG power source paired with a torch and non-consumable tungsten electrode. The remaining equipment controls shielding, current delivery, filler addition, and operator safety.
- TIG welding machine with the required AC or DC capability.
- TIG torch, collet, collet body or gas lens, ceramic cup, and tungsten electrode.
- Argon or another suitable inert shielding-gas supply with regulator or flowmeter.
- Work lead and clamp connected to clean conductive metal.
- Filler rods that match the base metal, joint, and service requirements.
- Dedicated cleaning tools and tungsten-grinding equipment.
- Welding helmet, safety glasses, gloves, flame-resistant clothing, and suitable footwear.
Filler selection cannot be reduced to one universal rod. ER70S-series rods are common with many carbon steels, while aluminum fillers such as ER4043 or ER5356 are selected according to the aluminum alloy and service requirements.
ER5356 and ER70S-3, mentioned in many general TIG setups, are therefore examples rather than universal choices. Match the filler classification to the actual base metal and procedure.
Safety And Setup
Safe TIG welding starts before the arc is struck. Arc radiation, hot metal, electrical energy, fumes, compressed-gas cylinders, and grinding operations all create hazards even though TIG usually produces less visible spatter than some other arc processes.
Warning: Wear a welding helmet with the correct filter shade, safety glasses, gloves, flame-resistant clothing, and protective footwear. Provide suitable ventilation, keep flammables away from the work area, secure gas cylinders, and follow the welder and gas-equipment manuals before energizing the system.
For general-industry work, OSHA’s eye and face protection standard lists a minimum protective shade 8 for GTAW below 150 amps and shade 10 from 150 to 500 amps. OSHA also advises starting with a shade that is too dark and moving lighter only while staying at or above the required minimum.
Prepare the work area so fumes do not collect around your breathing zone. This matters especially when welding stainless steel, coated materials, or metals that can release hazardous contaminants.
Tungsten preparation also deserves care. Thoriated tungsten has long been used for DC welding, but it contains radioactive thorium. Ceriated and lanthanated electrodes are widely used non-thoriated alternatives.
Finally, make sure the work lead has clean metal contact, gas connections are secure, hoses are undamaged, and the torch is assembled correctly before you start.
Set Up Your TIG Welder
Set up your TIG welder in a fixed sequence so one overlooked connection or setting does not spoil the weld. Start with the machine off, confirm the equipment is suitable for the material, and prepare the workpiece before setting welding parameters.
- Clean the joint. Remove oil, moisture, rust, paint, scale, and oxide that could enter the weld pool.
- Connect the torch and shielding gas. Secure the torch connection, regulator or flowmeter, and gas hose according to the machine manual.
- Attach the work lead. Clamp it to clean, bare metal on the workpiece or welding table so the electrical path is reliable.
- Select the current. Use DCEN for most carbon and stainless steel TIG work and AC for conventional aluminum TIG welding.
- Choose and prepare the tungsten. Match its type and diameter to the machine, amperage, and material.
- Set the shielding gas. Argon is the common starting gas, and about 15–20 cubic feet per hour is a typical general starting range. Cup size, joint geometry, drafts, and torch setup can require adjustment.
- Set maximum amperage. A commonly used starting rule for steel is about 1 amp per 0.001 inch of material thickness, but joint type, position, alloy, machine, preheat, and technique can change the actual requirement.
- Test on scrap. Establish a stable puddle on matching material and fine-tune amperage, gas flow, and travel before welding the finished part.
Many machines offer remote amperage control through a foot pedal or torch control. This lets you set an upper limit at the machine and vary the actual current while the weld progresses.
A stable arc, smooth puddle, consistent shielding, and bead edges that tie into the base metal are signs that the basic setup is working. If the arc wanders, the tungsten overheats, or the bead becomes porous or sooty, stop and correct the setup rather than welding through the problem.
Understanding multimode welding options can also help if you need one machine for TIG plus other processes.
Choose the Right Tungsten
The right tungsten depends on the current type, amperage, power-source design, and material. Modern TIG practice offers several alloyed electrodes, so the old rule of automatically using pure tungsten for every AC aluminum job is no longer universal.
Ceriated and lanthanated electrodes are commonly used across AC and DC applications. Pure green tungsten is still associated with conventional AC transformer equipment, while modern inverter machines often perform better with an alloyed electrode prepared according to the manufacturer’s instructions.
Thoriated tungsten has strong DC arc characteristics, but its thorium content creates an additional grinding and dust-control concern. Many welders therefore use ceriated or lanthanated tungsten instead.
Electrode diameter must support the intended current range. A 1/16-inch tungsten works for many lower-amperage jobs, while 3/32-inch and larger electrodes handle progressively higher current ranges.
For DC work, grind the tungsten longitudinally so grinding marks run with the length of the electrode rather than around it. A pointed or truncated tip produces a focused arc. On modern inverter AC equipment, a prepared pointed or truncated alloyed tungsten is also commonly used instead of deliberately forming a large ball.
Typical stick-out is around 1/8 to 1/4 inch, although a gas lens and joint geometry may allow more. Excessive stick-out without adequate shielding can expose the tungsten and weld pool to air.
If you are comparing gases used by different processes, this shielding gas guide provides additional context, but remember that TIG normally requires inert shielding gas rather than common MIG argon-CO2 blends.
Pro Tip: Prepare several clean tungstens before a practice session. If you touch the puddle or filler rod, swap the contaminated electrode instead of trying to continue with an unstable arc.
How to Make Clean TIG Beads
Clean TIG beads come from three basic controls: clean material, steady torch movement, and consistent filler addition. A decorative ripple pattern means little if the joint has poor fusion, porosity, contamination, or excessive heat input.
Hold the torch at a slight push angle, maintain a short and consistent arc, and move only as fast as the puddle allows. Add filler at the leading edge while keeping the rod tip inside the shielding-gas envelope.
Gloves with good fingertip sensitivity can make fine filler-rod control easier while still providing suitable welding protection.
Clean Joint Preparation
Joint preparation affects TIG more than many beginners expect because the process is sensitive to oil, moisture, oxides, paint, rust, and cross-contamination. Clean both the base metal and filler before welding.
For carbon steel, remove rust, heavy mill scale, paint, and oil from the weld zone. Stainless steel should be cleaned with tools reserved for stainless so carbon-steel particles are not embedded in the surface.
For aluminum, degrease first and then remove the oxide layer with a clean stainless-steel brush dedicated to aluminum. Keep the filler rod clean as well.
- Inspect the joint surfaces and filler rod.
- Remove oil, moisture, coatings, oxide, rust, and scale as appropriate.
- Check joint gap and alignment.
- Keep cleaned parts and filler protected from recontamination before welding.
Correct fit-up matters because a changing gap forces you to change heat, filler amount, or travel speed during the weld. Consistent fit-up makes it much easier to keep the bead uniform.
Steady Torch Control
Steady torch control keeps the arc focused and helps the shielding gas cover the molten metal. A useful starting torch angle is about 15–20 degrees in the direction of travel, adjusted for the joint and visibility.
Keep the electrode close to the work without touching it. A general technique range of roughly 1/8 to 3/16 inch helps maintain a concentrated arc; the best distance can be shorter on small work and varies with the setup.
| Variable | Target | Effect |
|---|---|---|
| Torch angle | 15-20° starting range | Maintains visibility and gas coverage |
| Travel speed | 4-8 ipm starting range where appropriate | Helps maintain an even bead when matched to heat input |
| Arc length | About 1/8-3/16 in | Keeps the arc focused and controllable |
| Hand motion | Steady | Supports uniform bead width |
| Practice | Matching scrap material | Builds consistent control |
Do not treat any travel-speed number as universal. Material thickness, amperage, joint design, filler size, position, and alloy can require much faster or slower movement.
Consistent Filler Feeding
Filler feeding should match the size and speed of the weld pool. Feed too much and the puddle cools or builds excessive reinforcement; feed too little and the joint can become underfilled.
- Hold the filler at a low approach angle, around the original 45-degree starting reference where access permits.
- Choose a rod diameter that suits the joint, base-metal thickness, and amount of metal you need to add.
- Keep the filler tip inside the shielding-gas envelope so the hot end does not oxidize between additions.
- Dip the filler into the leading edge of the puddle rather than touching the tungsten.
- Coordinate each filler addition with torch movement so the bead width and reinforcement remain consistent.
Do not use a fixed rule that the rod must be a specific fraction of the workpiece thickness. Filler size is chosen from the joint geometry, heat level, material thickness, and deposition required.
TIG Welding Tips for Better Torch Control
Better torch control comes from making the weld physically easier to perform. Stable hand support, comfortable body position, short arc length, and a dry practice run can improve consistency before you change any machine setting.
Keep the torch at roughly 15–20 degrees and push it along the joint rather than laying it far over. Excessive torch angle stretches the arc, reduces shielding effectiveness, and makes the heat harder to place accurately.
Maintain a short arc and keep your wrist or forearm supported where practical. Before striking the arc, move the torch through the full planned weld path to make sure cables, body position, and hand support will not force you to stop halfway.
The filler rod should approach the front of the puddle and remain within the gas shield. Pulling a glowing filler tip far outside that shield can oxidize it before the next dip.
A foot pedal or torch-mounted control lets you taper heat as the workpiece warms. Set enough maximum current to establish the puddle promptly, then use the remote control to manage actual heat instead of holding one fixed amperage throughout every joint.
If you use a multiprocess machine, understanding duty cycle and process capability helps prevent you from expecting a machine to operate beyond its rated limits.
Common TIG Welding Problems
Most TIG problems can be traced to heat input, shielding, contamination, tungsten condition, electrical setup, or operator movement. Diagnose the visible symptom first, then change one variable at a time.
- Incomplete penetration: Current may be too low, travel may be too fast, or the joint may not be prepared for the required penetration. Increase usable heat, correct fit-up or joint preparation, or slow the travel as appropriate.
- Excessive penetration or burn-through: Current may be too high, travel too slow, or the gap too large. Reduce heat input, increase travel speed, improve fit-up, or use a heat sink when suitable.
- Tungsten contamination: If the tungsten touches the puddle or filler rod, stop welding. Replace it or grind away the contaminated section before restarting.
- Porosity: Check for dirty metal or filler, moisture, gas leaks, drafts, incorrect gas, poor cup position, or gas flow that is too low or excessively high.
- Unstable or wandering arc: Inspect tungsten type, diameter, tip condition, polarity, work-lead contact, gas coverage, and machine connections.
- Discoloration or poor bead appearance: Review gas coverage, travel speed, post-flow, cleanliness, and heat input before assuming the machine is at fault.
If adjustments do not solve the problem, return to the machine’s setup chart and manual rather than changing multiple controls at once. Comparing the behavior with other welding-process options can also clarify whether TIG is the best process for the specific production job.
TIG Welding Uses and Best Metals
TIG welding is strongest where control, cleanliness, joint quality, or appearance matters more than maximum deposition speed. It is widely used for thin sheet, tubing, root passes, precision fabrication, repair work, and joints made from reactive or corrosion-resistant alloys.
Common TIG-welded metals include carbon steel, stainless steel, aluminum, magnesium, titanium, nickel alloys, and some copper alloys. Each requires its own current type, filler selection, preparation, and shielding approach.
Stainless steel benefits from TIG’s fine heat control and clean process, while aluminum benefits from AC control and inert shielding. Titanium is especially sensitive to atmospheric contamination and may require more extensive shielding than a normal torch alone provides.
TIG produces no flux slag and normally creates very little spatter, reducing cleanup. Its tradeoff is lower deposition speed and greater operator coordination than many MIG or flux-cored applications.
Do not assume that a 200-amp machine has one universal maximum material thickness. A machine in that class can cover many light and medium fabrication jobs, but weldable thickness depends on alloy, joint preparation, preheat, number of passes, duty cycle, and required penetration.
For a home shop, a machine such as the PrimeWeld TIG225X illustrates the type of AC/DC TIG platform that adds features such as pulse and high-frequency starting.
Frequently Asked Questions
What Is the Rule of 33 in TIG Welding?
The Rule of 33 is an informal starting point for high-speed pulsed TIG, not an AWS welding rule. It sets pulse frequency to about 33 pulses per second, pulse time to 33%, and background current to 33%, after which the settings are adjusted for the material, joint, and desired heat input.
Can You Provide a Guide for Beginners to Learn TIG Welding?
Yes. Start by learning safety, machine setup, tungsten preparation, and puddle control on clean scrap before adding filler rod. Then practice maintaining a short arc, steady torch angle, consistent travel, and rhythmic filler addition before moving to different joint types, positions, and metals.
Can I Teach Myself TIG Welding?
You can learn basic TIG skills through careful study and supervised-safe practice on scrap, but welding hazards and code-critical work deserve formal instruction. Follow the equipment manual, use correct PPE and ventilation, practice simple beads first, and have structural or safety-critical welds handled or inspected by appropriately qualified people.
What Pays More, TIG or MIG?
There is no reliable national TIG-versus-MIG pay figure because wages are normally reported by occupation, industry, location, and skill rather than welding process. The U.S. Bureau of Labor Statistics reports a May 2025 median annual wage of $53,750 for welders, cutters, solderers, and brazers overall.
Conclusion
TIG welding rewards careful setup more than speed. Match the current and tungsten to the material, keep the joint and filler clean, maintain reliable shielding, and concentrate first on a short arc and steady puddle rather than bead appearance.
For a beginner, the most productive next step is to practice straight beads on clean scrap while changing only one variable at a time. Once arc length, torch angle, and puddle control become consistent, add filler and progress to actual joints.
Sources
- American Welding Society — What Is GTAW?: Supports the GTAW definition, constant-current process, non-consumable tungsten, inert shielding, filler-metal use, and equipment overview.
- Occupational Safety and Health Administration — Eye and Face Protection: Supports welding eye-protection requirements and GTAW minimum filter-shade values.
- U.S. Bureau of Labor Statistics — Welders, Cutters, Solderers, and Brazers: Supports the May 2025 national median wage used in the FAQ.