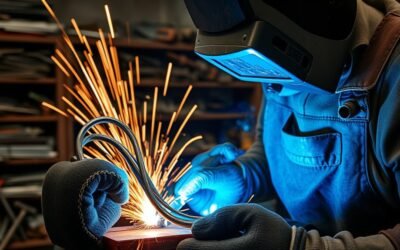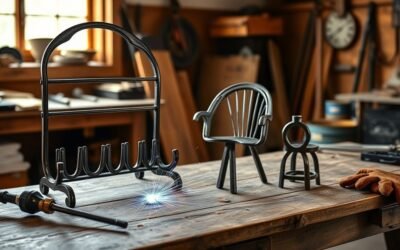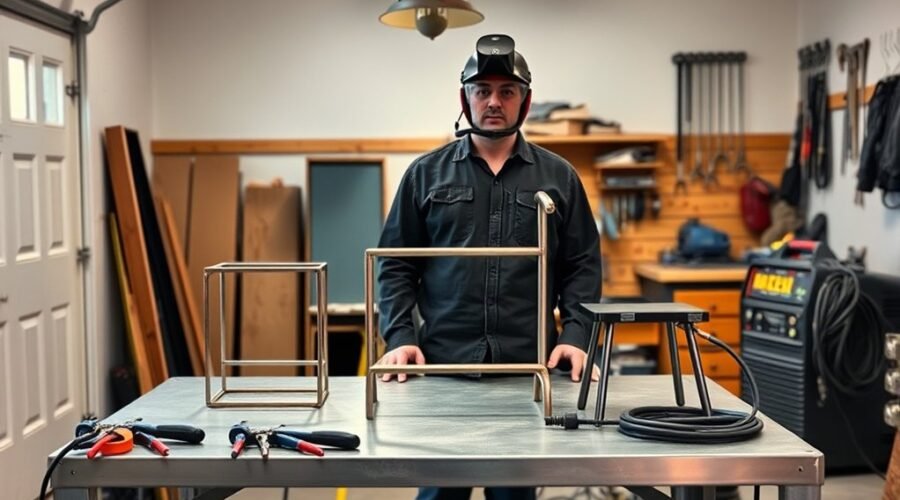
Easy welding projects for beginners should teach one or two core skills at a time without adding unnecessary risk or complicated fabrication. Practice coupons, a small metal box, wall hooks, a coat rack, and a basic welding table can help a new welder learn joint preparation, tack welding, bead control, heat management, squareness, and safe shop habits while producing useful results.
Quick Answer
Start with clean mild-steel practice coupons, then move to a wall hook, small box, coat rack, or simple welding-table project. These builds teach travel speed, fit-up, tacking, heat control, and finishing without complex geometry. Use your welder’s settings chart, proper PPE and ventilation, and avoid pressure vessels or safety-critical structural work.
Key Takeaways
- Begin with practice coupons before moving to useful projects such as hooks, boxes, organizers, plant stands, or light-duty shop accessories.
- Clean mild steel is a practical learning material because it is widely available and generally more forgiving than aluminum for basic fabrication.
- Use the settings chart supplied with your welder and make a test weld on scrap of the same material and thickness before welding the project.
- Good fit-up, secure clamping, tack welds, steady travel speed, and controlled heat reduce distortion and rework.
- Do not use beginner projects to practice on pressure vessels, used gas cylinders, lifting equipment, vehicle safety parts, or structural components whose failure could injure someone.
At a Glance
| Time Required | About 20–60 minutes for practice coupons or a small hook; several hours to a day for larger beginner projects such as a box, rack, table, or fire-pit accessory. |
| Difficulty | Beginner to beginner-plus, depending on the project, metal thickness, cutting method, and welding process. |
| Tools Needed | Welder, welding helmet, safety glasses, welding gloves, flame-resistant clothing, clamps, square, tape measure, marking tool, and suitable cutting/deburring tools. |
| Cost | Low for scrap practice pieces and small hooks; higher for new steel, plate, casters, coatings, consumables, and larger projects. Welder and PPE are not included. |
Choose Easy Welding Projects for Beginners
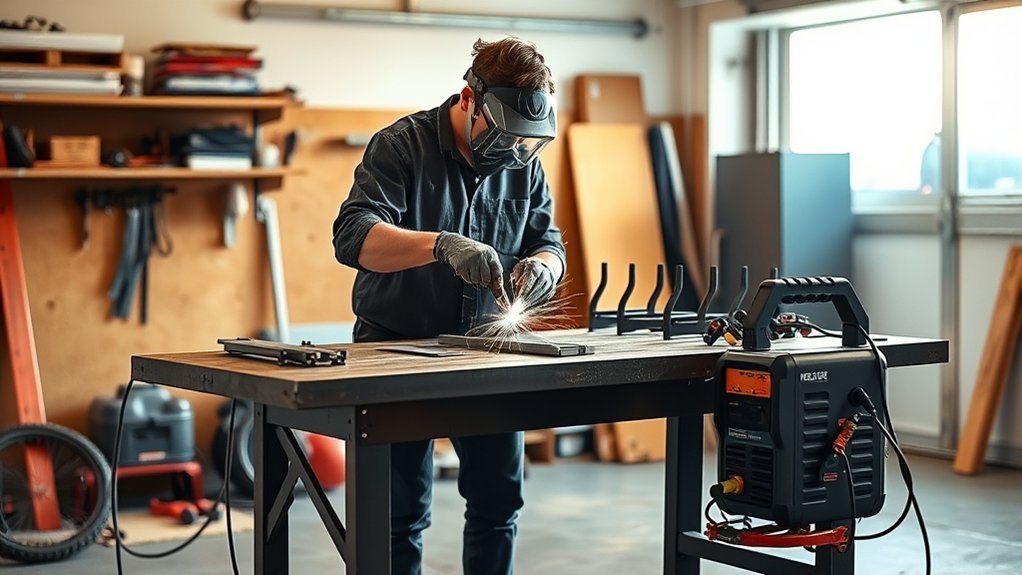
Beginner welders are best served by projects with simple cuts, easy-to-clamp joints, limited load requirements, and enough room to correct mistakes before the final weld. Good choices include metal candle holders, plant stands, bookends, desk organizers, simple wall hooks, small brackets, and other light-duty shop or household items.
A small metal box is useful because it develops corner-joint control, squareness, tack sequencing, and heat management. A desk organizer or horseshoe Dutch oven holder can also provide useful practice without requiring a large amount of material.
The best first project is not the most impressive one. It is the one that lets you repeat accurate measuring, cleaning, fitting, tacking, welding, and inspection without creating a dangerous part if the weld is imperfect.
Themed pieces, such as a metal heart made from motorcycle chain, provide creative practice. A portable metal drink carrier, small fire-pit accessory, or decorative metal art piece can follow after the learner is comfortable controlling the arc and fitting joints. If you are still choosing equipment, review appropriate beginner welder options before selecting a project that exceeds your machine’s output or process capability.
| Project | Difficulty | Main Skills | Good First Step? |
|---|---|---|---|
| Practice coupons | Very easy | Settings, bead control, travel speed | Yes |
| Wall hook | Easy | Shaping, tacking, small fillet welds | Yes |
| Small metal box | Easy–moderate | Corner joints, squareness, distortion control | After coupon practice |
| Coat rack | Easy–moderate | Layout, repeated joints, finishing | After basic hooks |
| Welding table | Beginner+ | Frame squareness, sequencing, heavier material | After smaller projects |
Choose the Metal and Welding Process
For early practice, clean mild steel is usually easier to prepare and more forgiving than aluminum. Aluminum conducts heat differently, develops a tenacious oxide layer, and requires process-specific preparation and equipment. Stainless steel also needs suitable filler, shielding, cleaning tools, and fume precautions.
Many beginners start with MIG or self-shielded flux-cored welding on mild steel. MIG uses continuously fed wire and usually relies on shielding gas, while self-shielded flux-cored wire can be useful where wind would disturb MIG shielding gas. TIG offers excellent control but requires more coordination. Whatever process you use, follow the machine and consumable manufacturer instructions.
Note: Do not assume one set of voltage, amperage, polarity, gas, or wire settings works for every material. Metal type, thickness, joint design, wire diameter, position, and shielding gas all affect the setup.
Gather Tools, Metal, and Safety Gear
A welding project starts with a controlled work area and the correct equipment. Typical beginner tools include a MIG, flux-cored, TIG, or stick welder suited to the material; clamps; a square; measuring and marking tools; and a suitable cutting tool such as a metal saw, angle grinder with the correct wheel and guard, or plasma cutter where appropriate.
Wear a welding helmet with an appropriate filter shade, safety glasses, welding gloves, sturdy footwear, and flame-resistant clothing. OSHA requires suitable eye and personnel protection for welding operations. Review the current OSHA welding, cutting, and brazing requirements and your equipment manuals before working.
Welding fumes should not be treated as harmless smoke. NIOSH notes that welding fumes contain metals and commonly include manganese. Use adequate ventilation or local fume extraction appropriate to the process and material, and keep your breathing zone out of the plume. See the NIOSH welding-fume guidance for current health information.
Warning: Do not weld, cut, or grind metal when you do not know what it is or what coating is on it. Paint, plating, galvanizing, oil, residues, and certain alloys can create hazardous fumes or fire risks. Keep combustibles away from the hot-work area, provide suitable ventilation, and follow the material, coating, and equipment manufacturer instructions.
Organize the workspace before energizing the welder:
- Place the welder on a stable surface and route cables where they will not become a trip hazard.
- Secure gas cylinders upright according to the supplier and equipment instructions when using shielding gas.
- Sort metal stock by material and thickness so unknown scrap is not accidentally welded.
- Keep clamps, square, measuring tools, helmet, gloves, and other PPE within reach.
- Remove flammable materials from the work area and confirm that sparks cannot travel into hidden combustible spaces.
- Attach the work lead to clean metal as directed by the welder manufacturer.
For MIG welding, use the machine’s door chart or manual as the first settings reference. Voltage and wire-feed speed change with material, thickness, joint design, wire size, position, and shielding gas. Miller’s MIG parameter guidance also treats published formulas as starting points that should be fine-tuned using test welds. Choosing the correct MIG shielding gas is another part of proper machine setup.
Know What a Beginner Should Not Weld
A project can look simple while carrying serious consequences if a weld fails. Until you have appropriate training, procedures, material knowledge, and inspection, avoid fabricating or repairing parts whose failure could injure someone.
- Pressure vessels, tanks, drums, or used compressed-gas cylinders
- Trailer hitches, trailer frames, and towing components
- Vehicle steering, suspension, chassis, roll-cage, or restraint components
- Lifting hooks, hoists, crane parts, overhead supports, or lifting points
- Stairs, structural railings, platforms, beams, or load-bearing building components
- Chairs, elevated seating, or other furniture where a failed joint could cause a fall
Use beginner practice to develop technique on low-consequence items first. A visually attractive bead does not by itself prove that a weld is suitable for structural or life-safety service.
Start With a Welding Practice Piece
A practice weld coupon gives a beginner a controlled surface for learning equipment setup, gun or torch position, travel speed, and heat input without risking an entire project.
Use clean scrap that matches the material and thickness of the planned project whenever possible. Label different settings so you can compare the resulting beads after the coupons cool.
Pro Tip: Make the final practice coupon from the same material type, thickness, joint style, position, wire or filler, gas, and settings you plan to use on the project. It is a much more useful test than practicing on unrelated scrap.
Practice Weld Coupon
Practice weld coupons let a new welder repeat the same task and see how changing one variable affects the result. Mild-steel coupons can be prepared as flat bead plates, lap joints, T-joints, butt joints, and corner joints.
- Cut small pieces of known material and deburr sharp edges.
- Clean the weld area to bright, uncontaminated metal as appropriate for the material.
- Fit and clamp the joint securely.
- Tack both ends so the pieces cannot shift easily.
- Make the weld using the manufacturer-recommended starting settings.
- Allow the coupon to cool before handling it without hot-work gloves.
- Inspect the bead for obvious problems such as porosity, severe undercut, erratic width, incomplete tie-in, cracks, or excessive spatter.
- Record the settings and change only one major variable at a time during the next test.
Visual inspection is useful for learning, but it cannot certify a weld for safety-critical use. More advanced training may include destructive bend, break, macro-etch, or other qualification tests under appropriate supervision.
As you progress, machine features such as output range and TIG welder duty cycle and features become more important for longer projects.
Basic Bead Control
Basic bead control comes from keeping the variables appropriate for the process: steady travel speed, consistent gun or torch position, suitable work and travel angles, and stable arc or stickout.
On a scrap practice piece, compare the bead shape after making deliberate small changes. An inconsistent bead width often points to irregular travel or torch movement, while excessive buildup can occur when travel is too slow or deposition is too high for the joint.
| Variable | Goal | What to Watch |
|---|---|---|
| Travel speed | Consistent bead | Even width and tie-in |
| Stickout / arc distance | Stable arc | No erratic arc or excessive spatter |
| Gun / torch angle | Direct the puddle correctly | Both sides of the joint wet in |
| Settings | Match material and joint | No obvious burn-through or cold-looking buildup |
| Repetition | Build consistency | Less variation between beads |
Build Your First Welding Table
Building a welding table can be a useful beginner-plus project because it teaches measuring, frame squareness, tack sequencing, distortion control, and working with heavier material. It also creates a stable reference surface for future fabrication.
Use a flat steel top and a frame designed for the expected load. The exact plate thickness and frame dimensions should match the size of the table, intended work, material availability, and the capacity of your cutting and welding equipment rather than an arbitrary one-size-fits-all specification.
- Cut the frame members to length and deburr them.
- Lay out the frame on the flattest surface available.
- Clamp and tack opposite corners rather than fully welding one corner immediately.
- Measure diagonals to check squareness before adding more weld.
- Add legs and bracing while repeatedly checking level and square.
- Attach the top using a weld pattern that limits concentrated heat and distortion.
- If using casters, choose units appropriately rated for the completed table and expected workpiece weight.
Set the working height to reduce awkward posture. Clamp-ready edges or fixture holes can make later setup faster. If you are comparing ready-made alternatives before building, review available welding table options.
Make a Small Metal Box
A small metal box is a useful next project because four corner joints make errors in fit-up and heat control easy to see. A beginner can use approximately 1/8-inch mild steel for a sturdy practice box if the welder can handle that thickness, although other thicknesses may be appropriate depending on the equipment and desired result.
A plasma cutter is one cutting option, but it is not required. A metal saw, shear, or correctly equipped angle grinder can also be used where suitable.
- Measure and mark four side panels and one base panel.
- Cut the pieces and deburr every sharp edge.
- Remove rust, paint, scale, oil, and other contamination from the joint area as appropriate.
- Clamp two sides at 90 degrees and make small tack welds.
- Add the remaining sides and repeatedly check the box for square.
- Tack the base in place before completing long seams.
- Weld short, separated sections in a balanced sequence to reduce concentrated heat and distortion.
- Let the work cool as needed rather than forcing a long continuous weld into thin material.
- Inspect the joints before grinding. Correct poor fit-up rather than simply filling large gaps with weld metal.
- After final cleaning, apply a coating suitable for the metal and intended environment.
If you later move into aluminum projects, AC/DC capability may become relevant; compare appropriate AC/DC TIG welder options rather than assuming the same setup used for mild steel will work for aluminum.
Weld a Doorbell From Scrap Steel — Safely
A decorative welded doorbell can be made from a section of new steel tube, a steel rod for the clapper, and a steel mounting plate. This preserves the rustic scrap-metal idea without asking a beginner to cut into a pressure container.
Warning: Some DIY bell designs use old argon or other compressed-gas cylinders. Do not cut, drill, grind, heat, or weld a used compressed-gas cylinder as a beginner project. OSHA requires used containers to be thoroughly cleaned of hazardous residues and hollow spaces to be vented before hot work. Use new steel tube or a purpose-made bell shell instead.
For the safer tube-based version:
- Cut a section of new steel tube to the desired bell length.
- Deburr and smooth the cut edges.
- Drill or fabricate a mounting point for the clapper without weakening the shell unnecessarily.
- Bend a steel rod into the clapper shape and test its swing before welding.
- Tack the mounting bracket or plate, check alignment, and complete the welds.
- Clean the finished bell and apply an exterior coating suitable for its environment.
This project develops cutting, drilling, shaping, fit-up, and small welds without introducing a used pressure vessel. A machine with suitable multi-process welder capabilities can also provide more process flexibility as later projects become more varied.
Create a Wall Hook or Coat Rack
A wall hook or coat rack is a practical project for practicing repeated small welds. Hooks can be formed from known mild-steel rod, flat bar, rebar, chain links, or horseshoes when the material is clean and suitable for welding.
Lay out the spacing before welding so the finished hooks have enough room for coats, bags, or light shop items. MIG welding is a common choice for this type of steel project. If input power flexibility matters in your shop, compare dual-voltage MIG options.
Simple Hook Designs
Simple hooks teach shaping, layout, tack welding, and small fillet welds. Start with one hook before making an entire coat rack so you can adjust the dimensions and bend radius.
- Cut each piece to the planned length.
- Deburr the ends.
- Bend the hook to a smooth, functional shape using appropriate tooling.
- Clean the joint areas.
- Clamp the hook to the backing plate.
- Tack it and verify the angle before completing the weld.
Once one hook works well, repeat the layout for the remaining hooks. Decorative wood accents or paint can be added after welding and cleaning.
Materials And Tools
Gather clean steel rod, rebar, chain links, horseshoes, or flat steel strips of known composition. Avoid mystery-coated scrap. A thicker flat bar or plate can serve as the mounting base.
Useful tools include a suitable welder, welding helmet, safety glasses, gloves, flame-resistant clothing, clamps, vise, square, drill, and angle grinder or other finishing tool. Use ventilation appropriate to the process and material.
Mounting And Finishing
Choose a sturdy base and space the hooks so large items do not crowd each other. After welding:
- Remove sharp burrs and edges without unnecessarily grinding away sound weld metal.
- Clean the surface according to the coating manufacturer instructions.
- Apply a suitable corrosion-resistant finish if desired.
- Mount the rack using fasteners and anchors designed for the actual wall material and expected load.
Do not treat a beginner-made rack as an overhead lifting point or support for loads that could injure someone if the rack or wall fastener fails.
Build a Simple Fire Pit Accessory
A steel sheet, flat bar, round bar, expanded metal, or tube can be used for simple fire-pit accessories such as a spark screen frame, poker, log support, or grate frame. Plan the dimensions around the actual fire-pit opening and allow adequate clearance for heat and handling.
Sketch the design first, then mark and cut each part accurately with a suitable saw, plasma cutter, or angle grinder. Deburr the pieces, fit them on a flat surface, and tack the assembly before completing the welds.
A simple workflow is:
- Measure the fire-pit opening.
- Cut and deburr the frame pieces.
- Clamp them in position and tack opposite sides.
- Check shape and dimensions before completing the joints.
- Weld short sections in a balanced sequence to limit distortion.
- Let the accessory cool before finishing or coating it.
Note: High-heat paint is not automatically appropriate for every fire-pit surface. Common high-heat coatings may be intended only for exterior surfaces and may specifically prohibit direct flame or direct food contact. Never coat a grill grate or cooking surface unless the coating manufacturer explicitly approves that exact use.
Follow the label for the coating you select. For example, Rust-Oleum’s high-heat coating instructions state that the product should not be used on metal directly exposed to flame or in direct contact with food, such as a grill grate.
If you want one machine for several home-project processes, understanding home-use welder options can help match the process to future projects.
Get Cleaner Welds With Simple Techniques
Cleaner welds begin before the arc starts. The parts need suitable material preparation, controlled fit-up, secure clamping, appropriate machine settings, and a repeatable welding technique.
For MIG welding, do not guess at voltage and wire-feed speed. Start with the machine chart or manual for the wire type, diameter, shielding gas, and material thickness, then test on matching scrap. Miller also uses approximately one amp per .001 inch of material thickness as a MIG starting rule of thumb, but the manufacturer notes that joint design, fit-up, wire type, shielding gas, position, and other variables affect the final settings.
Do not apply generic preheat simply because the metal looks thick. Some materials and qualified procedures require preheat, while others do not. If a job needs specific preheat or interpass-temperature control, follow the applicable material specification, welding procedure, or manufacturer guidance.
Comparing machines such as the Hobart Handler 140 and Lincoln 140 can help explain machine capability, but correct setup and technique still matter more than the brand name printed on the case.
Fit-Up Before Welding
Good fit-up reduces the amount of correction needed during welding. Pieces should sit in the intended position with a gap appropriate to the joint and procedure rather than being forced together with excessive weld metal.
- Measure and cut as accurately as the project requires.
- Deburr sharp edges and prepare any bevels required by the joint.
- Clean the weld zone.
- Clamp parts securely.
- Tack in several locations rather than making one long tack that pulls the assembly out of position.
- Recheck square, alignment, dimensions, and gap before the final weld.
For frames and boxes, alternate tack and weld locations so heat is not concentrated in one corner. Check dimensions again after each major stage because a project that was square before welding can move as the welds shrink.
Control Heat Input
Excessive heat can distort thin material or cause burn-through, while insufficient heat or an unsuitable technique can produce poor tie-in. Heat input is influenced by current, voltage, travel speed, process, electrode or wire size, joint geometry, and other variables.
| Practice | Why It Helps |
|---|---|
| Start with manufacturer settings | Provides a tested baseline for the machine and consumable |
| Test on matching scrap | Lets you fine-tune before risking the project |
| Maintain steady travel | Reduces large changes in bead width and heat concentration |
| Use short, separated welds where appropriate | Can reduce distortion on boxes, sheet, and frames |
| Allow cooling when the procedure permits | Helps control accumulated heat in non-critical DIY projects |
Clean Metal Surfaces
Rust, paint, oil, grease, mill scale, and oxidation can interfere with welding or produce hazardous fumes. The correct preparation depends on the metal and process.
For mild steel, clean the joint area as required using an appropriate wire brush, abrasive, grinder, or other preparation method. Remove coatings whose fumes may be hazardous before hot work, using a safe method appropriate to the coating.
Aluminum needs a different sequence. Miller recommends removing oil, grease, dirt, and moisture with an appropriate residue-free solvent and then removing aluminum oxide using a dedicated stainless-steel wire brush. Do not use chlorinated solvents around a welding arc because dangerous decomposition products can form. See Miller’s aluminum weld-preparation guidance.
- Identify the material and any coating before cleaning.
- Remove grease and contamination using a compatible cleaner and its safety instructions.
- Mechanically prepare the joint using tools appropriate to that metal.
- Keep dedicated brushes for metals such as aluminum or stainless steel to avoid cross-contamination.
- Allow flammable cleaning solvents to evaporate completely and keep them away from sparks, arcs, and hot work.
Fix Common Beginner Welding Mistakes
Common beginner welding mistakes usually come from poor preparation, unsuitable settings, inconsistent travel, incorrect gun or torch position, inadequate shielding, or trying to make a full project before practicing on matching scrap.
| Problem | Possible Cause | What to Check |
|---|---|---|
| Porosity / pinholes | Contamination or poor shielding | Cleanliness, gas flow, leaks, wind, nozzle condition |
| Burn-through | Excess heat for the joint | Settings, travel speed, gaps, material thickness |
| Narrow bead with poor tie-in | Travel too fast or insufficient output | Manufacturer settings and test coupon |
| Very wide bead / excessive buildup | Travel too slow or deposition too high | Travel speed, wire feed, current, technique |
| Distorted frame or box | Too much welding in one area | Tack sequence, weld sequence, clamping, accumulated heat |
| Excessive spatter | Settings, polarity, contamination, gas, or technique | Machine chart, consumable requirements, work lead and setup |
Travel speed should remain controlled rather than deliberately fast or slow. Miller notes that excessive travel speed can produce a narrow bead with inadequate tie-in, while traveling too slowly can put too much heat into the work and contribute to an excessively wide bead or burn-through on thin material.
Technique should match the process, joint, electrode or wire, and welding procedure rather than relying on one weave pattern for every weld. Practice straight, controlled beads first and add more complex manipulation only when the process or joint calls for it.
Safety equipment also affects control. A helmet that stays in position, properly fitted clothing, and welding gloves with reinforced palm patches can improve comfort and grip while protecting the hands from normal welding hazards.
Frequently Asked Questions
What Is a Good First Welding Project for a Beginner?
Start with practice beads and simple lap or T-joint coupons. After you can repeat reasonably consistent welds, a small metal box, bookend, wall hook, or desk organizer is a useful first finished project. These builds teach measuring, cleaning, clamping, tacking, joint control, and heat management without requiring safety-critical welds.
What Are Some Cool Little Welding Projects I Can Do?
Small beginner projects include candle holders, wall hooks, bookends, plant stands, phone stands, desk organizers, decorative chain art, simple brackets, tool hangers, and geometric metal art. Choose low-load projects with simple cuts and easy-to-clamp joints while you develop consistency.
What Are Some Welding Projects I Can Do to Make Money?
Possible small products include decorative wall art, garden pieces, coat racks, plant stands, signs, simple tables, fire-pit accessories, and custom organizers. Before selling welded products, make sure the design, materials, workmanship, finish, and intended load are appropriate. Avoid selling safety-critical items until you have the qualifications and quality-control process required for that work.
What Can I Weld as a Beginner?
Beginners can practice on mild-steel coupons and then make light-duty items such as candle holders, wall hooks, desk organizers, phone stands, boxes, bookends, and simple shop accessories. Move to larger projects only after you can prepare, tack, align, and weld smaller pieces consistently.
What Metal Is Best for Beginner Welding Projects?
Clean mild steel is a practical starting material for many beginner projects because it is common, available in many shapes and thicknesses, and works with several welding processes. Aluminum and stainless steel can also be welded, but they require different preparation, consumables, settings, shielding, and technique.
How Do I Know What Welding Settings to Use?
Start with the settings chart or manual supplied with your welder for the material, thickness, wire or electrode, gas, and process you are using. Then make a test weld on matching scrap and fine-tune one variable at a time. Do not rely on a universal amperage or voltage number for every joint.
Conclusion
Easy welding projects for beginners work best when each build adds one manageable skill. Start with practice coupons, then progress to hooks, organizers, a small box, a coat rack, or a basic shop project after your fit-up and bead control become more consistent.
Measure carefully, clean the joint, clamp securely, tack before final welding, use the manufacturer’s settings as your baseline, and test on matching scrap. Most importantly, keep early projects low-risk. Pressure containers, structural components, lifting equipment, vehicle safety parts, and other high-consequence work belong outside the beginner practice stage.
Sources
- Occupational Safety and Health Administration — 29 CFR 1910.252 — welding, cutting, hot-work containers, eye protection, PPE, and ventilation requirements.
- NIOSH — Welding Fumes and Manganese — current welding-fume and manganese exposure information.
- American Welding Society — Free Safety Resources and AWS/ANSI Z49.1 — welding safety, fumes, radiation, electrical hazards, fire prevention, and related guidance.
- Miller — MIG Welding: Setting the Correct Parameters — material thickness, amperage starting points, wire-feed speed, voltage, and bead troubleshooting.
- Miller — Cleaning and Preparing Aluminum Before Welding — degreasing, oxide removal, dedicated stainless brushes, and solvent precautions.
- Rust-Oleum — Specialty High Heat Label — coating-use restrictions for direct flame and direct food-contact surfaces.