A complete welding tool list includes more than a welding machine. You also need the right torch or electrode holder, work lead, PPE, workholding tools, measuring and marking tools, metal-prep equipment, and process-specific consumables. The exact setup changes for MIG, TIG, stick, and flux-cored welding, so the best list is built around the process, material, and job rather than a fixed number of tools.
Quick Answer
The essential welding tools are a suitable welder, process-specific gun/torch or electrode holder, work lead, helmet, gloves, protective clothing, clamps, an angle grinder, measuring and marking tools, and the correct consumables. Add shielding gas and a regulator for gas-shielded MIG or TIG, plus safe ventilation and fire-control equipment.
Key Takeaways
- Start with the welding process first: MIG, TIG, stick, and flux-cored setups do not use exactly the same torches, electrodes, gas equipment, or cleanup tools.
- Core shop tools include secure workholding, an angle grinder, a wire brush, measuring and marking tools, and a stable noncombustible work surface.
- PPE should match the hazard: proper-shade eye and face protection, welding gloves, flame-resistant or suitable protective clothing, and protective footwear are the foundation.
- Fume control, fire prevention, electrical safety, and compressed-gas handling are part of the welding setup—not optional accessories.
- Choose a machine by process, base metal, thickness, input power, output range, and duty cycle rather than price alone.
Essential Welding Tools
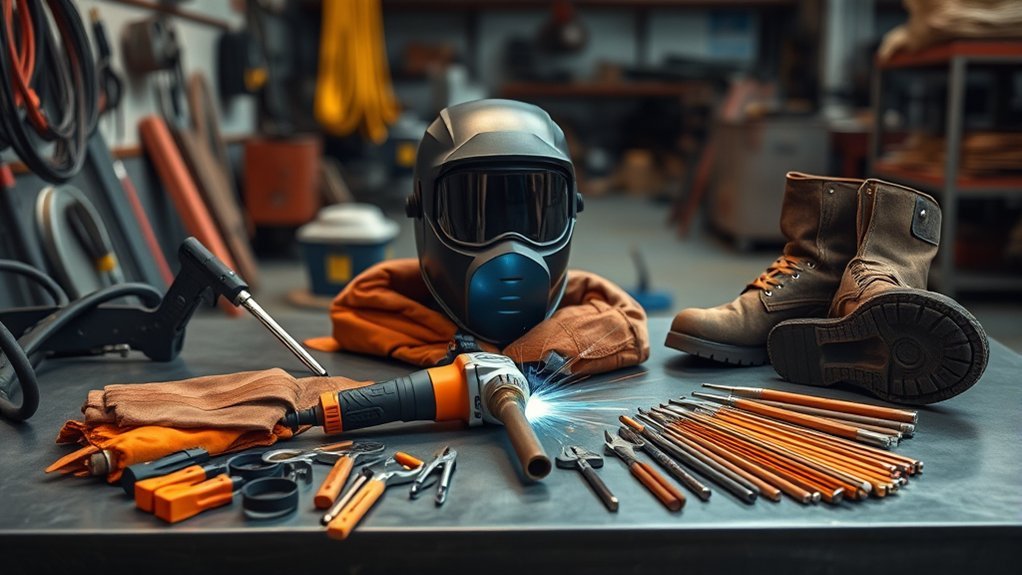
A proper welding setup starts with the equipment that creates and controls the arc, then adds tools for fit-up, preparation, inspection, cleanup, and safety. The welding machine is the main power source, but the rest of the circuit and process equipment matter just as much.
| Tool or Equipment | Why You Need It |
|---|---|
| Welding machine | Provides the welding current and must match the process, material, thickness, input power, and required output. |
| Gun, torch, or electrode holder | Delivers wire, holds the tungsten, or holds the stick electrode depending on the process. |
| Work lead and clamp | Completes the welding circuit and needs clean, secure contact with the work or welding table as appropriate. |
| Clamps and fixtures | Hold parts in position for accurate fit-up and tacking. |
| Angle grinder | Prepares edges, removes coatings or scale where appropriate, and finishes welds with the correct wheel or disc. |
| Measuring and marking tools | Tape measures, squares, soapstone, scribes, and gauges improve layout and repeatability. |
| Process consumables | Wire, rods, electrodes, tungsten, contact tips, cups, nozzles, and shielding gas vary by process. |
For TIG work, a machine with the output and controls suited to the metal can make setup easier; this guide to choosing a TIG welder for your needs covers common AC/DC options.
Pro Tip: Buy tools around the process you actually use. A stick welder may need an electrode holder and slag-removal tools, while TIG needs a torch, tungsten, shielding gas, and often a remote amperage control. A universal “10-tool” list can miss critical process-specific equipment.
Welding Safety Gear
Welding exposes the operator to arc radiation, hot metal, sparks, fumes, electrical hazards, noise, and flying particles. OSHA’s welding, cutting, and brazing requirements address fire prevention, eye and face protection, protective clothing, ventilation, and other controls, while ANSI Z49.1:2021 provides broader welding safety guidance.
Helmet, Eye, and Face Protection
Use a welding helmet with a filter shade appropriate for the process and amperage. An auto-darkening helmet improves convenience because the lens changes state when the arc starts, but it still must be suitable for the welding operation. Wear safety glasses with side protection when chipping, brushing, grinding, or doing other work that can send particles toward the eyes.
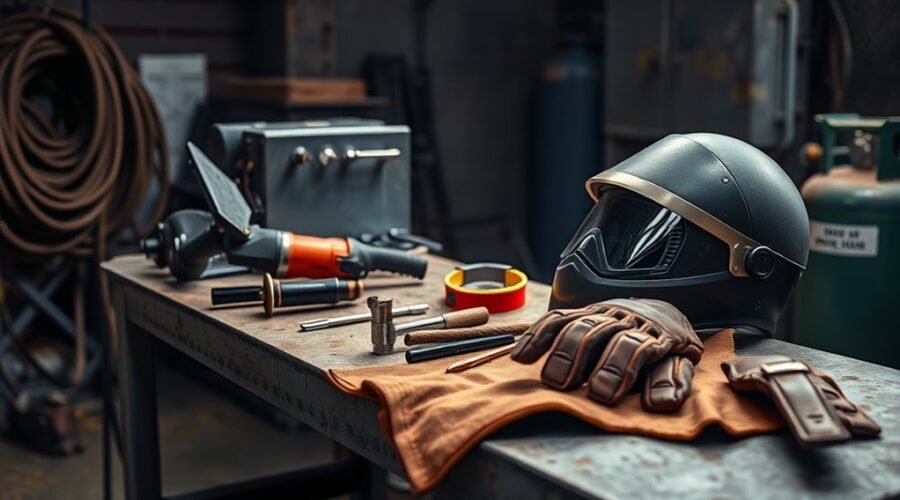
A proper welding setup protects against the arc, hot metal, fumes, fire, electrical hazards, and flying debris before the first tack is made.
Protective Clothing, Gloves, and Footwear
Use welding gloves suited to the process and heat level. Thinner TIG gloves can improve dexterity, while heavier MIG and stick gloves provide more heat protection. Gloves with durable construction and reinforced palm areas may last longer where the added bulk does not interfere with control.
Cover exposed skin with flame-resistant or otherwise suitable welding clothing. Avoid clothing that can readily melt or ignite. High-top work boots help keep hot sparks and slag out; safety-toe footwear is appropriate where falling or rolling objects create an impact or compression hazard.
Hearing, Fume, and Fire Protection
Noise exposure depends on the welding process and surrounding work such as grinding, gouging, and hammering. Under OSHA’s general-industry rule, a hearing conservation program is triggered at an 8-hour time-weighted average of 85 dBA; hearing protection should be selected for the actual exposure. See OSHA 29 CFR 1910.95.
Welding fumes also require attention. Keep your head out of the fume plume and use general or local exhaust ventilation as required for the process, material, coating, and workspace. Do not assume a small fan makes every welding situation safe, especially with stainless steel, galvanized coatings, lead-, cadmium-, or beryllium-containing materials, or confined spaces.
Warning: Remove or shield combustible materials before welding, keep suitable fire-extinguishing equipment ready, and never weld a used drum, tank, or container until it has been properly cleaned and made safe for hot work. Confined-space welding requires additional controls and should not be treated like ordinary bench welding.
Tools for Setup and Positioning
Accurate welding starts before the arc. Workholding clamps, a stable welding table, squares, and fixtures keep joints aligned while you measure, tack, and control distortion. The number and type of clamps depend on the part geometry; there is no universal requirement to own ten or more.
Workholding Clamps
Workholding clamps keep metal pieces secured during fit-up and tacking. C-clamps, F-style clamps, locking pliers, and purpose-built welding clamps each suit different shapes and access points. Use enough clamping force to hold alignment without crushing thin material or pulling the joint out of square.
Clamps help control movement, but they do not eliminate thermal distortion. Tack sequence, joint design, heat input, and welding sequence also affect whether the finished assembly stays straight.
Welding Tables
A solid welding table provides a stable, heat-resistant reference surface for layout, clamping, and fit-up. Tables with holes or slots make fixtures easier to position and can improve repeatability on repeated parts.
For larger assemblies, a flat heavy-duty welding surface can reduce setup frustration. Portable welding tables are useful for field work, but their load rating, stability, and clamping options should still match the job.
Positioning Magnets
Positioning magnets can hold ferromagnetic parts at common angles such as 45° or 90° while you establish fit-up and tack the joint. They are convenient, but they are not a replacement for rigid clamping when accuracy or restraint is critical.
Strong magnetic fields near a DC welding arc can contribute to arc blow, which may deflect the arc and make fusion less consistent. If the arc becomes unstable, move the magnet farther from the weld or replace it with a mechanical clamp after tacking.
Measuring and Marking Tools
A complete welding tool list should also include a tape measure, combination or framing square, soapstone or paint marker, scribe, and any gauges needed for the job. These tools help control cut length, joint angle, hole location, and repeatability before welding starts.
For fabrication work, checking diagonals on rectangular frames is a simple way to confirm squareness before final welding. Measure again after tacking because heat and restraint can shift the assembly.
Cleanup Tools for Weld Finishing
Cleanup tools remove slag, spatter, oxidation, sharp edges, and surface irregularities. The tools you need depend on the process: stick and many flux-cored welds produce slag, while gas-shielded MIG and TIG normally do not create the same slag layer.
Slag Removal Tools
A chipping hammer is useful after stick welding and other slag-producing processes. Chip carefully so fragments do not strike your face or nearby workers, then use a suitable wire brush to remove remaining residue.
Use brushes that are appropriate for the base metal and keep dedicated brushes for materials where cross-contamination matters. A wire brush removes loose residue; it does not repair lack of fusion, porosity, undercut, cracks, or other weld defects.
Surface Finishing Gear
An angle grinder is one of the most useful metal-prep and finishing tools in a welding shop. Grinding wheels can remove material quickly, flap discs can blend surfaces, and cut-off wheels can make straight cuts when used within their design limits.
Keep the grinder guard installed, use a wheel rated for the grinder speed, inspect discs before use, and wear suitable eye and face protection. Hand files are useful where a grinder would remove too much material or where a controlled edge finish is needed.
Must-Have Welding Supplies
Welding supplies are the items that wear out, get consumed, or need regular replacement. Stocking the correct consumables prevents a project from stopping because a contact tip, electrode, tungsten, or gas supply is wrong for the setup.
| Process | Common Consumables and Supplies |
|---|---|
| MIG/GMAW | Solid wire, shielding gas, contact tips, nozzles, liners as needed, and anti-spatter products when appropriate. |
| TIG/GTAW | Tungsten electrodes, shielding gas, cups, collets/collet bodies, and filler rod when the joint requires filler metal. |
| Stick/SMAW | Covered electrodes selected for the base metal, position, polarity, strength requirement, and storage conditions. |
| Flux-cored/FCAW | Flux-cored wire, contact tips and nozzles; some wires are self-shielded while others require external shielding gas. |
Gas-shielded processes also need a suitable cylinder, regulator or flowmeter, and sound hoses and connections. Compressed-gas cylinders must be protected from being knocked over and handled according to applicable rules; OSHA’s compressed-gas standard covers general handling, storage, and use requirements for compressed gases in covered workplaces.
For MIG work, dedicated MIG welding pliers are useful for cutting wire, changing tips, and cleaning the nozzle. A quality welding helmet remains a core safety purchase rather than a consumable.
Note: “Ground clamp” is common shop slang, but the clamp attached to the welding circuit is more accurately called a work clamp or work lead connection. It completes the welding circuit and is not the same thing as building electrical grounding.
Choosing Tools by Welding Type
Tool selection should match the welding process, base metal, thickness, joint design, available power, and expected workload. A machine that can produce enough amperage for a short repair may still be a poor choice for long production welds if its duty cycle is too low at the required output.
| Welding Type | Key Tools | Main Setup Need |
|---|---|---|
| MIG/GMAW | MIG welder/wire feeder, gun, work lead, solid wire, shielding gas, regulator/flowmeter | Correct voltage, wire-feed speed, polarity, wire, and gas coverage |
| TIG/GTAW | TIG power source, torch, work lead, tungsten, shielding gas, filler rod when needed, optional remote control | Precise heat control, clean material, correct tungsten and shielding |
| Stick/SMAW | Power source, electrode holder, work lead, covered electrodes, chipping hammer, wire brush | Correct electrode, polarity, current, arc length, and slag removal |
| Flux-cored/FCAW | Wire-feed machine, gun, work lead, flux-cored wire, and shielding gas when the wire requires it | Correct wire classification, polarity, feed settings, and slag cleanup |
If you want one machine for several processes, a multi-process welder can be convenient, but confirm what accessories are actually included. Some machines support a process electrically but still require a separate TIG torch, foot control, gas regulator, spool gun, or other equipment.
Duty Cycle, Input Power, and Output
Duty cycle describes how long a welder can operate at a stated output within a defined test period before it needs to cool. Compare duty-cycle ratings at the amperage you expect to use, not just the machine’s maximum output. Miller explains the concept in its duty-cycle guide.
Also confirm whether the machine needs 120 V, 240 V, or another supply and whether the available circuit is appropriate for the manufacturer’s requirements. For frequent MIG work, this roundup of MIG welders and their capabilities can help compare features after the electrical requirements are known.
Cutting Tools
Cutting tools are not part of the welding circuit, but they are often essential to fabrication. A band saw, chop saw designed for metal, portable saw, plasma cutter, or suitable grinder setup can prepare stock before fit-up. Choose the tool and blade, wheel, or consumable for the material and thickness, and follow the tool manufacturer’s guarding and PPE instructions.
Welding Tools for Beginners vs. Pros
Beginners should focus on a safe, complete setup rather than a large tool collection. A practical starter kit includes the welder and its process-specific accessories, helmet, gloves, protective clothing, safety glasses, work lead, several useful clamps, a measuring tape, square, soapstone or marker, wire brush, and an angle grinder with the correct discs.
Professional shops add capacity where the work demands it: more fixtures, dedicated welding tables, metal-cutting saws, fume extraction, additional grinders for different materials, cylinder carts, inspection tools, positioners, and machines with higher output or duty cycle. The difference is not simply “more expensive gear”; it is equipment matched to repeatability, production volume, code requirements, and the materials being welded.
Premium consumables can improve consistency only when they are correctly matched to the qualified procedure or the manufacturer’s recommendations. Expensive tools do not compensate for poor joint preparation, wrong settings, inadequate shielding, or unsafe work practices.
Frequently Asked Questions
What tools should every welder have?
Every welder needs a suitable power source, the correct gun/torch or electrode holder, a work lead, proper PPE, secure workholding, measuring and marking tools, metal-prep tools, and process-matched consumables. The exact list changes with MIG, TIG, stick, flux-cored, and the material being welded.
What are the 10 tools used in welding?
A useful 10-item list is: welding machine, welding gun/torch or electrode holder, work lead and clamp, welding helmet, welding gloves, workholding clamps, angle grinder, wire brush, measuring/marking tools, and the correct welding consumables. This is a simplified list; some processes also need shielding gas, a regulator/flowmeter, slag-removal tools, or additional PPE.
Can you make $200,000 as a welder?
It is possible in unusual circumstances—such as very high overtime, travel/per-diem arrangements, specialized contract work, supervision, or self-employment—but $200,000 should not be presented as a typical welding wage. The U.S. Bureau of Labor Statistics reports a $53,750 median annual wage in May 2025 for welders, cutters, solderers, and brazers, with the highest 10% earning more than $77,530 in its national wage distribution. See the current BLS Occupational Outlook Handbook profile.
What are the basic tools needed for a welder?
For basic shop work, start with a welding machine and its required leads or torch, a proper helmet, welding gloves, protective clothing, safety glasses, clamps, an angle grinder, a wire brush, a tape measure, a square, and the correct electrodes, wire, tungsten, filler rod, or shielding gas for the process.
Do all welding processes need shielding gas?
No. TIG normally uses an external shielding gas, and standard solid-wire MIG/GMAW uses external shielding gas. Stick/SMAW gets shielding from the electrode coating, and self-shielded flux-cored wire does not need an external gas cylinder. Gas-shielded flux-cored wire does require external shielding gas.
Do you need a chipping hammer for MIG or TIG welding?
Usually not for ordinary gas-shielded MIG or TIG because those processes do not leave the same slag layer as stick welding or many flux-cored processes. A chipping hammer is mainly useful when the process produces slag that must be removed between passes or after welding.
Conclusion
A complete welding tool list starts with the welder, process-specific gun/torch or electrode holder, work lead, PPE, workholding, measuring tools, metal-prep equipment, and matched consumables. Add gas equipment where the process requires it and choose the machine by material, thickness, input power, output, and duty cycle. Beginners benefit most from a safe, complete basic setup; professional shops add capacity, fixturing, extraction, cutting, and inspection tools as the work demands.
Sources
- OSHA 29 CFR 1910.252 — Welding, Cutting, and Brazing — fire prevention, PPE, hot-work, and ventilation requirements.
- OSHA 29 CFR 1910.101 — Compressed Gases — general compressed-gas cylinder handling, storage, and use requirements.
- OSHA 29 CFR 1910.95 — Occupational Noise Exposure — hearing-conservation and hearing-protection requirements.
- ANSI Z49.1:2021 — Safety in Welding, Cutting, and Allied Processes — broad welding safety guidance.
- Miller — Duty Cycle: What It Is and Why It’s Important — duty-cycle definition and machine-selection context.
- U.S. Bureau of Labor Statistics — Welders, Cutters, Solderers, and Brazers — current national wage and outlook data.