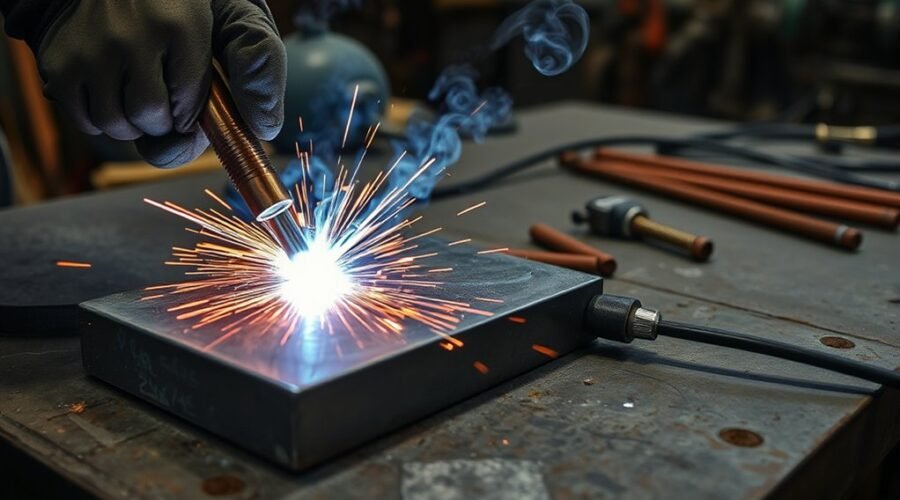
Arc welding problems often show up in the bead before the cause is obvious. In this guide, “arc welding” refers mainly to shielded metal arc welding (SMAW), or stick welding. Excessive spatter, porosity, lack of fusion, undercut, slag inclusion, arc blow, or a rod that keeps sticking can usually be traced to a small group of variables: amperage, polarity, arc length, electrode condition, travel technique, joint preparation, or the work connection.
Quick Answer
To troubleshoot stick welding problems, first check electrode type and polarity, amperage, work-clamp contact, arc length, travel speed, and metal cleanliness. A long arc or excessive current often causes spatter and undercut; low current can cause sticking and poor fusion; damp electrodes and contamination commonly contribute to porosity.
Key Takeaways
- Check electrode classification, polarity, amperage, arc length, travel speed, and the work connection before changing several variables at once.
- Clean oil, paint, heavy rust, moisture, and scale from the weld area and make the work-clamp connection on clean metal.
- Keep stick electrodes dry and follow the electrode manufacturer’s storage and redrying instructions, especially for low-hydrogen electrodes such as E7018.
- Treat arc blow as a magnetic/current-path problem: adjust the work-return position, shorten the arc, reduce current when possible, change sequence or direction, or use AC only when the procedure and electrode allow it.
- For structural, pressure-containing, lifting, suspension, or other safety-critical welds, follow the applicable welding procedure and inspection requirements instead of relying only on bead appearance.
At a Glance
| Time Required | About 2–10 minutes for basic setup diagnosis; longer if a weld must be removed and remade |
| Difficulty | Beginner to intermediate for diagnosis; critical weld repair may require a qualified welder or approved procedure |
| Tools Needed | Welder manual, correct electrodes, wire brush or grinder, chipping hammer, PPE, and a sound work clamp |
| Cost | Often $0 for a settings or technique correction; more if damaged leads, electrodes, or other equipment must be replaced |
Warning: Arc welding can cause electric shock, burns, eye injury, fire, and harmful fume exposure. Use suitable welding PPE, keep flammable material away, provide appropriate ventilation or fume extraction, and follow the welder and electrode manufacturers’ instructions. OSHA requires appropriate protection from welding hazards, including eye protection and exposure controls where needed.
Identify Arc Welding Problems Fast
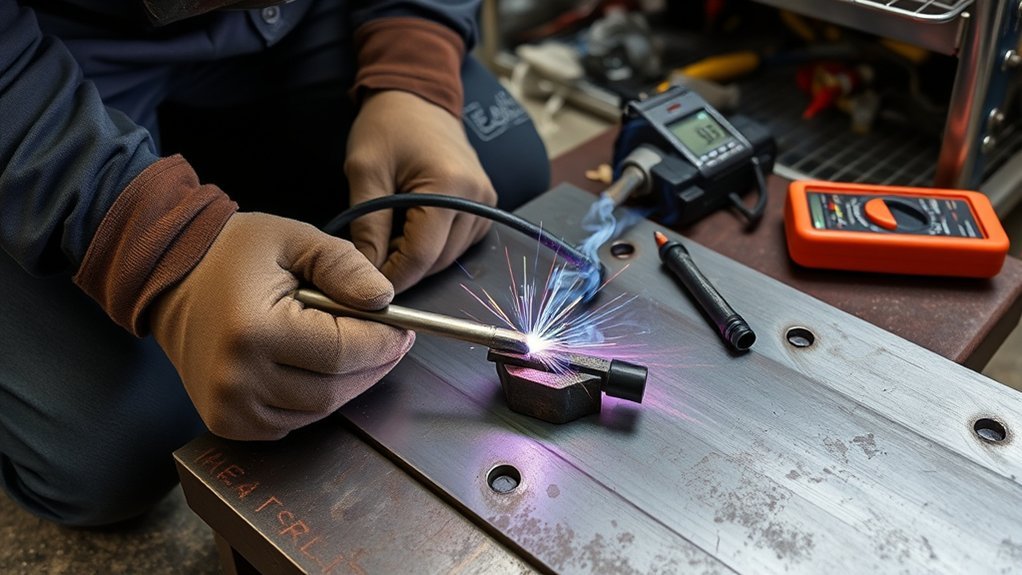
Quick identification of arc welding problems starts with the visible symptom. Instead of changing amperage, angle, travel speed, and electrode type at the same time, change one likely cause at a time and make another short test bead.
Note: Stick welding does not normally use an externally supplied shielding gas. The flux coating on the electrode produces shielding gases and slag as it burns. Gas-flow settings apply to processes such as MIG/GMAW and TIG/GTAW, not normal SMAW troubleshooting.
Quick Stick Welding Diagnostic Chart
| Symptom | Likely Causes | First Checks |
|---|---|---|
| Rod sticks or arc keeps going out | Current too low, arc too short, poor work connection, wrong polarity | Confirm polarity and electrode range; clean the work-clamp contact; increase current slightly within the specified range |
| Heavy spatter | Arc too long, current too high, polarity mismatch, arc blow | Shorten the arc; verify current and polarity; inspect for magnetic deflection |
| Porosity or pinholes | Long arc, damp/damaged electrode, contamination | Use a dry sound electrode, shorten the arc, and clean the joint |
| Weld sits on top or fails to tie in | Low heat, poor angle, unsuitable travel speed, dirty joint, electrode too large | Increase current within range, redirect the arc to the joint faces, and correct preparation |
| Groove along weld toe | Undercut from high current, long arc, fast travel, poor angle | Reduce current if high, shorten the arc, and slow or steady travel |
| Arc pulls sideways | Arc blow, residual magnetism, asymmetric return-current path | Move the work-return connection, shorten the arc, reduce current, or change sequence/direction |
| Dark lines or trapped material between passes | Slag inclusion | Remove all slag between passes; correct angle, heat, and bead placement |
Arc blow appears as a wandering or deflected arc and can produce an uneven bead, spatter, undercut, poor fusion, or irregular penetration. It is associated mainly with magnetic fields around DC welding current and residual magnetism in ferromagnetic workpieces.
Lack of fusion usually points to insufficient heat at the fusion face, poor electrode angle, unsuitable travel speed, contamination, inadequate joint preparation, or an electrode that does not fit the joint geometry.
Undercut often indicates excessive current, excessive arc length, fast travel, poor electrode angle, or an overly wide weave. Difficulty striking an arc can indicate low current, a poor work connection, the wrong polarity, electrode condition, or technique. Understanding consistent arc control also helps when comparing machine behavior.
The fastest diagnosis usually comes from checking the basics in order: electrode and polarity, amperage, work connection, arc length, angle, travel speed, and surface condition.
Fix Arc Welding Spatter
Excessive spatter in stick welding is commonly linked to a long arc, excessive amperage, incorrect polarity, contamination, or arc blow. A long arc raises arc voltage and makes metal transfer less controlled. Miller notes that an excessively long SMAW arc can increase spatter, undercut, and porosity.
Do not automatically lower amperage whenever spatter appears. First look at the puddle and electrode. If the puddle is excessively fluid, the arc is unusually harsh, or the electrode overheats, current may be too high. If the electrode sticks, the arc repeatedly goes out, or the bead piles up without fusion, current may instead be too low.
Dirty surfaces can also destabilize the weld. Remove oil, grease, paint, moisture, loose rust, and heavy scale from the joint area. Make the work-clamp connection on clean bare metal and inspect leads and connectors for damage, looseness, or excessive heating.
Arc blow can increase spatter by pushing the arc away from the intended path. Electrode storage also matters because damaged or moisture-affected coatings can change arc behavior. A stable power source and adequate duty cycle and cooling reliability are useful, but settings and technique should be checked first.
Pro Tip: When tuning current, stay inside the electrode manufacturer’s operating range and change amperage in small steps. Miller recommends adjustments of about 5–10 amps at a time when refining a stick-welding setting.
Stop Arc Welding Porosity
Porosity is caused by gas becoming trapped in the weld metal as it solidifies. In SMAW, common contributors include contamination on the base metal, damp or damaged electrodes, excessive arc length, and poor technique.
Stick welding does not rely on an external gas cylinder to shield the puddle. The electrode coating generates the protective shielding atmosphere and slag. For that reason, electrode condition and arc length are especially important. A long arc allows more atmospheric contamination and can interfere with effective shielding from the flux.
Effective correction starts with thorough surface cleaning, a dry and undamaged electrode, correct amperage, and a controlled arc. If you are troubleshooting MIG/GMAW rather than stick welding, the separate issue of shielding gas composition becomes relevant.
Common Porosity Causes
Oil, grease, paint, moisture, rust, and other residues can release gases into the molten pool. Clean the joint to the degree required by the material, electrode, and welding procedure before welding.
A long arc is another common cause. Miller advises that the correct arc length varies with the electrode and application; as a useful starting point, it should generally not exceed the diameter of the electrode’s metal core.
Electrode condition matters as well. A cracked flux coating or moisture-contaminated electrode can disrupt the shielding system. Low-hydrogen electrodes require particular care because moisture pickup can defeat their low-hydrogen properties.
Fast Fix Techniques
For SMAW porosity, work through these corrections in order:
- Clean the weld area and make sure the workpiece is dry.
- Use an electrode with intact flux that has been stored according to the manufacturer’s instructions.
- Shorten an excessively long arc.
- Verify that amperage and polarity match the electrode classification and diameter.
- Keep a steady travel speed and electrode angle so the flux system can protect the puddle consistently.
For low-hydrogen electrodes such as E7018, ESAB notes that many manufacturers specify a holding-oven range around 225–300°F. That is a holding guideline, not a universal redrying instruction. Exposure limits and rebaking temperatures vary by electrode, package, manufacturer, code, and welding procedure. Cellulosic electrodes such as E6010 and E6011 should not simply be stored or baked under E7018 conditions.
| Fix | Target | Effect |
|---|---|---|
| Clean base metal | Oil, paint, rust, moisture, scale | Reduces gas-forming contamination |
| Control arc length | Excessive atmospheric exposure | Improves flux shielding and arc stability |
| Use properly stored electrodes | Moisture and damaged coating | Reduces moisture-related porosity risk |
Solve Arc Welding Lack of Fusion
Lack of fusion occurs when deposited weld metal fails to bond adequately with the base metal or a previous weld bead. Common SMAW causes include insufficient heat input, incorrect electrode angle, excessive travel speed, cold-lap from poor puddle control, contamination, inadequate joint preparation, or an electrode that is too large for the joint.
Proper joint preparation matters because the arc must reach the root and sidewalls. Thick material may require the correct bevel, root opening, or multiple passes according to the procedure. Heavy scale, slag from a previous pass, paint, and other contamination can block fusion.
Correction may require increasing current within the electrode’s approved range, adjusting travel speed, shortening the arc, using a more suitable electrode diameter, and directing the arc into the joint faces. Do not compensate for bad preparation simply by turning the welder much hotter.
Selecting equipment with suitable multi-process capability can add flexibility, but correct joint design and SMAW technique remain essential when stick welding.
Prevent Arc Welding Undercut and Overlap
Undercut and overlap are different bead-profile defects. Undercut is a groove melted into the base metal along the weld toe that is not filled with weld metal. Overlap, or cold lap, occurs when weld metal rolls onto the base material without properly fusing to it.
Undercut is commonly associated with excessive welding current, a long arc, excessive travel speed, incorrect electrode angle, or overly wide weaving. Reduce current if it is too high, tighten the arc, stabilize travel speed, and keep the electrode directed so the puddle fills the weld toes.
Overlap is more likely when travel is too slow, heat is not reaching the base material effectively, the electrode angle is wrong, or too much metal is deposited for the joint. Increase travel speed if the bead is piling up, correct the angle, and confirm adequate heat at the fusion face.
Electrode diameter must match the joint and position. A rod that is too large for a narrow joint can make it difficult to reach the root or sidewall. Understanding welding process versatility is useful, but correct SMAW electrode size and technique are the immediate fixes.
Control Arc Blow in Welding
Arc blow occurs when magnetic fields deflect the welding arc from its normal path. It is most common when DC welding ferromagnetic materials and may become severe near joint ends, corners, root openings, or magnetized workpieces.
The work-return connection—often casually called the “ground clamp”—affects the current path through the workpiece and therefore affects the magnetic field around the joint. There is no single clamp location that cures every case of arc blow.
- Move the work-return connection. Try a location that produces a shorter or more symmetrical current path around the weld. The best position depends on whether the arc is blowing forward, backward, or sideways.
- Shorten the arc. A tight, controlled arc is less easily deflected.
- Reduce welding current if the procedure allows. Lower current reduces the magnetic field created by welding current.
- Change welding direction or sequence. Back-step welding, skip sequences, or welding toward an appropriately positioned return may help.
- Use run-on/run-off tabs or substantial tack welds where the procedure permits. These can reduce end effects.
- Switch to AC only when allowed. AC often reduces magnetic arc blow, but the electrode classification, machine, weld procedure, and required properties must permit AC.
- Check for residual magnetism. Strongly magnetized components may require controlled demagnetization or field-compensation methods by qualified personnel.
ESAB describes magnetic arc blow as a combination of welding-current fields, residual magnetism, return-path geometry, and joint geometry. Clean contact at the work clamp is also important because a high-resistance connection can create separate arc-stability problems.
Reliable equipment and sound connections also contribute to cleaner welds, although a MIG power source should not be confused with SMAW-specific setup requirements.
Fix Arc Starting and Sticking
Arc starting depends on briefly touching the electrode to the work and then establishing the correct gap before the rod freezes to the plate. Welders commonly use a scratch start or a controlled tap-and-lift motion, depending on electrode and preference.
Rod sticking is commonly caused by low amperage, an arc held too short after ignition, a weak work connection, wrong polarity, damaged or moisture-affected electrodes, or difficulty maintaining the gap during the start.
Increase current only if the present setting is low for the electrode. Stay within the manufacturer’s recommended range and make small changes rather than setting the machine above the stated range. Gloves with reinforced palm patches can improve comfort and grip, but electrical setup and technique remain the primary causes of sticking.
Arc Striking Basics
Start with clean metal and a secure work connection. Touch or scratch the rod against the workpiece, then lift just enough to establish the arc. Once running, maintain a short and consistent gap.
Miller recommends treating arc length as electrode- and application-dependent. A useful starting point is an arc no longer than the diameter of the electrode’s metal core. For example, a 1/8-inch electrode commonly starts near a 1/8-inch arc, but that is not a universal value for every rod.
The same source recommends approximately a 5–15 degree drag angle for many flat, horizontal, and overhead stick welds. Vertical-up welding uses different electrode orientation and technique, so a single fixed 15-degree angle should not be applied to every position.
Use dry, correctly stored electrodes. For low-hydrogen electrodes such as E7018, follow the manufacturer’s package, exposure, holding, and redrying instructions rather than relying on one temperature for every product.
- Strike or tap the electrode decisively and lift slightly.
- Confirm the correct polarity for the electrode.
- Set current inside the electrode manufacturer’s operating range.
- If current is low and sticking persists, increase it in small increments and test again.
- Practice starts on scrap of similar thickness before making an important weld.
Why Rods Stick
When amperage is too low, the arc may repeatedly extinguish and the rod may freeze to the workpiece. An arc held too short can create the same problem even when the current is otherwise correct.
Electrode condition also matters. E7018 and other low-hydrogen rods require moisture control because moisture pickup can affect weld quality. However, sticking alone does not prove that an E7018 is wet; first check current, polarity, work connection, arc length, and technique.
The work clamp should make solid contact with clean metal. A loose, oxidized, undersized, or overheated connection can cause voltage drop and unstable arc behavior.
Quick Fixes That Help
- Clean the work-clamp location and tighten cable connections.
- Verify electrode type, diameter, and polarity.
- Check the electrode manufacturer’s amperage range and adjust in small steps.
- Use a short but sustainable arc once the electrode is lit.
- Replace electrodes with damaged flux and handle low-hydrogen rods according to their storage instructions.
- If the machine still struggles to initiate the arc, inspect leads and consult the welder manual for output or open-circuit-voltage troubleshooting.
A high-quality start comes from a stable electrical circuit, appropriate current, and controlled movement—not from forcing the electrode against the workpiece.
Fix Slag Inclusion Between Weld Passes
Slag inclusion occurs when nonmetallic slag becomes trapped inside the weld instead of floating to the surface. It is especially important in multi-pass SMAW because every pass leaves slag that must be removed before the next pass.
Common causes include incomplete slag removal, an electrode angle that allows slag to run ahead of the puddle, inadequate heat at the fusion face, an excessively wide weave, poor bead placement, and undercut from a previous pass that traps slag.
Chip and wire-brush each pass until the weld surface and toes are clean. Grind stubborn areas when the procedure permits. Use a bead width and electrode angle that allow you to see and control the leading edge of the puddle rather than allowing slag to outrun the arc.
Prevent Cracks in Stick Welds
Cracking requires more caution than a cosmetic bead problem because a crack can make a weld unacceptable even when the rest of the bead looks good. Causes depend on material and procedure but can include hydrogen, unsuitable filler metal, high restraint, rapid cooling, poor joint design, excessive hardness, crater cracking, and welding over contaminated material.
Low-hydrogen electrode control is especially important when the material, thickness, restraint, or governing welding code requires it. Do not simply weld over a visible crack. For a repair, the crack normally must be completely located and removed according to the applicable repair procedure before rewelding.
Warning: Cracks in structural, pressure-containing, lifting, roll-cage, trailer, suspension, or other safety-critical welds should be evaluated and repaired using the applicable code, welding procedure specification, and inspection requirements. A surface bead placed over a crack is not a reliable repair.
Fix Poor Penetration and Burn-Through
Poor or incomplete penetration means the weld does not adequately reach or fuse the root of the joint. Causes can include current that is too low, excessive travel speed, an electrode that is too large, insufficient root opening, an inadequate bevel, poor electrode placement, or a joint design that prevents the arc from reaching the root.
Correct the joint preparation first. Then select an electrode diameter and current range appropriate for the material thickness and welding position. On thick material, multiple passes are often preferable to simply increasing current.
Burn-through is the opposite problem: excessive heat creates a hole or excessive melt-through, especially on thin material or a wide root gap. Reduce heat input, increase travel speed appropriately, use a smaller electrode, improve fit-up, or use a procedure designed for the thin material.
Fix No Arc, Arc Outages, and Unstable Arc
If there is no arc at all, start with the electrical circuit rather than bead technique.
- Confirm the machine is powered on and set to the correct welding process.
- Check the electrode-holder and work-lead connections at the machine.
- Clamp directly to clean bare metal on the workpiece or approved welding fixture.
- Inspect leads, plugs, connectors, the holder, and work clamp for damage, overheating, or loose connections.
- Verify electrode polarity and output mode.
- If the machine repeatedly enters thermal protection, stop welding and allow it to cool according to the rated duty cycle.
An unstable arc that repeatedly goes out may indicate amperage that is too low, an excessively long arc, poor electrical contact, damaged leads, incorrect polarity, or an electrode that does not run well on the selected power source.
Control Distortion and Warping
Welding distortion occurs because the joint and surrounding metal expand when heated and contract as they cool. Excessive heat input, long continuous welds, uneven sequencing, and highly restrained joint geometry can increase distortion.
Where the design and procedure allow, use proper fit-up, balanced welding sequences, intermittent welding, back-step techniques, suitable fixturing, and only the heat needed to make the required weld. Do not clamp a component so aggressively that the restraint creates another cracking or alignment problem.
Tune Welding Settings for Better Beads
Fine-tuning welding settings directly affects bead quality and arc stability. A useful way to remember the core SMAW variables is current, arc length, electrode angle, manipulation, and travel speed.
Set Current and Polarity First
The electrode classification and diameter determine the appropriate current type, polarity, and operating range. Read the electrode packaging or manufacturer’s data rather than assuming that every rod uses the same polarity.
If amperage is too low, the rod may stick, the arc may go out, and fusion may be poor. If amperage is too high, the puddle can become difficult to control and the risk of spatter and undercut increases.
Control Arc Length
Arc length should be appropriate for the electrode and application. Miller recommends using an arc no longer than the electrode core diameter as a practical starting point. A long arc commonly increases spatter, undercut, and porosity; an arc that is too short can make the electrode stick.
Use the Correct Electrode Angle
For many flat, horizontal, and overhead SMAW welds, a small drag angle—about 5–15 degrees—is a useful starting point. Vertical-up welding uses a different orientation and manipulation pattern. Joint type and electrode manufacturer guidance take priority over a universal angle.
Match Travel Speed to the Puddle
Travel too fast and the bead may become narrow, underfilled, undercut, or poorly penetrated. Travel too slowly and excess metal can pile up while heat is concentrated in the puddle instead of the base material, creating cold lap or poor fusion.
Keep the arc near the leading portion of the weld pool and adjust travel so the puddle wets into both joint faces without rolling ahead of the arc.
The base metal should be cleaned before welding because oil, paint, oxide, scale, and moisture can contribute to porosity, inclusions, cracking, or lack of fusion. Machines with adjustable arc force controls can help tailor arc behavior, but the basic settings still need to be correct.
Choose and Store Stick Electrodes Correctly
Electrode type affects polarity, penetration, bead shape, positional capability, mechanical properties, and moisture-control requirements. Do not select a rod only because its diameter fits the holder.
E6010 and E6011 are cellulosic electrodes with different moisture requirements from low-hydrogen electrodes. E7018 is a low-hydrogen classification and should be handled according to the electrode manufacturer, welding procedure, and applicable code.
ESAB notes that many low-hydrogen electrodes are stored in holding ovens around 225–300°F after opening when low-hydrogen control is required. Hermetically sealed or vacuum-packed electrodes may have different permitted exposure and handling rules. Redrying temperatures are not the same thing as holding temperatures.
Maintain Your Welder for Reliable Performance
Routine welder maintenance helps preserve stable arc performance and reduces preventable faults. Before each session, inspect accessible leads, connectors, the electrode holder, work clamp, input cord, and machine exterior for damage, looseness, overheating, or contamination.
Routine maintenance supports stable arc performance, but internal servicing must be performed with the machine isolated from input power and according to the manufacturer’s service instructions.
Secure electrical connections should remain tight, conductive, and free of heavy oxidation. A poor work connection can imitate a settings problem by causing unstable arc behavior or voltage drop.
- Inspect cables, connectors, the holder, and work clamp before welding.
- Keep cooling openings clear and operate within the machine’s duty-cycle rating.
- Disconnect input power before maintenance that exposes internal electrical components.
- Follow the owner’s manual for internal cleaning and servicing; use qualified service personnel where required.
- Store electrodes in the conditions specified for their classification and manufacturer.
Understanding duty cycle limits also helps prevent unnecessary thermal shutdown and equipment stress.
When to Remove and Rework a Weld
Not every defect can be corrected by changing the next pass. Visible cracks, severe lack of fusion, trapped slag, unacceptable porosity, or major undercut may require the defective weld metal to be removed before rewelding.
For noncritical practice work, the defect can often be ground or gouged out to sound metal and rewelded after correcting the cause. For code-governed or safety-critical work, follow the approved repair procedure and required inspection method. Do not hide a known defect beneath another bead.
Do Not Ignore Welding Fume and Workshop Safety
Welding fumes can contain metal particles and gases whose composition depends on the electrode, base metal, coatings, and process. OSHA requires appropriate controls for hazardous welding exposures, and NIOSH notes that welding-fume exposure can involve manganese and other metals.
Keep your head out of the fume plume and use suitable local exhaust ventilation or other controls for the job. Respiratory protection may be required when engineering and work-practice controls do not reduce exposure adequately. Do not weld on unknown coatings, galvanized material, stainless steel, lead-containing material, or other potentially hazardous surfaces without identifying the exposure and using the appropriate controls.
Frequently Asked Questions
What are some common faults in arc welding?
Common SMAW or stick-welding problems include excessive spatter, porosity, slag inclusion, lack of fusion, incomplete penetration, undercut, overlap, cracks, arc blow, electrode sticking, unstable arc behavior, and distortion. Their causes commonly involve incorrect amperage or polarity, poor arc length, unsuitable travel speed or electrode angle, dirty metal, electrode condition, joint preparation, or a poor work connection.
Why do welders drink milk after welding?
Some welders drink milk because of a long-running belief that it protects against welding fumes or metal fume fever. It does not. There is no scientific evidence that milk detoxifies inhaled welding fumes or prevents their health effects. Milk can be consumed as an ordinary food, but it is not a substitute for fume extraction, ventilation, appropriate respiratory protection, or medical evaluation after significant exposure.
What are the 7 most common welding defects?
A commonly used list includes porosity, slag inclusion, incomplete fusion, incomplete penetration, undercut, overlap, and cracking or distortion. There is no single universal “seven defects” list used for every welding process or code. The important step is identifying the actual discontinuity and determining whether it is acceptable under the applicable weld standard.
What is the golden rule in welding?
There is no formally recognized universal “golden rule” that reduces welding to one setting. For SMAW, consistently control the fundamentals: correct electrode and polarity, suitable amperage, short controlled arc length, appropriate electrode angle, proper travel speed, clean preparation, a sound work connection, and safe working practices.
How can I tell porosity from slag inclusion?
Surface porosity often appears as round pinholes or cavities caused by trapped gas. Slag inclusion is trapped nonmetallic flux residue and may appear as irregular dark lines or pockets, especially between passes. Internal defects may require suitable inspection rather than visual examination alone.
What should I check first when a stick weld looks wrong?
Check the electrode classification and polarity, amperage range, work-clamp connection, metal cleanliness, arc length, electrode angle, and travel speed. Change one variable at a time and make a short test bead so you can identify which correction actually solved the problem.
Conclusion
Effective arc welding troubleshooting comes from identifying the visible symptom and checking the SMAW variables most likely to cause it. Start with the electrode and polarity, current setting, work connection, arc length, travel speed, angle, joint preparation, and electrode condition. Spatter, porosity, lack of fusion, undercut, overlap, slag inclusion, arc blow, sticking, penetration problems, and distortion all leave different clues. Correct one variable at a time, remove unacceptable defects before rewelding, and use an approved welding procedure whenever the joint is safety-critical.
Sources
- MillerWelds — Five Steps to Improving Your Stick Welding Technique — amperage, arc length, electrode angle, travel speed, preparation, and common SMAW symptoms.
- ESAB — Storing and Redrying Stick Electrodes the Right Way — low-hydrogen electrode holding temperatures and storage differences between electrode types.
- ESAB — Magnetic Arc Blow in Welding — causes, return-current path, residual magnetism, and corrective strategies.
- OSHA 29 CFR 1910.252 — Welding, Cutting, and Brazing — eye protection, ventilation, confined-space, and welding-fume safety requirements.
- CDC/NIOSH — Welding Fumes and Manganese — welding-fume composition, exposure concerns, and manganese information.
- Cancer Council Australia — Does Drinking Milk Protect You From Toxic Welding Fumes? — evidence addressing the milk-and-welding-fume myth.