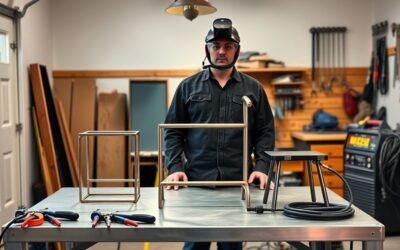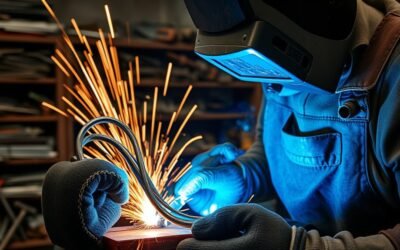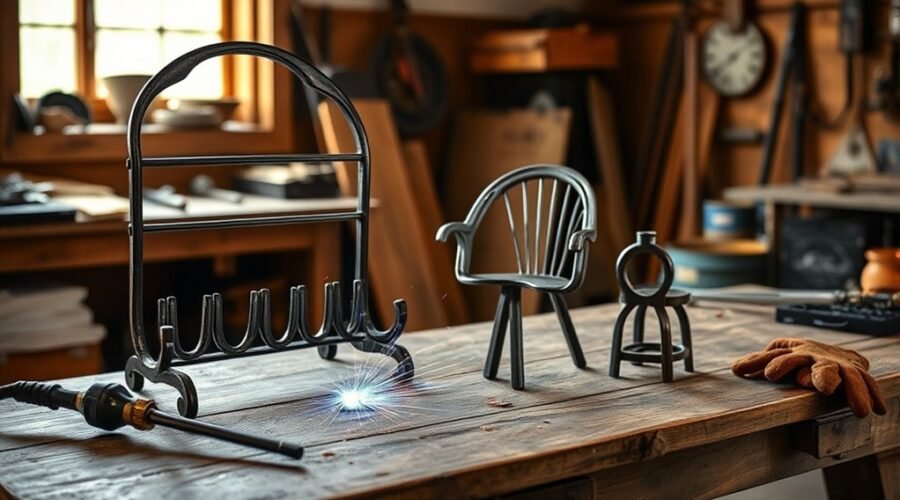
Horseshoe welding projects are a practical way to turn new or used horseshoes into candle holders, coat racks, boot racks, seasonal decorations, wine racks, garden art, and other useful pieces. They work especially well for beginners because many designs use repeated shapes and short joints, but good results still depend on identifying the horseshoe material, cleaning it correctly, controlling heat, and working safely.
Quick Answer
Good beginner horseshoe welding projects include candle holders, wall hooks, coat racks, boot racks, and small holiday trees. Identify the horseshoe material first, clean the weld areas to bare metal, clamp the layout, tack everything in position, recheck alignment, then complete the welds using settings matched to the metal and its thickness.
Key Takeaways
- Beginner horseshoe welding projects include candle holders, coat racks, boot racks, Christmas trees, wine racks, wall art, and puzzles.
- Do not assume every horseshoe is the same steel. Steel and aluminum horseshoes both exist, so identify the material before choosing a process or filler metal.
- For steel projects, MIG is convenient for many beginners, while stick and DC TIG can also work when properly matched to the material and joint.
- Remove nails, rust, dirt, oil, paint, and unknown coatings from the weld area before welding.
- Tack first, recheck alignment, control heat, inspect the finished joints, remove sharp edges, and apply an appropriate finish before using the project.
At a Glance
| Time Required | About 30 minutes for a very simple hook to several hours for multi-piece projects |
| Difficulty | Beginner to intermediate, depending on cuts, number of joints, alignment, and required strength |
| Tools Needed | Welder, clamps, wire brush or grinder, measuring tools, suitable cutting tool if needed, welding helmet, safety glasses, gloves, and protective clothing |
| Cost | Usually low when reclaimed horseshoes and scrap steel are available; filler metal, hardware, abrasive discs, paint, and finishing supplies add to the cost. Welder and PPE are not included. |
Warning: Welding creates arc radiation, hot metal, sparks, grinding debris, and fumes. Work in a suitable ventilated area, keep unprotected people away from the arc, remove or shield combustible materials, keep appropriate fire-extinguishing equipment available, and follow your welder and PPE manufacturers’ instructions. Do not weld or grind an unknown coating until you know what it contains.
Best Horseshoe Welding Projects to Try First
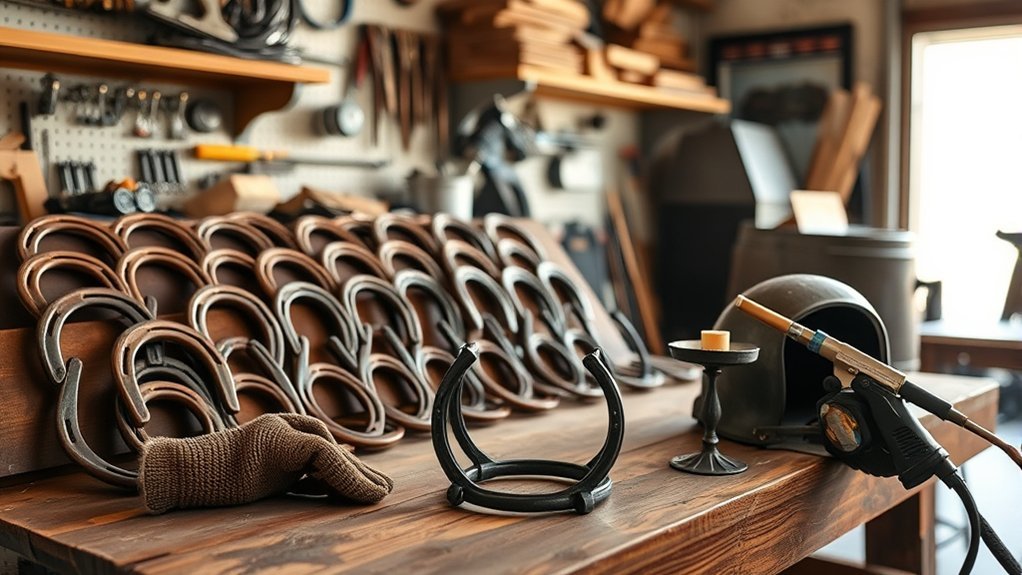
For a beginner, a horseshoe candle holder is a useful first project because it can be made with few parts, simple joints, and limited cutting. It provides practice in layout, clamping, tack welding, heat control, and finishing while producing functional rustic decor.
If you are still learning machine setup, reviewing beginner welding-machine options can also help you understand the differences among MIG, TIG, and stick equipment.
A good first horseshoe project uses only a few joints, sits flat on the workbench, and lets you check alignment before committing to full welds.
After a candle holder, a horseshoe boot rack or boot jack adds more measurement and symmetry. A horseshoe Christmas tree introduces repeated pieces and layout work. Miller publishes a beginner horseshoe holiday-tree project using a MIG welder, six horseshoes, a wire brush, cutting tools, a grinder, measuring tools, and .030-inch ER70S-6 wire.
A horseshoe wine rack adds stability and spacing requirements because bottles must sit securely. A horseshoe puzzle or modular decorative design adds more fit-up practice without necessarily requiring heavy structural welds.
| Project | Difficulty | Main Skill Practiced |
| Candle holder | Beginner | Fit-up and tack welding |
| Wall hook or coat rack | Beginner | Attachment points and alignment |
| Boot rack | Beginner–Intermediate | Measurement and symmetry |
| Christmas tree | Beginner–Intermediate | Repeated layout and cutting |
| Wine rack | Intermediate | Spacing, balance, and stability |
| Plant arch or trellis | Intermediate | Larger assemblies and outdoor finishing |
Tools and Materials for Horseshoe Welding
Start by identifying what the horseshoe is made from. Modern horseshoes are available in both steel and aluminum, so material should never be assumed from appearance alone. For example, Mustad sells both steel and aluminum horseshoe models. Aluminum and steel require different welding procedures, filler choices, and machine settings.
For ordinary steel horseshoe projects, a MIG welder is convenient because it is relatively easy to make short, repeatable welds. Stick welding can also work, especially on thicker or less pristine steel. TIG offers precise control when the surfaces are very clean. If TIG welding steel, DC is normally sufficient; AC becomes important when TIG welding aluminum.
A wire brush, grinder, or suitable abrasive tool is used to expose clean metal around each planned joint. Remove loose rust, scale, oil, dirt, and old nails. If a shoe has paint, plating, or another unknown coating, identify it before grinding or heating it.
Clamps or welding magnets help maintain fixed alignment while you make tack welds. A tape measure, square, marker, and flat welding table make repeated layouts easier. Cutting tools may be needed for holiday trees, hooks, stands, or designs that use half-horseshoes.
Essential protective gear includes a suitable welding helmet, safety glasses, welding gloves, and protective clothing. OSHA’s eye-protection guidance specifies minimum protective filter shades according to welding process and current, so the helmet shade should match the actual process rather than being chosen only by preference.
A multi-process welder can be useful if you routinely switch between MIG, TIG, and stick projects, but a multi-process machine is not required simply to weld ordinary steel horseshoes.
Note: OSHA rules apply to workplaces, but their controls for welding fumes, eye protection, fire prevention, and hot work are also useful safety references for hobby welders. Follow the instructions supplied with your specific welding machine and PPE.
How to Prepare and Weld Horseshoes
1. Inspect the Horseshoes
Check every shoe for cracks, severe thinning, deep corrosion, embedded nails, clips, sharp burrs, and coatings. Set aside any part that is too damaged for the intended project. A decorative piece can tolerate different conditions than a rack expected to hold weight.
2. Identify the Metal
Determine whether the shoe is steel, aluminum, or another known alloy. Do not use steel MIG wire or steel stick electrodes on an aluminum horseshoe. If you cannot identify the metal or coating confidently, obtain known material instead.
3. Clean the Weld Area
Remove rust, scale, dirt, oil, paint, and contamination from the planned weld zone. Miller’s horseshoe holiday-tree instructions specifically call for cleaning rust and dirt before fabrication. Clean metal also makes it easier to judge fit-up and see defects.
4. Lay Out and Clamp the Parts
Arrange the horseshoes on a flat surface, check measurements and symmetry, then clamp the pieces securely. Mark contact points before welding so parts do not slowly drift out of position.
5. Test the Welder Settings
Set voltage, amperage, wire speed, polarity, electrode, shielding gas, and filler according to the welder manufacturer’s chart and the known material. If possible, make a test weld on comparable scrap before starting the finished piece.
6. Tack Weld First
Place small tack welds at several points rather than immediately completing one entire joint. After tacking, stop and check that the project is still square, level, symmetrical, and stable.
7. Complete the Welds
Finish the required joints in a balanced sequence. On larger assemblies, moving between separated joints rather than concentrating all the heat in one area can help limit distortion. Avoid adding weld metal simply for appearance; use enough weld for the actual joint and intended service.
8. Inspect and Finish
After the project has cooled, inspect the joints for visible cracking, obvious lack of fusion, porosity, loose parts, and instability. Remove sharp edges and unwanted spatter with appropriate tools. Apply paint, clear coat, or another suitable finish if corrosion protection is needed.
Pro Tip: Tack the entire project before making long welds. A layout that looks perfect before welding can pull out of alignment as heat builds, so recheck measurements after every group of tack welds.
Easy Horseshoe Welding Projects for Beginners
Once the metal is prepared and the welding setup is ready, begin with simple horseshoe projects that use short joints and easy-to-check layouts.
A candle holder, coat rack, horseshoe hook, or boot rack normally requires fewer cuts and less complicated fit-up than a large garden sculpture. Old horseshoes can provide durable material for DIY welding, but their condition and composition should be checked before use.
Tack welding is especially useful for beginner welding because it holds alignment while still giving you a chance to make corrections. A good sequence is to position the parts, clamp them, tack opposite sides, recheck measurements, and only then finish the joints.
Simple Horseshoe Candle Holder
- Choose two or more compatible steel horseshoes in good condition.
- Remove nails and clean the planned contact areas to bare metal.
- Arrange the shoes into a stable base and upright support.
- Clamp the layout and make small tack welds.
- Check that the assembly sits flat and does not rock.
- Complete only the welds needed to secure the structure.
- Allow the assembly to air-cool, then remove spatter and sharp edges.
- Add a properly sized noncombustible candle platform or holder and verify that the finished piece cannot easily tip.
Warning: A welded candle holder still involves an open flame. Keep candles away from combustible decorations, curtains, wood surfaces, and anything that could be ignited by heat or a falling candle.
Finished pieces can become rustic home decor or practical fixtures. A guide to TIG welding gloves may also be useful when comparing hand protection, although glove choice should match the process and heat exposure you actually use.
Creative Horseshoe Welding Ideas for Home and Garden
Creative horseshoe welding ideas extend beyond small practice pieces. Horseshoes can become candle holders, wine racks, coat racks, decorative hooks, picture frames, bookends, plant stands, garden trellises, seasonal decorations, mailbox accents, or parts of larger outdoor art.
- A single horseshoe can form the base for a wall-mounted coat hook or key holder.
- Several matched shoes can form a wine rack, boot rack, picture frame, or candle stand.
- Repeated horseshoe patterns work well for flowers, wreaths, Christmas trees, pumpkins, crosses, and wall art.
- Plant arches and trellises apply the same layout principles on a larger scale.
- Horseshoes can be decorative elements around a purpose-built fire pit, but the design still needs a suitable fire-containing structure and safe clearances.
- A welder with capabilities suited to home fabrication can support a wider range of steel projects when its output matches the material being welded.
For larger home and garden pieces, plan the complete assembly before welding. Think about where loads enter the project, whether the base can tip, how it will be anchored, where water can collect, and how the surface will be protected from corrosion.
Finishing Horseshoe Projects
After welding, remove sharp projections, burrs, and unwanted spatter. If you grind welds for appearance, avoid removing so much metal that the joint becomes weaker.
For indoor decorative pieces, a clear coat or paint can help preserve the chosen appearance. Outdoor pieces generally need more durable corrosion protection, especially where water can sit in crevices between welded horseshoes.
Before painting, clean away grinding dust, oil, and loose oxidation and follow the coating manufacturer’s preparation and curing instructions. If the project will contact heat, flames, food, animals, or children, choose materials and coatings specifically approved for that use rather than assuming ordinary decorative paint is suitable.
Tips for Strong, Clean Horseshoe Welds
Strong, clean horseshoe welds begin with surface preparation. Remove rust, scale, grease, paint, and debris from the weld zone so the arc is working on known, clean material.
Welder settings must match the horseshoe material, section thickness, filler, joint, and welding process. Incorrect voltage, amperage, polarity, or wire speed can contribute to poor fusion, excessive spatter, burn-through, or an unstable arc.
MIG welding is convenient for many clean steel horseshoe projects because it supports fast tack welds and repeatable beads. Stick can work well on thicker steel and in less controlled conditions, while TIG provides precise heat control when the surfaces are thoroughly cleaned.
The best setting is not a universal horseshoe setting. Match the welder, polarity, filler metal, shielding gas, and output to the known base metal and joint.
To help control distortion, tack the whole assembly first and complete welds in a balanced sequence rather than concentrating all the heat in one location. Miller also recommends distributing heat when distortion is a concern.
For ordinary decorative steel projects, allowing the work to cool in air is a simple default. Do not quench an unidentified horseshoe merely to speed up handling because the alloy and previous heat treatment may be unknown.
An AC/DC TIG welder provides additional versatility if you intend to TIG-weld both steel and aluminum. For steel alone, DC TIG is sufficient; AC is primarily relevant when TIG welding aluminum.
Common Horseshoe Welding Problems and Fixes
Porosity
Likely causes: contamination, inadequate shielding gas, drafts, or unsuitable setup.
Fix: Clean back to sound metal, verify gas flow and connections for MIG/TIG, protect the weld area from strong drafts, and retest before continuing.
Parts Move Out of Alignment
Likely causes: weak clamping, too few tack welds, or completing one side before the rest of the assembly is secured.
Fix: Clamp on a flat surface, tack multiple points, alternate sides, and remeasure before full welding.
Excessive Spatter
Likely causes: contaminated metal, incorrect wire speed or voltage, incorrect polarity, or excessive stickout.
Fix: Clean the joint and compare the machine setup with the welder manufacturer’s recommended starting settings.
Weak or Cold-Looking Welds
Likely causes: insufficient heat, poor joint fit-up, incorrect travel technique, or welding onto rust or coating.
Fix: Stop using the project until the suspect joint is removed or repaired and the cause is corrected. Decorative appearance alone does not prove adequate fusion.
Project Rocks or Tips
Likely causes: uneven horseshoes, poor layout, heat distortion, or too narrow a base.
Fix: Check the assembly on a flat surface before finishing, correct the layout, and enlarge or redesign the base if the completed item is unstable.
Frequently Asked Questions
What are some creative welding projects I can do?
Creative welding projects include candle holders, coat racks, benches, fire-pit accessories, tables, wall art, garden sculptures, tool racks, custom signs, picture frames, planters, and furniture accents. Start with projects that use simple joints and known materials before moving to large pieces that must safely carry significant loads.
What are some creative horseshoe designs?
Creative horseshoe designs include garden art, wall decorations, coat racks, wine holders, key holders, candle holders, picture frames, bookends, furniture accents, mailbox decorations, Christmas trees, wreaths, flowers, crosses, pumpkins, boot racks, and plant stands.
What welding projects can I make to sell?
Common small products include garden art, home decor, wall hooks, coat racks, wine racks, tool racks, signs, pet-related items, and outdoor sculptures. Price each piece from actual material, consumable, finishing, packaging, and labor costs. Do not advertise an item as load-rated, fire-safe, food-safe, or suitable for another safety-critical purpose unless its design and materials support that claim.
What can I make with old horseshoes?
Old horseshoes can become coat racks, key holders, candle holders, picture frames, wine racks, door handles, wall decor, table or furniture accents, garden art, seasonal decorations, plant stands, boot racks, and sculptures. Inspect and clean each shoe before cutting or welding it.
Can all horseshoes be welded the same way?
No. Horseshoes are available in different materials, including steel and aluminum, and their exact alloys can vary. Identify the material before selecting a welding process, filler metal, polarity, shielding gas, or machine setting.
Is MIG or stick better for horseshoe projects?
For clean steel horseshoes, MIG is convenient for beginners because tack welds and short beads are easy to repeat. Stick can also work well on thicker steel and is less dependent on shielding gas. TIG provides precise control but generally requires cleaner material and more operator skill. The correct choice depends on the known metal, joint, machine, and work environment.
Conclusion
Horseshoe welding projects offer a practical way to practice cleaning, fit-up, tack welding, heat control, alignment, grinding, and finishing while producing useful home and garden pieces. Start with a candle holder, wall hook, coat rack, boot rack, or holiday decoration before moving to larger projects that require more careful stability and load considerations.
Reusing an old horseshoe also keeps an existing piece of material in service. A frequently cited U.S. energy statistic provides broader context: the U.S. Energy Information Administration reported an EPA estimate that secondary steel production from scrap uses about 74% less energy than producing steel from iron ore. That figure applies to industrial steel production and should not be interpreted as the measured energy saving from one horseshoe craft project.
The most important habits are straightforward: identify the metal, remove contamination, use the correct process and settings, protect yourself from arc radiation and fumes, control fire hazards, tack before full welding, inspect the finished joints, and make sure the completed project is stable before use.
Sources
- Mustad Hoofcare — Horseshoes — confirms modern horseshoe ranges include different products and materials, including steel and aluminum.
- Miller — DIY Horseshoe Holiday Tree — beginner horseshoe-project tools, materials, cleaning, cutting, and MIG-welding example.
- OSHA 1910.252 — Welding, Cutting and Brazing — fire prevention, protective equipment, ventilation, and general welding safety.
- OSHA 1910.133 — Eye and Face Protection — welding filter-lens shade guidance by process and current.
- NIOSH — Welding Fumes and Manganese — welding-fume exposure and health considerations.
- U.S. Energy Information Administration — Recycling and Steel Manufacturing — context for the EPA estimate that secondary steel production uses about 74% less energy than steel production from iron ore.