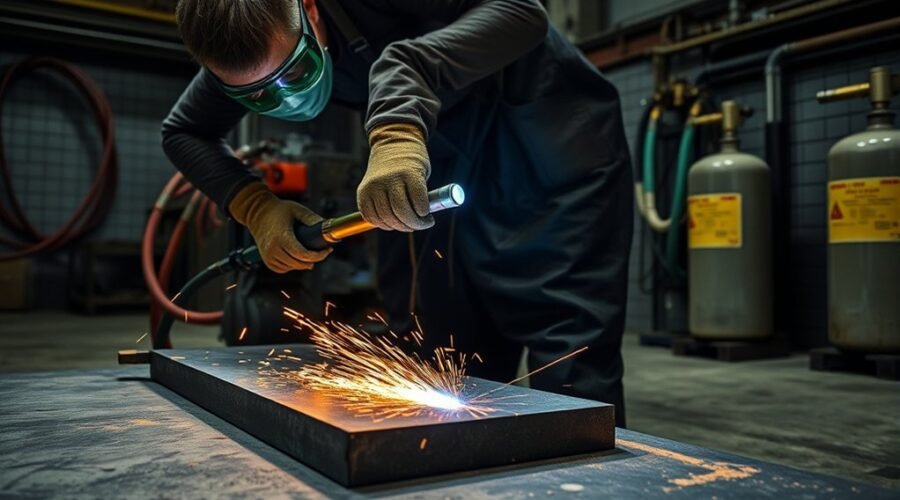
Oxy-fuel cutting can make fast, controlled cuts in carbon and many low-alloy steels, but good results start long before you press the cutting-oxygen lever. Safe oxy-fuel cutting depends on matching the tip to the steel, inspecting the gas system, setting pressures from the manufacturer’s chart, and moving the torch at a steady speed.
Quick Answer
Set up an oxy-fuel torch by inspecting and securing the equipment, connecting the correct regulators and hoses, leak-testing and purging each gas line, then setting pressures from the exact cutting-tip chart. Light the fuel with an approved striker, adjust a neutral preheat flame, heat the steel to ignition temperature, and apply cutting oxygen while moving steadily.
At a Glance
| Difficulty | Safety-sensitive hot work that requires proper training and equipment-specific instructions |
| Tools Needed | Oxygen and fuel supply, regulators, correct hoses, cutting torch and tip, approved safety devices, leak-test solution, striker, PPE, and fire-control equipment |
Key Takeaways
- Inspect the torch, tip, hoses, regulators, cylinders, and safety devices before every cutting session.
- Never choose gas pressure from a generic number alone. Match the pressure and tip size to the manufacturer’s chart and steel thickness.
- Keep oxygen equipment free of oil and grease, secure cylinders, remove nearby combustibles, and provide suitable ventilation.
- Purge the oxygen and fuel lines separately before ignition, then light the fuel with an approved spark lighter and adjust the preheat flame.
- A clean cut depends on correct tip condition, nozzle distance, oxygen pressure, torch position, and travel speed working together.
What Is Oxy-Fuel Cutting?
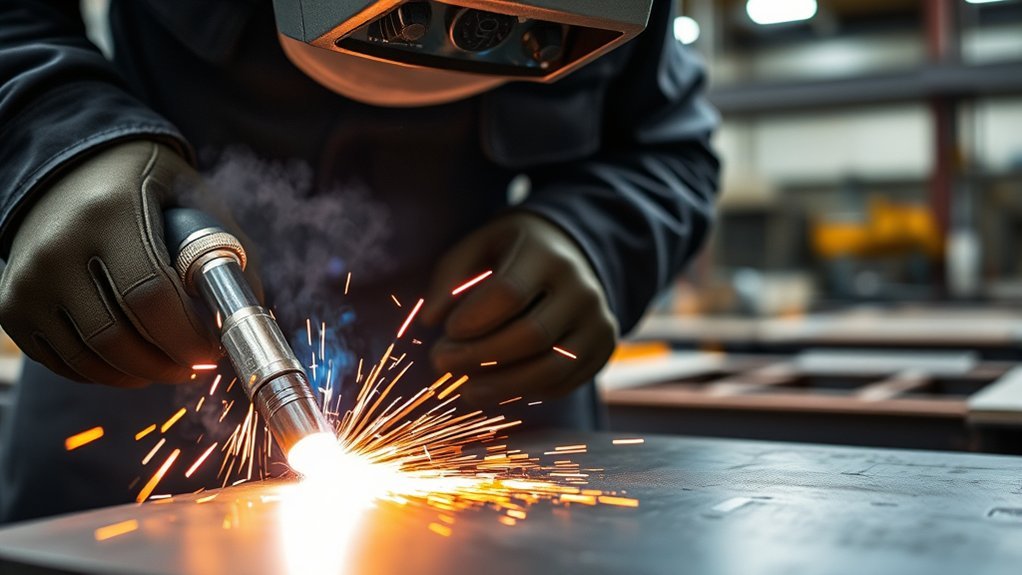
Oxy-fuel cutting is a thermal and chemical cutting process. A fuel gas such as acetylene or propane burns with oxygen to preheat the steel, while a separate high-purity cutting-oxygen jet rapidly oxidizes the hot iron and blows the resulting oxides from the kerf.
The process works especially well on carbon and many low-alloy steels. It is not simply a matter of melting the entire cut path. The oxidation reaction is a major part of what allows the oxygen jet to continue cutting through the heated steel.
This explains why oxy-fuel does not behave the same way on every metal. Conventional torch cutting is not the normal choice for aluminum or most stainless steel. A process such as plasma cutting may be more suitable for those materials; this guide to budget plasma cutters explains that alternative.
Oxy-acetylene also provides an intense preheat flame, which makes portable torch systems useful for fabrication, construction, repair, and demolition. A complete torch kit, including options such as the Victor Performer cutting torch kit, still needs to be set up according to its own manual and tip data.
Set Up the Cutting Torch
Safe setup follows a repeatable sequence: secure and inspect the equipment, connect the components, pressurize it carefully, test for leaks, set the operating pressure, and purge the lines before lighting. Do not improvise the sequence for your particular torch or fuel system.
Note: Treat this as general operating guidance, not a substitute for hands-on training. Follow the manual supplied with your torch, regulator, flashback protection, fuel gas, and cutting tip because valve positions, allowable flows, and shutdown procedures can differ by equipment.
- Secure the cylinders. Keep them upright and protected from being knocked over. Keep oxygen equipment away from oil and grease.
- Inspect the system. Check the torch body, tip, regulator connections, hoses, valves, seals, and protective devices for damage or contamination.
- Connect the correct regulators and hoses. Never interchange oxygen and fuel-gas components.
- Back out the regulator adjusting controls before pressurizing. Make sure torch valves are in the position specified by the equipment manufacturer.
- Open cylinder valves slowly. Standard oxygen-cylinder instructions commonly call for fully opening the valve after gradual pressurization. Acetylene valves have different limits.
- Set pressure while gas is flowing as instructed. Use the cutting-tip chart for the exact tip, fuel, hose arrangement, and material thickness.
- Leak-test every connection. Correct any leak before lighting the torch.
- Purge each line separately. Purge in a well-ventilated location away from sparks and flames, following the manufacturer’s procedure.
The OSHA oxygen-fuel gas standard requires approved equipment, careful cylinder handling, regulators on fuel-gas supply equipment, and slow cylinder-valve opening. It also states that acetylene must not be used above 15 psig.
Torch Inspection
Inspecting the complete gas path before ignition helps catch damage that could cause leakage, unstable gas flow, backfire, or flashback. Do not continue if a component is cracked, contaminated, badly worn, or otherwise questionable.
| Component | Required condition |
|---|---|
| Hoses | No cuts, burns, cracks, severe abrasion, leaks, or damaged fittings |
| Regulators | Correct for the gas, securely connected, clean, and operating normally |
| Gas cylinders | Correctly identified, secured, and protected from damage |
| Torch body | Tip, valves, seals, and connections clean and undamaged |
| Protective devices | Correct type and location for the torch system and manufacturer’s instructions |
Pay particular attention to oxygen-side contamination. Oil or grease can react violently in oxygen-enriched conditions, so oxygen valves, regulators, fittings, and hands or gloves used on them should be clean.
Pressure And Leak Checks
There is no single oxygen-pressure setting that works for every oxy-fuel cutting job. Pressure depends on the fuel, tip design and size, steel thickness, hose arrangement, and manufacturer.
Open the cylinder valves slowly while standing out of the direct line of regulator components. OSHA states that an acetylene cylinder valve must not be opened more than 1½ turns and says no more than three-quarters of a turn is preferred.
After pressurizing the system, use an approved leak-detection solution or suitable oil-free soap-and-water solution on the connections. Bubbles indicate leakage. Never search for a gas leak with a flame.
Miller’s safe oxy-fuel torch setup guidance also stresses checking hoses, using suitable backflow or flashback protection, opening cylinders slowly, leak-testing connections, and purging before ignition.
Inspect Hoses, Regulators, and Safety Gear
Oxy-fuel cutting combines pressurized oxidizer, fuel gas, flame, hot metal, sparks, and slag. Your inspection therefore needs to cover the equipment, your protective gear, and the surrounding work area rather than the torch alone.
Remove combustible material that sparks or slag could ignite, and keep suitable fire-extinguishing equipment ready. OSHA’s general welding and cutting requirements require hot-work areas to be made fire safe and specify additional fire-watch precautions where significant fire hazards exist.
Hoses and Fittings
Inspect oxygen and fuel hoses over their entire accessible length. Look for cuts, burns, cracks, abrasion, damaged couplings, heat damage, and places where a falling workpiece or hot slag could reach the hose.
Oxygen and fuel hoses must remain identifiable and must not be interchanged. Keep them routed away from the cut path, hot metal, traffic, sharp edges, and anything that can crush or pull them.
Reverse-flow check valves and flashback arrestors perform different functions. Use the safety devices specified for your torch system, install them in the intended location, and make sure their flow capacity is adequate for the selected tip.
Regulator Condition
A regulator must match the gas service and provide stable control at the required flow. Do not use a regulator with damaged fittings, contaminated oxygen-side parts, abnormal gauge behavior, or evidence of leakage.
Do not compensate for an undersized tip, restricted hose, blocked passage, or damaged regulator by simply increasing pressure. First confirm the correct tip, hose capacity, connections, and manufacturer settings.
If a gauge behaves abnormally or the pressure will not remain stable, stop and diagnose the system before lighting. Regulator problems are not something to work around while the torch is burning.
Safety Gear Check
Wear flame-resistant clothing, suitable gloves, safety footwear, and eye and face protection appropriate for oxygen cutting. Your clothing should cover exposed skin and should not have open pockets or cuffs that can trap hot slag.
The OSHA eye and face protection table lists minimum filter shade 3 for oxygen cutting under 1 inch, shade 4 for 1 to 6 inches, and shade 5 for material over 6 inches. Site rules or the equipment manufacturer may call for additional protection.
Inspect gloves, lenses, clothing, and face protection before work. Replace damaged items. If you are assembling or replacing shop PPE, this roundup of welding gear and equipment can help you compare common categories.
Warning: Never cut in an explosive atmosphere or on a closed, uncleaned, or improperly prepared container that held flammable material. Sparks, hot slag, oxygen enrichment, or residual vapor can cause fire or explosion.
Purge the Lines and Check for Leaks
Purging clears air or mixed gas from the hoses before ignition. Purge oxygen and fuel separately, never together, and direct discharged gas into a well-ventilated area away from flames, sparks, people, and ignition sources.
- Pressurize the system according to the manufacturer’s instructions.
- Open the oxygen torch valve as directed, allow the required purge flow, then close it.
- Purge the fuel-gas line separately in the same controlled manner.
- Confirm the system remains leak-free before lighting.
Leak checks should cover the regulator connections, hose connections, torch fittings, and other joints specified by the manufacturer. If bubbles continue to form, shut off the gas and correct the problem before use.
Do not confuse oxy-fuel gases with the gases used to shield an electric welding arc. MIG and other arc processes have different gas requirements, covered separately in this MIG shielding gas guide.
Adjust Flame and Pressure
Set gas pressures from the exact manufacturer tip chart, not from a universal PSI rule. Then light the fuel with an approved friction or spark lighter and introduce preheat oxygen as specified by the torch manufacturer until the flame reaches the required cutting condition.
For oxy-acetylene cutting, a neutral preheat flame has sharply defined inner cones without a long acetylene feather. Check the flame again while operating the cutting-oxygen lever if the manufacturer instructs you to do so, because gas flow can change under cutting conditions.
The reason tip charts matter becomes clear in ESAB/Victor’s Type 101 acetylene cutting-tip data. One 1/4-inch-steel entry specifies 20–25 psig cutting oxygen and 3–5 psig acetylene, while listed 1/2-inch combinations use higher cutting-oxygen pressures. Those figures apply to those specific tips, not every torch.
Set pressure from the exact cutting-tip chart, not a generic PSI rule.
Acetylene itself has a firm safety limit: OSHA prohibits its use above 15 psig. Normal cutting-tip charts are generally well below that limit on the acetylene side.
A blocked, damaged, overheated, or incorrectly seated tip can disturb the flame and oxygen stream. Use the manufacturer-approved tip-cleaning method and the correct size cleaner so you do not enlarge or distort the ports.
Gas-pressure settings are separate from electrical welder ratings. If your fabrication work also uses arc equipment, concepts such as welder duty cycle and process selection apply to those machines, not to an oxy-fuel tip chart.
Cut Steel With Better Torch Technique
Good torch technique keeps the cutting-oxygen jet aligned with the kerf while giving the preheat flames enough time to maintain ignition temperature ahead of the cut. For a normal square cut, keep the torch appropriately aligned with the plate rather than assuming one universal travel angle.
- Select the right tip. Match the tip to the fuel gas, torch, and steel thickness.
- Set the specified gas pressures. Check the chart supplied for that exact tip.
- Set the correct tip-to-work distance. Follow the manufacturer’s specified nozzle clearance instead of dragging the tip unless the equipment is designed for it.
- Preheat the starting point. Hold the torch steady until the steel reaches its ignition temperature and shows the characteristic bright red appearance.
- Apply cutting oxygen smoothly. Depress the cutting-oxygen lever without jerking the torch off the cut line.
- Watch for penetration. Sparks and oxidized material should pass through the bottom of the plate when the cut is fully established.
- Move at a steady speed. Travel fast enough to avoid excessive heating but slowly enough to maintain full penetration.
- Finish through the edge. Keep the cutting action established until the oxygen stream passes completely beyond the end of the workpiece.
Starting from an edge is usually easier than piercing because slag has somewhere to escape. SSAB’s oxy-fuel cutting guidance recommends heating the edge to ignition temperature before applying cutting oxygen and notes that surface piercing is more difficult because molten material can blow back toward the nozzle.
When piercing, follow the torch manufacturer’s specific procedure. The tip may need to be raised or tilted temporarily to reduce slag blowback before returning to the correct cutting position.
If you are still learning how cutting relates to fabrication and joining, this overview of beginner welding processes and machines provides useful background.
| Parameter | Guidance |
|---|---|
| Cutting tip | Match the torch, fuel gas, and steel thickness |
| Torch position | Keep the cutting-oxygen jet aligned through the kerf; use special angles only when the procedure requires them |
| Travel speed | Use the tip chart as the starting point, then maintain full penetration without excessive heating |
| Flame/pressure | Correct preheat flame and manufacturer-specified pressures for the selected tip |
Pro Tip: Use the sparks below the plate as feedback. If the stream does not pass cleanly through the kerf, check travel speed, tip condition, nozzle distance, alignment, and cutting-oxygen pressure before simply increasing gas pressure.
Troubleshoot Common Cutting Problems
Most oxy-fuel cutting problems come from a small group of causes: wrong pressure, poor gas flow, a damaged or dirty tip, incorrect nozzle distance, too much or too little preheat, or the wrong travel speed. Change one cause at a time so you can see what actually fixes the cut.
Cut Will Not Start or Penetrate
First confirm that the steel is suitable for conventional oxy-fuel cutting and that it has reached ignition temperature. Then check the tip size, cutting-oxygen pressure, hose capacity, nozzle cleanliness, and gas supply.
If the oxygen jet cannot pass completely through the plate, forcing the torch forward will usually produce an incomplete cut and heavy slag.
Heavy Slag or Dross
Heavy buildup can result from incorrect travel speed, insufficient cutting oxygen, poor tip condition, excessive nozzle distance, or inadequate penetration. Inspect the cut face and slag pattern before changing settings.
A tip cleaner is useful for maintaining the orifices, but use one made for the tip rather than an improvised wire that can damage the openings. Small maintenance items like these also appear among common welding tools and accessories.
Rounded or Washed Top Edge
A badly rounded top edge often points to too much heat input, incorrect nozzle height, slow travel, or an unsuitable flame setting. Reduce the cause rather than trying to correct the shape afterward with more oxygen.
Popping, Backfire, or Flashback
A single pop can be a backfire, while sustained burning or a shrill hissing sound inside the torch can indicate a more serious flashback. Stop using the torch immediately and follow the manufacturer’s emergency shutdown procedure.
After the equipment has cooled, inspect the tip, seating surfaces, gas pressures, hoses, valves, and protective devices. If a flashback repeats or the torch is damaged, remove it from service until it has been properly inspected or repaired.
Flame Changes When the Cutting Lever Is Pressed
A major flame change under cutting flow can point to insufficient supply capacity, pressure drop, restrictions, an incorrect tip, or settings made without the required gas flow. Recheck the manufacturer’s setup procedure and operating-pressure method.
Frequently Asked Questions
How Do I Set up an Oxy-Acetylene Cutting Torch Safely?
Secure the cylinders, inspect the torch and hoses, connect the correct regulators, and keep oxygen equipment free of oil and grease. Pressurize the system slowly, set flowing pressure from the exact tip chart, leak-test all connections, and purge each line separately before lighting with an approved striker.
What Are the Safety Rules for Using an Oxy-Acetylene Torch?
Use approved equipment, secure cylinders, remove fire hazards, provide suitable ventilation, wear flame-resistant PPE, and protect your eyes with the correct filter shade. Keep hoses away from hot slag, check for leaks without a flame, never contaminate oxygen equipment with oil or grease, and follow the torch manufacturer’s operating procedure.
What Should My Oxy-Acetylene Torch Be Set To?
Set an oxy-acetylene cutting torch to the pressures specified for its exact tip size and steel thickness. There is no universal oxygen setting. Acetylene must never be used above 15 psig, and the preheat flame is normally adjusted to the manufacturer’s specified neutral cutting condition before the cut begins.
Which Method Should Be Used to Light an Oxy-Fuel Torch?
Use an approved friction or spark lighter intended for torch ignition. Do not use matches, cigarette lighters, another torch, or nearby hot work. Open and light the fuel according to the torch manufacturer’s sequence, then introduce preheat oxygen and adjust the flame before operating the cutting-oxygen lever.
Can an Oxy-Fuel Torch Cut Stainless Steel or Aluminum?
Conventional oxy-fuel cutting is best suited to carbon and many low-alloy steels, not aluminum or most stainless steel. The process depends on rapid oxidation of heated iron and removal of that oxide from the kerf. Plasma, mechanical cutting, or other specialized processes are normally better choices for those metals.
Why Does My Oxy-Fuel Cut Have Heavy Slag?
Heavy slag usually means one or more cutting conditions are wrong. Check travel speed, cutting-oxygen pressure, tip size and condition, nozzle distance, alignment, and whether the steel is fully penetrating. Correct the identified cause instead of automatically increasing oxygen pressure, because excessive pressure can also reduce cut quality.
Conclusion
Reliable oxy-fuel cutting comes from matching the tip and pressure to the job, keeping the gas system clean and leak-free, and controlling preheat, oxygen flow, torch position, and travel speed. Avoid generic pressure or speed rules when your manufacturer provides exact operating data.
Before every cut, inspect the system, clear the work area, wear suitable PPE, and follow the torch and tip instructions. If gas flow, flame behavior, or safety equipment does not look right, stop and correct the problem before continuing.
Sources
- OSHA 1910.253 — Oxygen-Fuel Gas Welding and Cutting: acetylene pressure limits, cylinder handling, regulators, and oxygen-fuel equipment requirements.
- OSHA 1910.252 — Welding, Cutting and Brazing: fire prevention, hot-work controls, and ventilation requirements.
- OSHA 1910.133 — Eye and Face Protection: minimum protective filter shades for oxygen cutting.
- Miller — 10 Steps for Safe Oxy-Fuel Torch Setup: inspection, protective devices, cylinder opening, leak testing, pressure setting, and purging.
- ESAB/Victor Type 101 Acetylene Cutting Tips: manufacturer-specific steel thickness, cutting speed, and gas-pressure data.
- SSAB Cutting Process Guide: oxy-fuel edge starts, piercing technique, nozzle clearance, oxygen pressure, and cut-quality troubleshooting.