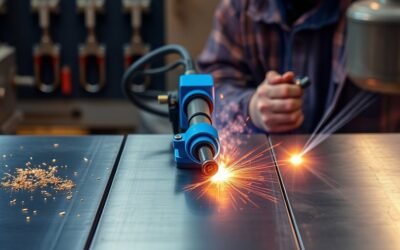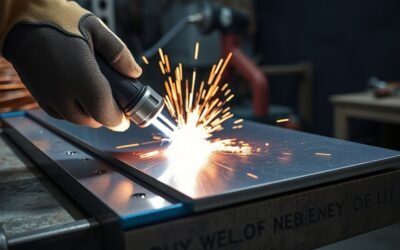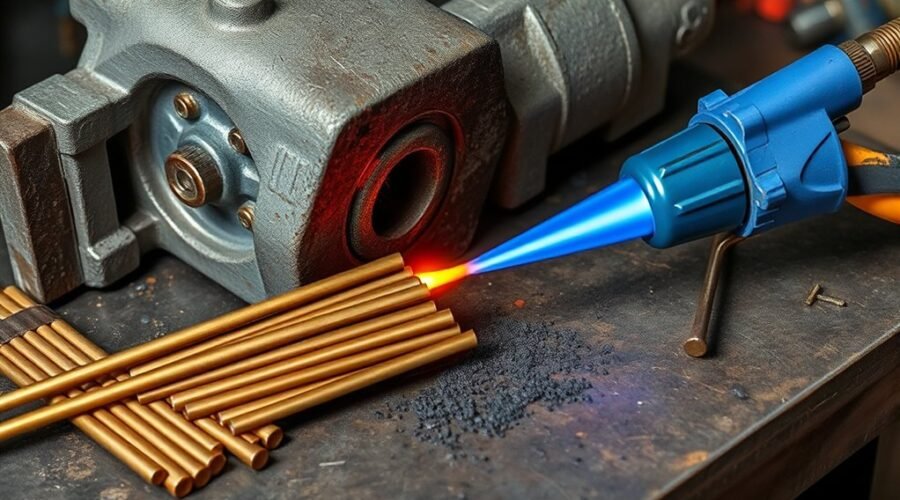
Cast iron brazing can repair cracks and broken castings without melting the base iron, which reduces many of the heat-related problems associated with fusion welding. For the groove-filled repairs commonly described as “brazing,” the more precise term is braze welding: you heat the casting, melt a copper-alloy filler onto the prepared joint, and keep the cast iron itself solid.
Quick Answer
For many gray-cast-iron crack repairs, use a compatible low-fuming bronze filler and high-temperature brazing flux, expose sound metal, locate and stop the crack ends, bevel the joint, preheat evenly, then braze without melting the casting. Control the temperature throughout the repair and let the part cool gradually before inspection.
Key Takeaways
- Most groove-filled cast-iron repairs with bronze rod are technically braze welding, not capillary brazing.
- RBCuZn-C low-fuming bronze is a proven filler for gray and malleable cast iron, but the rod and flux must suit the exact casting and service conditions.
- Preheat and brazing temperature are different. A NIST gray-iron repair used 500°F–600°F preheat near the joint but about 1800°F during braze welding.
- Crack preparation matters as much as torch technique: find the true crack ends, remove defects to sound metal, and open the joint enough for filler access.
- Do not rigidly over-clamp the casting. Support alignment while allowing normal thermal expansion and contraction.
- Visual appearance alone does not prove a critical repair is safe; use inspection or testing appropriate to the part and its service.
Warning: Brazing creates hot metal, infrared radiation, fumes, and fire hazards. Remove combustible materials and hazardous coatings from the work area, provide suitable ventilation, and use appropriate eye, hand, face, and protective clothing. OSHA’s welding, cutting, and brazing requirements specifically address ventilation, eye protection, protective clothing, and hazardous brazing fluxes.
Why Cast Iron Cracks So Easily
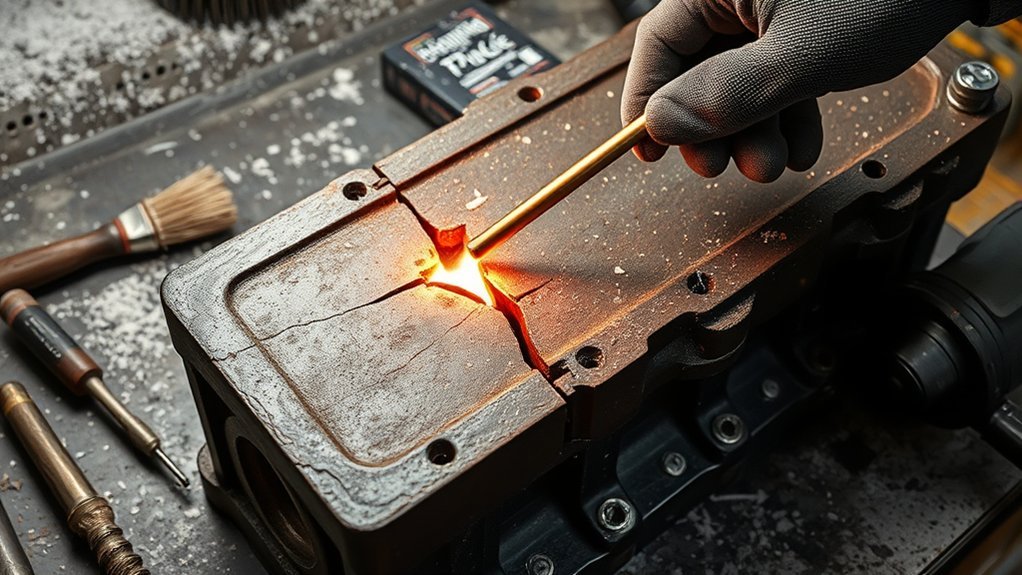
Cast iron is less tolerant of concentrated heating than ordinary low-carbon steel. Gray cast iron commonly contains about 2.5%–4% carbon, much of it as graphite flakes, and has relatively low ductility. Those features make thermal stress and restraint important concerns during repair.
The TWI cast-iron welding guidance explains that rapid or uneven heating can create stresses the casting cannot easily relieve by plastic deformation. In fusion welding, carbon can also contribute to hard, brittle structures in the heat-affected zone.
Braze welding reduces that metallurgical problem because the cast iron is not intentionally melted. The filler bonds to the prepared surface at a lower temperature than a fusion weld requires. That does not make cracking impossible, however; poor preparation, uneven heating, heavy restraint, or rapid cooling can still damage the casting.
If you are comparing brazing with fusion repair, remember that the consumables are different. The site’s guide to low-hydrogen rods concerns welding electrodes; a conventional steel electrode is not a substitute for the bronze filler used in this braze-welding procedure.
Choose the Right Brazing Filler
For oxy-fuel braze welding of many gray and malleable cast-iron repairs, a low-fuming copper-zinc bronze rod is a well-established choice. The filler should wet the iron without requiring you to melt the casting, while its flux must remain active through the filler alloy’s working range.
The American Welding Society definition of brazing distinguishes brazing from welding because only the brazing filler metal is intended to melt. AWS defines brazing filler metal as having a liquidus above 840°F (450°C) but below the solidus temperature of the base material.
For cast-iron groove repairs, low-fuming bronze classified as RBCuZn-C is especially relevant. Aufhauser’s cast-iron repair guidance lists RBCuZn-C low-fuming bronze and RBCuZn-D nickel-silver filler for braze welding and notes that gray, malleable, and austenitic cast irons can be repaired this way.
Silver brazing alloys can join cast iron in suitable close-fitting joint designs, but they are not automatically “stronger” or better for a V-groove crack repair. Choose filler by joint design, iron type, service temperature, required strength, machinability, and the manufacturer’s procedure.
Wire-fed bronze processes also exist, but they are different procedures with different heat input and shielding requirements. If you are researching those systems, wire feed speed is one variable that must match the selected process rather than being copied from oxy-fuel brazing practice.
Clean and Bevel the Crack
Good cast iron brazing starts by exposing clean, sound metal and finding the full extent of the defect. Oil, paint, rust, casting scale, embedded contamination, and loose graphite can prevent wetting or hide the real end of a crack.
For a visible crack, locate the true ends before grinding. TWI recommends identifying fine crack tips with suitable inspection methods and drilling the ends before removing the defective material so the preparation itself does not extend the crack.
Open the defect enough to reach its bottom and give the bronze access to sound metal. The exact groove size depends on the casting and repair procedure; do not rely on one universal bevel width for every part. Equipment such as the machines discussed in this guide to material thickness capacity does not replace correct joint preparation.
Expose Bare Metal
Remove coatings, corrosion, grease, oil, casting skin, and damaged material until the joint exposes sound cast iron. Contaminated old castings may require repeated cleaning because oil can remain in pores even after the surface initially looks clean.
Grinding is useful for opening the defect, but smeared graphite can interfere with braze wetting. After mechanical preparation, brush and degrease the joint according to the flux and filler manufacturer’s procedure. Keep the prepared area free of new oil, fingerprints, dust, and grinding residue.
Do not start brazing simply because the top of the crack looks clean. The filler must reach prepared metal through the depth of the joint rather than bridge over contamination or an unopened crack.
Drill Crack Ends
Drilling at the true crack tips can blunt the sharp ends and reduce the chance that preparation heat or grinding will drive the crack farther. Locate the ends accurately first; a stop hole placed short of the actual crack tip does not arrest the complete defect.
| Action | Purpose |
|---|---|
| Locate true crack ends | Avoid stopping short of the defect |
| Drill end holes | Blunt the crack tips before grinding |
| Clean to sound metal | Improve filler wetting |
| Open and bevel the joint | Give filler access to the root |
| Degrease and inspect | Confirm the joint is ready for flux |
After drilling, grind or otherwise excavate the damaged material to the bottom of the crack. Reinspect the prepared area before heating so you do not trap an unremoved branch crack beneath the bronze.
Bevel for Strong Bond
A groove repair needs enough opening for the filler to contact sound cast iron along the joint instead of lying only across the surface. The correct included angle, root opening, and depth depend on the casting thickness, access, filler behavior, and qualified procedure.
A useful real-world reference comes from the NIST repair development for the U.S. Capitol Dome. That specific historic gray-iron repair used a minimum 2 mm root opening and a minimum 70-degree included angle. Those dimensions are evidence for that procedure, not a universal specification for every casting.
After grinding, clean the groove again. Apply flux only after contamination and loose abrasive residue have been removed, then support the pieces so their alignment can be maintained through heating and cooling.
Preheat Cast Iron for Brazing
Preheating reduces the temperature difference between the repair zone and the surrounding casting, but there is no single correct preheat temperature for every cast-iron braze repair. The iron type, section thickness, geometry, filler, and repair procedure all matter.
The distinction between preheat and brazing temperature is critical. In the NIST U.S. Capitol Dome repair study, the cast iron was preheated to approximately 500°F–600°F in the area near the joint, while the actual braze-welding temperature was near 1800°F. Aufhauser gives a different 320°C–400°C (608°F–752°F) preheat range for its general cast-iron braze-welding guidance.
| Parameter | Target | Effect |
|---|---|---|
| Preheat | Procedure-specific; NIST used 500°F–600°F | Reduces the local thermal gradient |
| Braze-welding temperature | Filler-specific; NIST used about 1800°F | Melts and wets the bronze without melting the iron |
| Heat source | Controlled oxy-fuel flame for this procedure | Provides broad, adjustable heating |
| Coverage | Heat the repair zone evenly | Limits severe temperature differences |
Move the torch rather than parking the flame in one spot. Measure temperature with a suitable method when your procedure specifies a preheat or interpass range. A plasma cutter is not a temperature-control tool; the site’s discussion of performance vs. cost applies to cutting equipment, not to setting braze temperature.
Note: Pressure-containing, load-bearing, lifting, steering, braking, safety-critical, high-temperature, or historically valuable castings need a repair procedure appropriate to their service. If the iron grade or required joint strength is unknown, have a qualified welding or materials professional assess the part before brazing.
Clamp the Casting Securely
Support the casting so the crack stays aligned, but do not assume that maximum clamping force is best. Cast iron must expand while heating and contract while cooling; excessive restraint can add stress to an already brittle component.
Lucas-Milhaupt’s brazing fixturing guidance recommends supporting components in a way that permits thermal expansion and contraction while maintaining alignment until the filler solidifies. That principle is especially useful on irregular castings.
Use a stable, heat-resistant support arrangement that gives the torch clear access to the joint. Keep heavy fixture mass away from the heated zone where possible because it can act as a heat sink and create an uneven temperature field.
Check alignment before heating and again as the assembly warms. Shop organization can make torch work safer and easier; if you use mobile equipment, inspect its stability and smooth caster performance before beginning hot work.
Apply Flux Before Brazing
Flux helps remove and control oxides so the molten bronze can wet the prepared cast iron. Use a brazing flux that is compatible with the chosen filler alloy and whose active temperature range covers the actual joining temperature.
The original recommendation for “Anti Borax EZ #3” could not be confirmed in the current manufacturer’s catalog. Superior Flux currently lists Anti-Borax No. 2 as a bronze-brazing powder flux for RBCuZn filler and ferrous or malleable-iron applications, with an active range of 1400°F–2200°F.
Clean first, then use the flux specified for the selected filler and process. Flux cannot compensate for oil, rust, graphite contamination, or an improperly prepared joint.
Apply the product as its manufacturer directs. More flux is not automatically better; you need adequate, continuous protection without creating unnecessary residue or inclusions.
Hot flux, flame, and molten filler can burn skin and damage clothing. Wear suitable flame-resistant materials as part of the PPE selected for the job, and keep your head away from fumes.
Braze the Joint in Controlled Passes
Braze the groove with controlled, manageable passes that let you maintain wetting without overheating the casting. There is no universal rule that every cast-iron braze bead must be exactly 1 inch long; pass length should suit the joint geometry and heat-control procedure.
Keep the torch moving and heat the base metal rather than trying to melt the rod directly in the flame. Add filler when the prepared iron is hot enough for the alloy to wet and spread, while keeping the casting itself below its melting point.
Build the joint progressively if its depth requires more than one pass. Do not bury slag, oxide, or flux residue between passes. For beginners comparing joining methods, this guide to welding techniques covers other processes, but braze welding still requires its own temperature and filler control.
Use Short, Manageable Passes
Short passes can help you control localized heat, especially on a long crack or a casting with uneven section thickness. The useful principle is heat control, not a fixed bead length copied to every repair.
- Bring the surrounding repair area to the required preheat evenly.
- Heat a manageable joint section until the flux and base metal are ready for filler.
- Add enough bronze to wet and fill the prepared groove without melting the cast iron.
- Move to the next section while maintaining the required temperature range.
- Clean between passes if the selected procedure or flux requires it.
If the bronze balls up instead of wetting the surface, stop adding filler. Recheck cleanliness, flux activity, and base-metal temperature before continuing.
Controlled Heat Input
Heat control is the core skill in cast iron brazing. Too little heat produces poor wetting; too much can overheat the iron, damage the flux, increase metallurgical changes, and raise cracking risk during cooling.
| Parameter | Control |
|---|---|
| Pass length | Procedure-specific; avoid long overheated runs |
| Heat delivery | Even, with the torch kept in motion |
| Post-braze handling | Cool gradually and uniformly |
Watch the behavior of the flux and filler rather than judging heat only by flame color. A temperature-indicating method is more reliable when a procedure specifies numerical preheat or interpass limits.
Use a Staggered Sequence Only When It Helps Heat Control
A staggered or “hopscotch” sequence can distribute heat along a long repair, but it is not a universal cast-iron brazing requirement. Use it only when the joint geometry and repair procedure benefit from moving between separated sections.
- Prepare and preheat the entire repair area as required.
- Braze a manageable section without overheating it.
- Move to another part of a long joint if doing so helps balance heat.
- Return to fill the remaining sections while keeping the joint clean and within the intended temperature range.
Do not let a staggered sequence create cold, poorly wetted junctions between passes. Each new section must bond continuously to the previous filler.
Control Heat and Slow the Cooldown
The casting should move through heating and cooling without abrupt temperature changes. Once the bronze has filled the joint, reduce heat gradually and protect the repair from drafts or rapid chilling.
This is also where the difference between preheat and brazing temperature matters. A 500°F–600°F preheat does not mean the bronze filler melts at that temperature; the local joint must reach the working range of the selected filler while the cast iron remains solid.
Keep the flame moving, avoid melting the base iron, and cool the casting gradually enough to limit severe thermal gradients.
Depending on the part and qualified procedure, slow cooling may use an insulating blanket, controlled furnace, dry insulating medium, or another method that prevents abrupt chilling. Large and complex castings need more care because thick and thin sections shed heat at different rates.
Protect your eyes throughout heating, filler application, and inspection. A helmet or goggles with suitable filtering is required for the actual radiant-energy hazard; features such as true-color optics do not replace choosing the correct protective shade.
Inspect the Braze and Test for Leaks
After the casting reaches room temperature, inspect the repair for continuous wetting, complete fill, visible cracks, voids, severe underfill, and signs that the bronze never bonded to part of the groove. A smooth surface alone does not prove full joint integrity.
The AWS C3.14 brazed-joint evaluation standard identifies wetting, filler penetration, voids, cracks, erosion, and related joint features as relevant inspection characteristics.
- Allow the part to cool fully before final evaluation.
- Clean flux residue so the joint surface can be inspected clearly.
- Check the complete repair and the adjacent cast iron for new cracks.
- Use an appropriate nondestructive or service test if the part requires more than visual inspection.
- Document the repair when traceability matters.
If the part carries gas or liquid, use the leak or pressure-test method specified for that component. Do not improvise a pressure test or assume that a casual pull, twist, or soap-bubble check proves a safety-critical casting is sound.
Keep PPE in serviceable condition as well. Inspect welding gloves for holes, heat damage, contamination, or worn areas before the next hot-work job.
Repair Weak Spots and Recheck the Joint
If inspection finds poor wetting, an unfilled groove, porosity, or a new crack, do not simply cover the defect with more bronze. Remove the unsound area, expose clean metal again, determine why the first pass failed, then repeat the required preparation and thermal cycle.
Common causes include contamination, inactive or unsuitable flux, insufficient base-metal temperature, excessive heat, incomplete crack removal, poor joint access, or movement during cooling. Correct the cause before adding filler.
General shop accessories can support safer organization, but they do not substitute for a qualified repair procedure. The site’s list of welding safety features may offer broader equipment ideas; select actual PPE and repair tools according to the hazards of this job.
Spot Weak Areas
Inspect both the bronze deposit and the adjacent cast iron under good lighting. Look for incomplete wetting, narrow surface cracks, underfilled sections, trapped residue, distortion, or a crack that has continued beyond the repaired groove.
- Remove flux residue and dirt before judging the surface.
- Trace the complete repair and both original crack ends.
- Use an appropriate crack-detection method when visual inspection is not enough.
- Mark each suspect area before grinding or reheating.
If the repair is safety-critical, stop at this point and use the specified inspection and acceptance criteria rather than relying on appearance alone.
Seal Hairline Cracks
A hairline crack should be treated as a real defect, not simply covered with filler. First determine its full length, then remove or open the damaged material enough for the selected repair process to reach sound metal.
Clean the prepared area again and restore the required preheat gradually. Apply the correct flux and use the selected bronze filler only after the surface reaches a condition where the alloy wets properly.
The base cast iron should remain solid during braze welding. If the iron begins to melt, the process is no longer operating as intended and the risk of undesirable metallurgical changes rises.
After the touch-up, cool the casting gradually and reinspect the original defect plus the surrounding heat-affected area.
Recheck Joint Strength
Rechecking a repair means confirming that the corrected joint meets the inspection requirements appropriate to its service. Visual continuity is useful, but strength cannot be guaranteed by appearance, tapping, or a hand-applied pull test.
- Inspect for continuous fill, sound wetting, and new cracking.
- Remove only the material needed for finishing or inspection.
- Use penetrant, magnetic-particle, pressure, load, or other testing only where appropriate to the material and qualified procedure.
- Repeat the repair if an unacceptable defect remains.
For critical components, acceptance criteria should come from the applicable engineering specification, manufacturer, repair procedure, or qualified inspector rather than an improvised shop test.
Frequently Asked Questions
What Brazing Rod Is Best for Cast Iron?
Low-fuming bronze such as AWS RBCuZn-C is a proven choice for oxy-fuel braze welding of many gray and malleable cast-iron repairs. The best filler still depends on the iron type, joint design, service temperature, required strength, machinability, and the repair procedure, so one rod is not correct for every casting.
How to Braze Cast Iron Step by Step?
To braze-weld cast iron, identify the casting, locate the full crack, drill the crack ends where appropriate, remove defects to sound metal, bevel and clean the joint, preheat according to the procedure, apply compatible flux, heat until the bronze wets the iron, fill the groove without melting the casting, cool gradually, clean the residue, and inspect the finished repair.
What Type of Flux Is Best for Brazing Cast Iron?
Use a high-temperature brazing flux specifically compatible with the selected copper-zinc or other brazing filler and the cast-iron application. The flux must remain active at the filler alloy’s working temperature; follow the filler and flux manufacturers’ instructions rather than assuming every general-purpose flux is interchangeable.
Is It Better to Braze or Weld Cast Iron?
Braze welding is often useful when lower heat input, reduced metallurgical change, and a machinable repair are priorities, while fusion welding may be selected when the service and engineering requirements call for it. Neither method is universally better; the iron grade, loading, temperature, joint geometry, and required properties determine the suitable repair process.
Is Cast Iron Brazing the Same as Braze Welding?
Not always. Conventional brazing usually relies on molten filler flowing through a close-fitting joint by capillary action, while braze welding deposits filler into an open groove or fillet without depending on capillary flow. Many cast-iron crack repairs commonly called brazing are therefore more accurately described as braze welding.
Conclusion
Reliable cast iron brazing depends on preparation and temperature control more than brute heat. Identify the casting, expose the entire defect, choose a compatible bronze filler and flux, distinguish preheat from actual brazing temperature, keep the iron from melting, and allow gradual cooling. Finish by inspecting the repaired casting to the level its service actually requires.
Sources
- TWI — Can You Weld Cast Iron?: cast-iron composition, cracking, cleaning, preheat, cooling, and braze-welding principles.
- NIST Technical Note 1500-10: documented low-fuming-bronze cast-iron repair, groove preparation, 500°F–600°F preheat, and approximately 1800°F braze-welding temperature.
- American Welding Society — Brazing & Soldering Manufacturers Committee: definition of brazing and brazing filler metal temperature threshold.
- Aufhauser — Cast Iron Welding Procedures: cast-iron braze-welding filler classifications, preparation, and preheat guidance.
- Superior Flux — Anti-Borax Fluxes: current bronze-brazing flux applications, filler compatibility, and operating range.
- OSHA 29 CFR 1910.252: welding, cutting, and brazing ventilation, eye protection, protective clothing, and flux-fume requirements.
- Lucas-Milhaupt — Brazing Fundamentals: fixturing, alignment, and accommodation of thermal expansion and contraction.
- AWS C3.14M/C3.14:2020: visual and metallographic evaluation of brazed-joint wetting, penetration, voids, cracks, and related defects.