Setting an oxy-fuel gas pressure regulator correctly is not about choosing one universal PSI number. The correct working pressure depends on the fuel gas, torch, tip size, process, hose configuration, and the equipment manufacturer’s pressure chart. Safe setup also requires the right regulator for the gas, clean oxygen equipment, slow cylinder pressurization, leak testing, and adjustment while gas is flowing.
Quick Answer
To set an oxy-fuel gas regulator, back the regulator adjustment out before opening the cylinder, pressurize the system slowly, select the pressure specified for your exact torch tip, purge each hose separately, and adjust the regulator to the recommended working pressure while that gas is flowing. Never use acetylene above 15 psig flowing.
Key Takeaways
- Use only a regulator designed and approved for the specific gas and pressure range.
- Back the regulator adjustment out before opening a cylinder valve, then open the cylinder slowly while standing to the side of the regulator.
- Set working pressure from the torch-tip manufacturer’s chart, not from a generic PSI recommendation.
- Set the final regulator pressure while gas is flowing because static and flowing pressure can differ.
- Never use acetylene above 15 psig flowing, and keep all oxygen equipment free from oil and grease.
- Leak-test the system with an approved oil-free leak-detection solution and remove defective regulators from service instead of opening them for DIY internal repair.
At a Glance
| Time Required | A few minutes for a trained operator, plus time for inspection and leak testing |
| Difficulty | Intermediate; operator should understand the specific oxy-fuel equipment and its manual |
| Tools Needed | Correct oxygen and fuel-gas regulators, torch and tip, compatible hoses, cylinder wrench if required, and approved oil-free leak-detection solution |
| Cost | Normally no additional cost when the oxy-fuel outfit is properly equipped; damaged or leaking components must be repaired or replaced |
Warning: Never allow oil or grease on oxygen cylinders, valves, regulators, hoses, fittings, hands, or gloves used with oxygen equipment. Open cylinder valves slowly, use only equipment intended for the gas being supplied, and never use acetylene above 15 psig flowing. Stop using any regulator that leaks, creeps, has damaged gauges, or cannot hold stable working pressure.
How Oxy-Fuel Gas Pressure Regulators Work
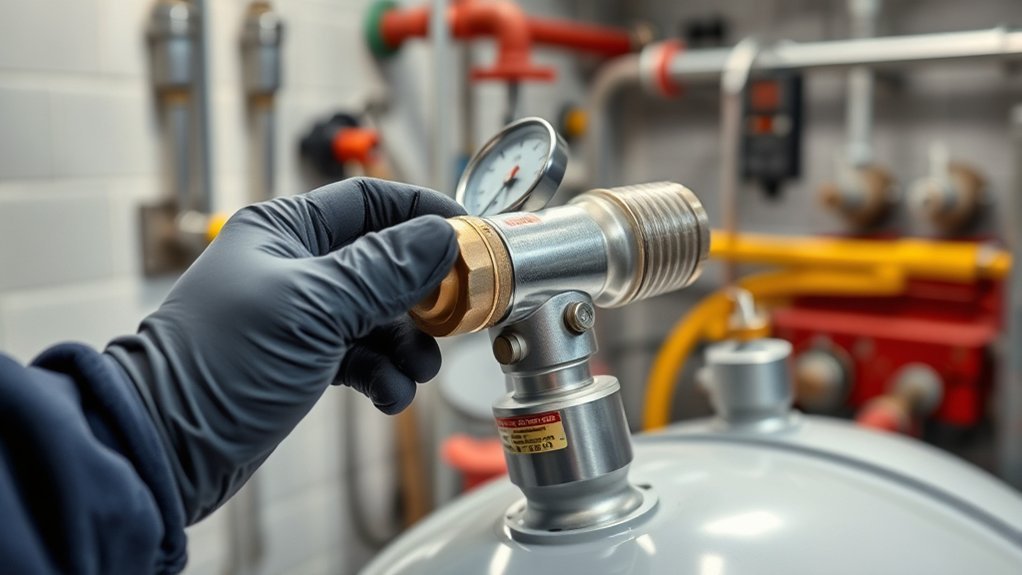
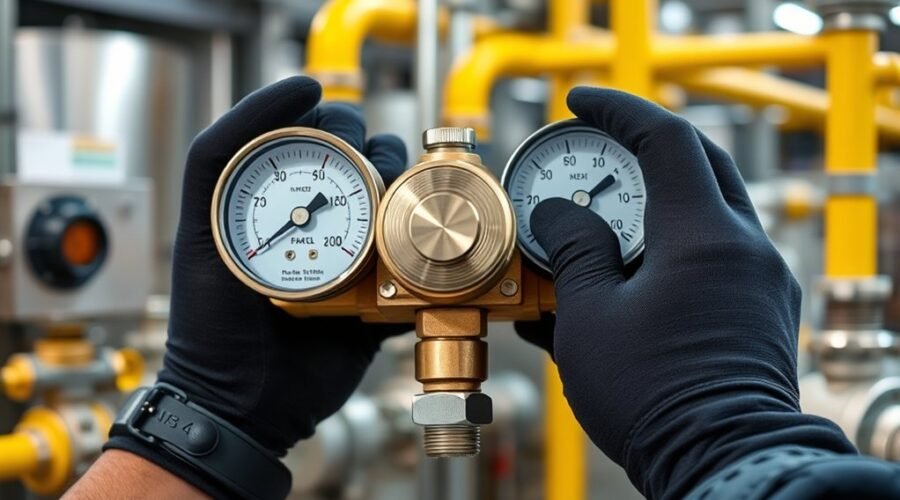
An oxy-fuel pressure regulator reduces high cylinder pressure to the much lower working pressure required by a welding, brazing, heating, or cutting torch. Inside a typical regulator, spring force acts against a diaphragm and valve mechanism. Turning the adjustment handle clockwise on common adjustable regulators increases spring force and raises delivery pressure; backing the adjustment out counterclockwise reduces the setting.
The regulator controls pressure, but the torch tip determines how much pressure and gas flow the job actually requires.
A two-gauge cylinder regulator normally shows cylinder or inlet pressure on one gauge and regulated delivery pressure on the other. The delivery-pressure reading can change when gas starts flowing because the hose, torch, tip, regulator capacity, and gas-withdrawal rate all create resistance or demand.
That is why oxy-fuel equipment manufacturers publish pressure charts for specific tips. Miller’s oxy-fuel technical information, for example, provides separate data for welding, cutting, heating, alternate fuels, hose sizes, and regulator flow.
Note: This procedure applies to oxy-fuel welding, brazing, heating, and cutting equipment. It is not the procedure for an automotive fuel-pressure regulator, a household natural-gas/propane appliance regulator, or a MIG shielding-gas flowmeter. For example, automotive vacuum-reference lines and fuel-return lines do not belong in an oxy-fuel regulator setup. MIG shielding-gas selection and flow are covered separately in this MIG shielding-gas guide.
Before Setting the Regulator Pressure
Inspect the complete system before pressurizing it. OSHA requires oxy-fuel regulators to be used only for the gas and pressures for which they are intended, and regulators and gauges must remain in proper working condition.
- Secure both cylinders. Keep them upright and protected from falling. Acetylene cylinders must remain valve-end-up. A suitable rack or stable welding cart can help keep a portable setup secure.
- Confirm the gas. Never install a regulator simply because the threads appear close enough. Use the correct gas-specific regulator and connection.
- Inspect the gauges and fittings. Do not use a regulator with a cracked gauge lens, damaged connection, contamination, visible impact damage, or other defects.
- Inspect the hoses and torch. Replace hoses with burns, leaks, severe wear, or damaged fittings.
- Keep oxygen equipment oil-free. Never use petroleum-based lubricants, oily rags, greasy gloves, or contaminated tools on oxygen fittings.
- Confirm the tip. Identify the exact torch and tip before choosing pressure. A compatible oxy-acetylene torch kit should include pressure information or direct you to the manufacturer’s tip chart.
- Check safety devices. Follow the equipment manufacturer’s instructions for reverse-flow check valves, flashback arrestors, and their required location and flow capacity.
Current Miller setup guidance recommends placing both regulator adjustment screws in the out/off position and closing the torch valves before opening the cylinder valves. The regulator should not already be applying delivery pressure when the high-pressure side is first pressurized.
How to Set Fuel Gas Pressure Regulator Pressure
The following workflow covers a common oxy-fuel cylinder setup. Your torch, regulator, fuel-gas supplier, or workplace procedure may specify additional steps, so the equipment manual remains the final authority.
- Close the torch valves and back out the regulator adjustments. Turn each regulator adjustment counterclockwise until spring pressure is released or the control reaches its specified off position. Do not force the control beyond its normal range.
- Open the oxygen cylinder slowly. Stand to the side of the regulator rather than directly in front of it. Allow the high-pressure gauge to rise gradually. For conventional oxygen cylinders with a back-seating valve, manufacturer procedures commonly call for opening the valve fully after it is pressurized.
- Open the fuel-gas cylinder slowly. Follow the cylinder and regulator manufacturer’s instructions. Under OSHA rules, an acetylene cylinder valve must not be opened more than 1-1/2 turns, and preferably no more than about three-quarters of a turn, so it can be shut rapidly in an emergency.
- Leak-test the pressurized connections. Apply an approved oil-free leak-detection solution to the relevant connections and watch for bubbling or another indication specified by the product. Never search for a gas leak with a flame.
- Find the pressure for the exact tip. Use the torch manufacturer’s table for the gas, tip number, metal thickness, and operation being performed.
- Purge one gas at a time. In a well-ventilated area away from ignition sources, briefly open the appropriate torch valve so only that gas flows through its hose. Close it and repeat separately for the other gas according to the torch manufacturer’s procedure.
- Set the regulator while gas is flowing. Open the appropriate torch valve and turn that regulator’s adjustment clockwise until the delivery gauge reaches the recommended working pressure. Close the torch valve after the setting is established. Repeat for the other gas.
- Recheck stability. The delivery pressure should remain predictable when the torch is flowing at the intended rate. Unexpected pressure rise, large pressure drop, unstable gauges, or leakage means the system needs troubleshooting before use.
Pro Tip: Use the flowing-pressure value specified for the tip rather than assuming a static gauge reading is the same thing. Long, undersized, or heavily connected hoses can cause substantial pressure loss between the regulator and torch.
What Pressure Should an Oxy-Fuel Regulator Be Set At?
There is no single correct pressure for every oxy-fuel torch. The pressure must match the manufacturer data for the exact tip, fuel gas, hose arrangement, and job. A cutting tip can require far more oxygen pressure than a small welding tip, while a large heating tip may demand enough gas flow that one cylinder cannot supply it safely.
The examples below come from Miller/Smith oxy-acetylene tip data and illustrate why a universal setting is inappropriate. They are examples only and should not replace the chart supplied for your own equipment.
| Application | Example Manufacturer Guidance | What It Shows |
|---|---|---|
| Small/medium oxy-acetylene welding or brazing tips | Many Smith SW/MW/AW tips in Miller’s 2024 chart specify about 10 psig for each gas | A common setting for one manufacturer’s welding tips is not a universal rule |
| Larger welding tip | Some larger tips specify higher pressure, such as 15 psig | Pressure changes with tip capacity |
| Oxy-acetylene cutting | Cutting oxygen can range widely with tip size and material thickness; many listed acetylene preheat settings are around 10 psig | Cutting oxygen and fuel pressure cannot be guessed from one fixed number |
| Heating tips | Several Miller/Smith heating-tip examples use 15 psig oxygen and 15 psig acetylene and require substantial gas flow | Large heating tips may reach the acetylene pressure ceiling and can require multiple cylinders |
For acetylene, one safety limit is not optional: OSHA 29 CFR 1910.253 prohibits using acetylene above 15 psig. Miller likewise states that acetylene should not be used above 15 psi flowing.
Hose size and length also matter. Miller’s oxy-acetylene data show that long or small-diameter hoses can create significant pressure drop between the regulator and torch. If the required gas flow exceeds what one cylinder can safely deliver, follow the equipment and gas supplier’s guidance rather than simply increasing regulator pressure.
How to Check for Leaks, Creep, and Regulator Damage
Check for Gas Leaks
After pressurization, use an approved oil-free gas leak-detection fluid on the connections specified by the equipment manufacturer. Bubbling or another positive indication means the system must be shut down and the leak corrected before the torch is used.
Never use a match, lighter, torch flame, or other ignition source to search for a leak. OSHA also requires gas systems and related equipment to be maintained gas-tight and in proper working condition.
Watch for Regulator Creep
Regulator creep is an unwanted rise in delivery pressure after the regulator has been set and gas flow has stopped. In an oxy-fuel regulator, this can indicate that the internal regulating seat is not sealing properly.
If delivery pressure keeps rising without further adjustment, close the cylinder valve, safely depressurize the system according to the manufacturer’s procedure, and remove the regulator from service. Do not compensate by repeatedly resetting the control.
Do Not Open the Regulator to Inspect the Diaphragm
The regulator’s diaphragm, seat, springs, relief components, and high-pressure passages are safety-critical parts. OSHA states that regulator and gauge repairs should be carried out by properly instructed skilled mechanics.
Therefore, symptoms such as creep, unstable pressure, a damaged gauge, leakage from the body, or inability to hold the correct setting should be treated as a reason for qualified inspection, repair, or replacement—not as an invitation to dismantle the regulator at home.
Common Fuel Regulator Problems and Fixes
| Symptom | Possible Cause | Safe Response |
|---|---|---|
| Delivery pressure rises after flow stops | Regulator creep or internal seat leakage | Stop using the regulator and have it professionally serviced |
| Pressure falls sharply when the torch valve opens | Undersized/long hose, restriction, incorrect tip setting, inadequate regulator capacity, or insufficient cylinder flow | Check the manufacturer’s tip and hose charts; inspect hoses and tips; consult the gas supplier if more cylinder capacity is required |
| Leak at a regulator connection | Loose, damaged, contaminated, or incorrect connection | Close the cylinder, depressurize safely, inspect the connection, and repair or replace damaged parts |
| Gauge remains off zero when fully depressurized | Damaged or miscalibrated gauge | Remove the regulator from service for qualified inspection |
| Oil or grease is found on oxygen equipment | Contamination | Do not pressurize the equipment; have it properly cleaned or serviced for oxygen use |
| Repeated backfires or flashbacks | Insufficient gas flow, damaged/dirty tip, incorrect pressure, restricted hose, or equipment fault | Stop work, inspect the system, verify tip pressure and flow, and service damaged equipment before reuse |
Do not solve low torch flow simply by turning the regulator higher. Doing so can exceed the pressure rating of the tip, hose, regulator, or acetylene system without correcting the actual restriction.
How to Shut Down and Depressurize the System
When the work is finished, do not leave the regulators and hoses pressurized indefinitely. Follow the shutdown order specified by your torch manufacturer. A common Miller/Smith procedure is:
- Close the oxygen and fuel-gas cylinder valves.
- Bleed the oxygen line. Open the appropriate oxygen torch valve and allow the pressure to fall until the regulator gauges indicate zero, then close the torch valve.
- Back out the oxygen regulator adjustment. Turn the adjustment counterclockwise to its off position.
- Bleed the fuel-gas line. Open the fuel-gas torch valve until the relevant gauges reach zero, then close the valve.
- Back out the fuel-gas regulator adjustment. Leave the regulator unloaded according to its manufacturer’s instructions.
This shutdown process removes pressure from the downstream equipment and avoids leaving the regulator’s control spring loaded between jobs. If your specific torch manual gives a different valve sequence, use that manufacturer’s procedure.
Frequently Asked Questions
How do you properly adjust an oxy-fuel pressure regulator?
Back the regulator adjustment out before opening the cylinder, pressurize the system slowly, find the specified pressure for the exact torch tip, purge the hose according to the manufacturer’s procedure, and then turn the regulator adjustment clockwise while gas is flowing until the delivery gauge reaches the specified working pressure. Leak-test the system before use.
Can you adjust a gas pressure regulator?
A user-adjustable oxy-fuel regulator is designed to let the operator set delivery pressure within its approved range. That does not mean the regulator should be internally modified or disassembled. If it creeps, leaks, has a damaged gauge, or cannot hold its setting, remove it from service for qualified repair or replacement.
What pressure should an oxy-fuel regulator be set at?
Set it to the pressure specified by the manufacturer for the exact torch, tip, fuel gas, hose arrangement, and operation. There is no universal oxygen or fuel-gas setting. For acetylene, never exceed 15 psig flowing. Cutting oxygen pressure can vary widely with tip size and material thickness.
Should pressure be set with the torch valve open or closed?
Use the manufacturer’s procedure, but oxy-fuel working pressure is commonly set while the relevant gas is flowing through the torch. A static reading with the torch valve closed can be higher than the pressure available under actual operating flow.
What position should a gas regulator be in?
Install the regulator in the orientation intended by its manufacturer and connection design. There is no universal rule that every oxy-fuel regulator body must be vertically mounted with a downward vent. The cylinder rules are clearer: acetylene cylinders must be used valve-end-up and cylinders should be securely supported.
What is regulator creep?
Regulator creep is an unintended rise in delivery pressure after the desired pressure has been set and flow has stopped. It can indicate an internal regulator-control fault. Shut the system down and have the regulator professionally inspected rather than continuing to compensate with the adjustment handle.
Conclusion
Safe oxy-fuel regulator setup depends on using the correct regulator, keeping oxygen equipment free from oil and grease, opening cylinders slowly, following the exact torch-tip pressure chart, and setting final working pressure under the conditions specified by the manufacturer. Do not substitute automotive fuel-pressure figures or appliance gas pressures for oxy-fuel settings.
After adjustment, check for leaks, stable delivery pressure, and abnormal pressure drop. Never operate acetylene above 15 psig flowing, and do not dismantle a defective regulator to investigate its diaphragm or valve mechanism. Shut the system down, bleed the lines safely, and have faulty equipment serviced by qualified personnel.
Sources
- OSHA — 29 CFR 1910.253, Oxygen-Fuel Gas Welding and Cutting — acetylene pressure limit, cylinder operation, oxygen contamination precautions, regulators, and repair requirements.
- Miller — 10 Steps for Safe Oxy-Fuel Torch Setup — regulator setup, cylinder pressurization, hose inspection, safety devices, purging, and tip-pressure guidance.
- Miller — Oxy-Fuel Technical Information — regulator flow curves, oxy-acetylene tip charts, alternate-fuel data, cylinder information, and hose charts.
- Miller/Smith — Oxy-Acetylene Tips Pocket Guide, August 2024 — tip-specific pressure, consumption, hose-pressure-drop, and acetylene-flow guidance.
- Compressed Gas Association — CGA E-12, 3rd Edition, November 2023 — safety devices used in gas welding, cutting, and allied processes.