MIG welding patterns change how the weld puddle is controlled, how wide the bead becomes, and how well the weld ties into the sides of a joint. A straight stringer is often the best starting point, while narrow weave motions can help when a joint is wider, vertical, or needs more sidewall coverage. The right choice depends on the joint, welding position, metal thickness, transfer mode, machine settings, and the required weld procedure.
Quick Answer
The main MIG welding patterns are the straight stringer and several narrow weave motions, including zigzag, circular, crescent, figure-eight, and J-shaped movements. Use a stringer when a narrow bead is enough. Use a controlled weave when you need wider coverage or better sidewall tie-in, while following the correct settings and welding procedure.
Key Takeaways
- A stringer bead travels mostly straight and is usually the simplest pattern for a narrow joint or thin material where you want to limit unnecessary dwell.
- A weave bead moves from side to side and can widen the weld, help fill a wider groove, or improve tie-in at the joint toes.
- Common training motions include zigzag, circular, crescent or C-pattern, figure-eight, and J-shaped movements.
- Pattern choice does not replace correct voltage, wire feed speed, travel speed, work angle, travel angle, stickout, shielding gas, or joint preparation.
- For structural or code-controlled welding, follow the approved welding procedure specification rather than choosing a pattern only by appearance.
At a Glance
| Practice Time | 30–60 minutes per focused practice session |
| Difficulty | Beginner to intermediate; vertical and overhead work require more puddle control |
| Tools Needed | MIG welder, correct wire and shielding gas, clean scrap steel, work clamp, welding helmet, gloves, protective clothing, wire brush or grinder |
| Cost | Low if you already own welding equipment; practice mainly uses wire, shielding gas, and scrap metal |
What Are MIG Welding Patterns?
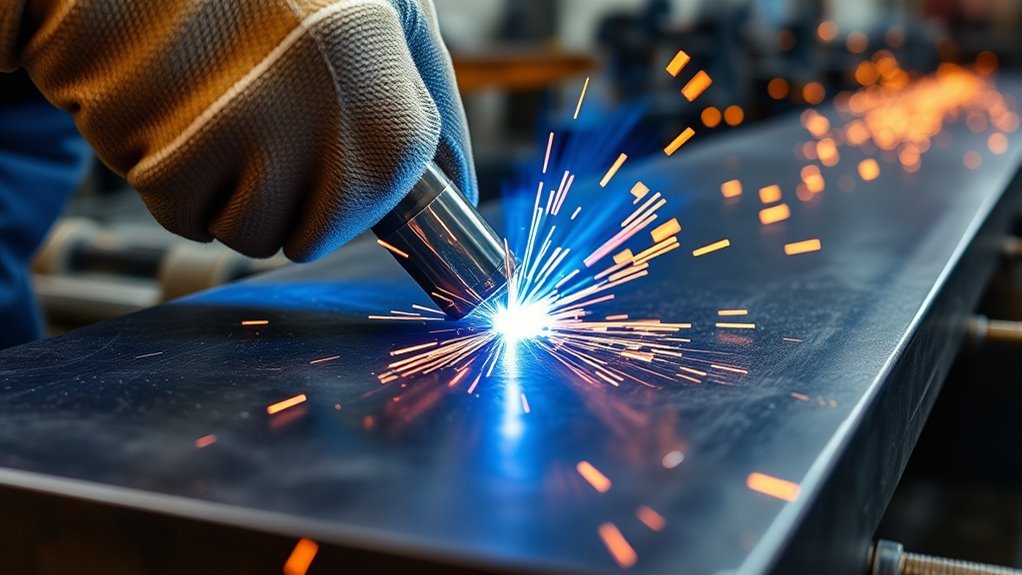
MIG welding patterns describe the path used to move the welding gun and molten puddle along a joint. MIG is also known technically as gas metal arc welding, or GMAW. A continuously fed wire electrode melts into the joint while shielding gas protects the weld pool from atmospheric contamination. Miller’s MIG welding guidance explains the relationship between gun movement, travel angle, work angle, stickout, settings, and welding position.
The two broad movement categories are stringer beads and weave beads. A stringer moves steadily along the seam with little lateral movement. A weave adds controlled side-to-side movement to widen the bead or direct the arc toward both sides of the joint.
For a narrow groove, a straight stringer is often enough. For a wider groove or gap, a controlled weave or multiple stringer passes can provide the required coverage.
Terms such as zigzag, circle, figure-eight, crescent, and J-pattern are useful descriptions of hand motion, but they are not universal rules that determine weld strength by themselves. Weld quality still depends on the procedure, base metal, filler wire, shielding gas, joint design, transfer mode, welding position, electrical settings, and operator technique.
Warning: Welding can expose you to intense ultraviolet radiation, hot metal, sparks, electrical hazards, fire hazards, and welding fumes. Wear appropriate eye, face, hand, body, and foot protection; remove combustible materials; and provide suitable ventilation or local exhaust. Coated, plated, stainless, lead-, cadmium-, or chromium-containing materials may create additional fume hazards. Confined-space welding requires special controls and should not be treated as ordinary shop practice.
Stringer Beads vs. Weave Beads
Stringer and weave beads differ mainly in how much lateral movement the operator adds while traveling along the joint. Neither technique is automatically stronger. The correct bead must achieve the required fusion, penetration, profile, and weld size without creating defects.
A stringer normally creates a narrower bead and allows relatively direct forward travel. That makes it useful for thin material, narrow grooves, root passes where permitted by the procedure, and situations where excessive dwell could cause burn-through or distortion.
A weave produces a wider bead by moving the arc across the joint. It can help cover a wide groove, bridge limited fit-up variation, or improve tie-in at the weld toes. However, weaving too slowly or too widely can enlarge the puddle, increase total heat input, reduce control, and contribute to distortion or lack of fusion.
Stringer Bead Basics
A stringer bead is a bead made with steady forward movement and minimal side-to-side manipulation. It gives the operator a simple reference for learning puddle size, travel speed, gun angle, and arc position.
Stringers are especially useful when the joint does not need a wide bead. On sheet metal, reducing unnecessary dwell and keeping travel speed high can help limit burn-through and warping. Multiple stringer passes can also be used on thicker or wider welds instead of making one excessively wide weave.
Do not assume that a stringer automatically has a specific heat input or penetration level. Voltage, amperage, wire feed speed, transfer mode, travel speed, stickout, shielding gas, and joint geometry all affect the result.
Weave Bead Differences
A weave bead adds a controlled lateral movement while the weld progresses. The movement may be a simple zigzag, small circle, crescent, figure-eight, or another repeatable path.
The key is to keep the motion purposeful. In a vertical-up weld, for example, a short movement across the center followed by slightly more time at the sides can help fill the toes and support sidewall fusion. In a wide groove, a weave can cover more area, although several stringer passes may provide better heat and puddle control.
A weave should not be chosen simply because it produces a decorative bead. The finished weld must meet the required size and fusion requirements, and any structural or code work should follow the approved welding procedure specification.
6 MIG Welding Patterns to Master
These six motions are useful practice patterns for learning MIG puddle control. They are not six separate welding processes, and no single motion is correct for every joint.
| Pattern | Motion | Typical Use | Main Risk |
|---|---|---|---|
| Stringer | Steady straight travel | Narrow joints, thin material, multi-pass work | Poor sidewall tie-in if the joint is too wide |
| Zigzag | Short side-to-side movement | Controlled wider coverage and vertical-up practice | Excessive width or dwelling in the center |
| Circular | Small overlapping circles | Puddle-control practice and wider bead coverage | Too much heat from slow travel |
| Crescent / C-pattern | Repeated shallow C-shaped sweeps | Directing the puddle toward both toes | Uneven toe pauses |
| Figure-eight | Alternating overlapping loops | Advanced hand-control practice | Over-manipulation and inconsistent travel speed |
| J-pattern | Short hook-shaped movement toward one side | Situations requiring deliberate attention to one toe | Uneven bead profile if repeated asymmetrically |
Pro Tip: Learn the straight stringer first. Once you can keep the bead width, travel speed, and gun angle consistent, add only enough side-to-side motion to solve a specific problem such as a wider groove or poor toe coverage.
Which MIG Pattern Fits Each Joint?
Joint geometry should influence your starting technique, but it does not dictate one mandatory decorative pattern. Work angle, access, gap size, weld size, material thickness, position, transfer mode, and the welding procedure matter more.
| Joint | Good Starting Technique | When a Weave May Help |
|---|---|---|
| Butt joint | Stringer centered on the joint with correct preparation and fit-up | A wider groove, multi-pass fill, or limited gap variation |
| Lap joint | Controlled stringer with work angle biased to achieve fusion at both pieces | When the required fillet is wider than a straight pass comfortably covers |
| T-joint | Stringer or narrow manipulation while holding roughly equal work angle between both members | Larger fillets, vertical-up welding, or sidewall tie-in problems |
| Corner joint | Small controlled stringer suited to the joint thickness and fit-up | When joint width requires additional coverage without an oversized puddle |
For mild-steel MIG welding, Miller gives a general travel-angle range of about 5 to 15 degrees under normal conditions. Work angle varies with the joint. A T-joint commonly starts near 45 degrees between the two members, while lap joints may require the gun to be biased toward the correct fusion line.
How Welding Position Changes the Pattern
Flat
Flat-position welding provides the easiest puddle control. A straight stringer is usually a good starting point. A modest weave can help fill a larger gap or wider groove, but there is no benefit to making the bead wider than the joint requires.
Horizontal
Gravity tends to pull molten metal toward the lower side of the bead. Keep the puddle controlled and avoid an unnecessarily wide weave. A slight hesitation toward the upper toe may help tie-in where the procedure allows it.
Vertical Up
Vertical-up welding is commonly used when stronger penetration and fill are needed on thicker material. Use a small, controlled puddle and keep the arc near its leading edge. A narrow zigzag or similar weave may help, with quick movement through the center and controlled attention at the sides.
Vertical Down
Vertical-down travel is fast and can reduce penetration and heat buildup, making it useful for some thin-material applications. It should not automatically be substituted for vertical-up welding on thicker structural work; follow the required procedure.
Overhead
Overhead welding requires a small, controllable puddle. Travel must remain fast enough to prevent molten metal from sagging or falling from the joint. Keep any weave narrow and use the settings, wire diameter, and transfer mode appropriate for the position.
Push vs. Pull and Gun Angle
Gun direction also affects the bead. A pull or backhand technique generally produces a narrower bead with deeper penetration and more buildup. A push or forehand technique generally produces a flatter, wider bead with somewhat less penetration and often gives the operator a clearer view of the joint.
These are tendencies, not substitutes for proper settings. Excessive travel angle can increase spatter, reduce penetration, and make the arc less stable. Keep the gun angle deliberate and consistent instead of exaggerating it to force the bead into shape.
How Transfer Mode Affects Pattern Choice
MIG/GMAW can operate in several metal-transfer modes, including short-circuit, globular, spray, and pulsed-spray transfer. The transfer mode changes puddle size, heat level, deposition behavior, and positional capability.
- Short-circuit transfer: Lower-current operation with a relatively controllable puddle, commonly used on thinner material and out-of-position work.
- Globular transfer: Large droplets and more spatter; generally less desirable when appearance and puddle control are important.
- Spray transfer: Higher-current, fine-droplet transfer with strong deposition and fusion, normally used in flat and horizontal applications with suitable argon-rich shielding gas.
- Pulsed spray: Alternates current levels to provide spray-like transfer with greater puddle control and broader positional capability on compatible equipment.
Do not copy a hand pattern from another welder without also considering transfer mode, wire size, gas, joint, position, and machine settings.
How to Avoid Common Weld Defects
Most MIG defects are not fixed by changing the hand pattern alone. Start with clean metal, sound fit-up, correct wire and shielding gas, stable electrical settings, correct stickout, and a consistent gun angle. Then use the smallest amount of manipulation needed to control the puddle.
| Problem | Common Causes | What to Change |
|---|---|---|
| Undercut | Excessive voltage, travel too fast, wrong angle, insufficient filler at the toes | Correct settings and angle; if weaving, slow slightly at the toes without dwelling excessively |
| Overlap / cold lap | Travel too slow, oversized puddle, insufficient heat at the fusion line | Reduce weave width, keep the arc on the leading edge, and confirm proper settings |
| Porosity | Poor gas coverage, leaks, drafts, contamination, moisture, excessive stickout, or turbulence | Clean the joint, check gas delivery and hoses, shield the arc from drafts, and maintain proper stickout |
| Burn-through | Too much heat, slow travel, poor fit-up, or large gap | Use suitable lower settings, faster travel, a stringer, improved fit-up, or backing where appropriate |
| Excessive crown | Travel too slow, voltage too low for wire feed, or poor puddle control | Correct settings and travel speed; avoid pausing in the center of a weave |
| Inconsistent width | Irregular travel speed, changing stickout, unstable gun angle, or uneven hand motion | Return to a stringer drill and rebuild consistency before adding a weave |
Solid MIG wire is less tolerant of rust, oil, paint, mill contamination, and dirt than some other welding processes. Clean the joint to sound metal where practical and place the work clamp on a clean electrical contact surface.
How to Practice MIG Welding Patterns
Effective practice starts with a controlled setup on clean scrap metal. Begin with stringer beads so you can judge travel speed, puddle width, stickout, gun angle, and bead consistency without the extra variable of side-to-side movement.
After you can repeat similar stringers, introduce one weave motion at a time. Keep the motion small. Compare the bead toes, face shape, consistency, penetration evidence on practice coupons, and the amount of spatter.
Practice Setup Essentials
Use a dedicated welding area with suitable fire control, PPE, and ventilation. Remove paint, oil, rust, and other contaminants from the practice zone. Check the gun consumables, cable connections, work clamp, wire feed, shielding-gas system, and polarity before starting.
Use scrap of known material and similar thickness when comparing patterns. Follow the welder manufacturer’s starting chart for voltage and wire feed speed, then fine-tune only as needed for the wire, gas, joint, position, and transfer mode.
Keep notes for each practice run. Record the material thickness, joint type, position, wire diameter, gas, voltage, wire feed speed, approximate travel speed, and movement used. This makes it easier to identify which change actually improved the weld.
Pattern Drills and Consistency
Run several straight stringers side by side and compare their width and appearance. Next, practice a narrow zigzag while keeping forward travel steady. Then try small circles, crescents, figure-eights, and J motions without allowing the puddle to become oversized.
Practice on butt and fillet joints after flat-plate drills become repeatable. Move to horizontal and vertical positions only after you can control the puddle in the flat position.
When a weave starts becoming irregular, return to a stringer. A clean straight bead is more useful than a decorative weave that hides inconsistent travel speed or poor fusion.
Tips for Better MIG Welding Results
- Keep the arc near the leading edge of the puddle. Letting the puddle run ahead of the arc makes fusion harder to judge.
- Use only as much weave as the joint needs. Wider is not automatically stronger.
- Maintain consistent stickout. Large changes alter current and arc behavior.
- Watch both toes of the weld. Good appearance in the center does not prove good sidewall fusion.
- Keep travel angle modest. Manufacturer guidance commonly places normal MIG travel angle around 5–15 degrees.
- Protect the shielding gas. Drafts can disrupt coverage even when the flowmeter shows gas flow.
- Do not compensate for bad settings with hand motion. Correct voltage, wire feed, polarity, gas, and joint preparation first.
- Use multiple passes when appropriate. Several controlled stringers may be preferable to one very wide weave.
Note: For structural, pressure, critical repair, or code-controlled work, the approved welding procedure takes priority over general pattern advice. A visually attractive bead is not proof that the weld has adequate penetration, fusion, or mechanical properties.
Frequently Asked Questions
What is the best pattern for MIG welding?
There is no single best MIG pattern for every weld. A straight stringer is usually the best starting point because it is simple and easy to control. Add a narrow weave only when the joint width, position, gap, weld size, or required sidewall coverage makes it useful.
What are the different weave welding techniques?
Common MIG weave motions include zigzag, small circles, crescent or C-shaped movements, figure-eight motions, and J-shaped movements. These names describe torch manipulation rather than separate welding processes. The motion should remain narrow enough to keep the puddle controlled.
What is the hardest style of MIG welding?
There is no universally hardest bead pattern. Vertical-up and overhead MIG welding are often more difficult than flat welding because gravity makes the molten puddle harder to control. Joint access, transfer mode, material, settings, and operator experience also affect difficulty.
What is the best technique for MIG welding?
Use clean material, correct machine settings, stable shielding gas, consistent stickout, the proper work and travel angles, and steady travel speed. Start with a stringer and watch the leading edge and toes of the puddle. Add manipulation only when it improves coverage or puddle control.
Are weave beads stronger than stringer beads?
Not automatically. Strength depends on whether the weld meets the required size, penetration, fusion, filler-metal, and procedure requirements. A properly made stringer can be stronger than a poor weave, and several stringer passes can be used instead of one wide weave.
Should you push or pull when MIG welding?
Both techniques can be used when appropriate. Pulling generally produces a narrower bead with deeper penetration and more buildup. Pushing generally produces a flatter, wider bead with less penetration and often gives a clearer view of the joint. Follow the procedure and machine guidance for the application.
Conclusion
MIG welding patterns are tools for controlling the puddle, not shortcuts to weld quality. Start with a consistent stringer, then add a narrow zigzag, circular, crescent, figure-eight, or J motion only when the joint or welding position benefits from it. Keep travel speed, gun angle, stickout, shielding gas, and machine settings consistent, and judge the weld by fusion, profile, penetration, and the applicable procedure rather than appearance alone.
Sources
- Miller — Understanding the Basics of MIG Welding for Mild Steel — MIG/GMAW fundamentals, cleaning, shielding gas, stickout, push/pull technique, angles, positions, and puddle control.
- Miller — Guide to Pulsed MIG Welding in Manufacturing — short-circuit, globular, spray, and pulsed-spray transfer modes.
- Occupational Safety and Health Administration — Welding, Cutting, and Brazing Hazards and Solutions — welding fumes, radiation, burns, electrical hazards, PPE, and safety controls.
- OSHA 29 CFR 1910.252 — General Welding Requirements — PPE, ventilation, confined-space, and welding-safety requirements.
- CDC/NIOSH — Welding Fumes and Manganese — health concerns associated with welding-fume exposure and manganese.