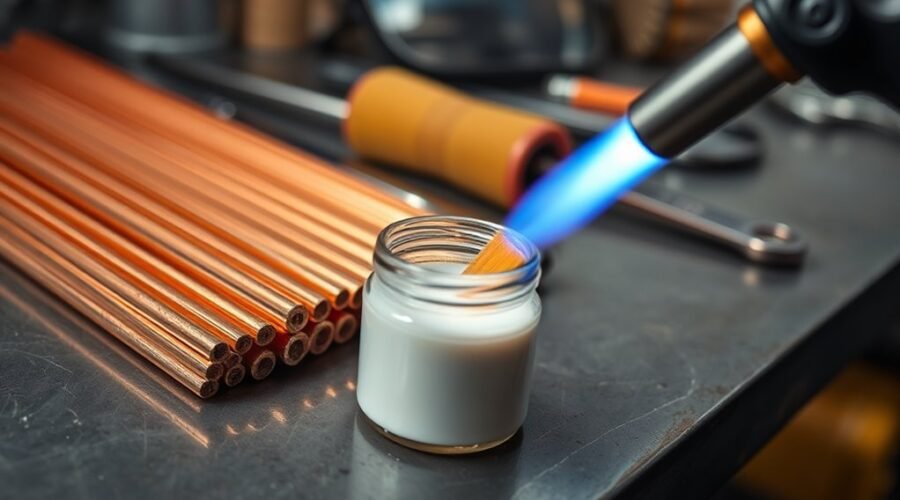
Copper brazing starts with square-cut, deburred, clean pipe ends and a snug fit. A white flux such as Stay-Silv is used on both mating surfaces, applied just before heating. For copper-to-copper joints, Dynaflow, Stay-Silv 5, or Stay-Silv 15 are suitable rods. A neutral torch flame heats the joint to about 1300–1500°F until capillary action draws in the filler. The joint then cools naturally and is cleaned. More detail follows below.
Key Takeaways
- Cut, deburr, and clean copper pipe surfaces thoroughly so the joint fits snugly and stays contamination-free.
- Apply a thin, even coat of flux just before heating; Stay-Silv white flux is commonly recommended for copper joints.
- Use copper-compatible brazing rods such as Dynaflow, Stay-Silv 5, or Stay-Silv 15; avoid phosphorus-bearing alloys for copper joints.
- Heat with a neutral flame to about 1300°F–1500°F, then touch the rod to the joint and let capillary action draw in the filler.
- Keep joint clearance tight, around 0.0015 inches, and clean off remaining flux after brazing with hot water or a wire brush.
How to Braze Copper Pipe
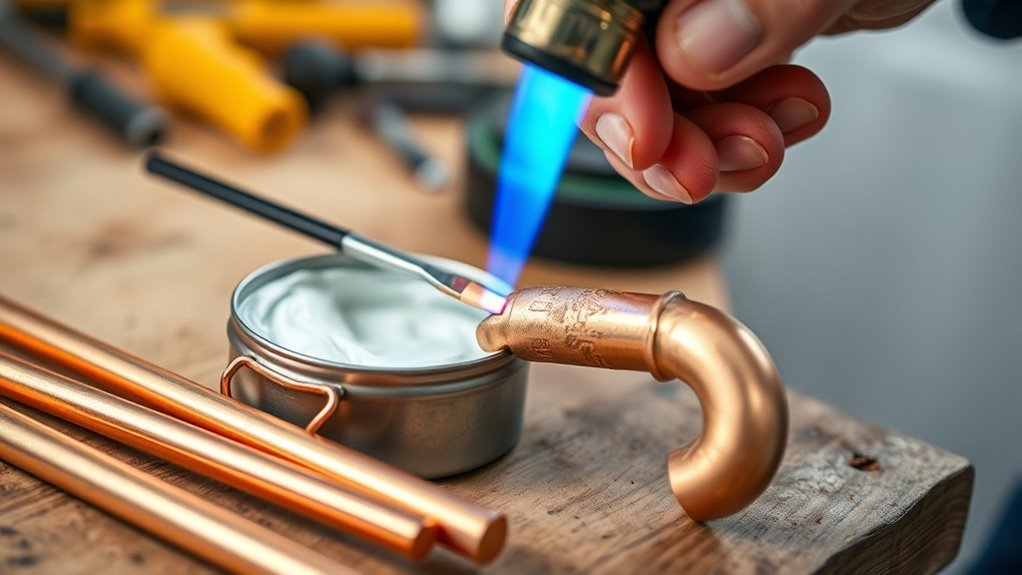
To braze copper pipe, the pipe should first be cut squarely with a tube cutter and deburred to provide proper fit and clearance for capillary action.
The joint surfaces are then cleaned with a stainless steel wire brush or emery cloth to remove oil, grease, and oxides; this cleanliness must be preserved until heating begins.
Clean the joint surfaces thoroughly and keep them pristine until heating begins to ensure a sound brazed connection.
Next, apply flux to both mating areas in a continuous coat, ensuring full coverage so oxidation is restrained during brazing.
A neutral torch flame is then directed to the tube, heating the assembly evenly rather than concentrating on one point.
When the metal reaches roughly 1300 to 1500°F, the brazing filler metal is introduced at the joint, where capillary action draws it through the clearance.
After flow is complete, the joint is allowed to cool naturally.
Residual flux is removed with hot water or a wire brush to reduce corrosion and preserve the integrity of the finished joint.
Which Brazing Rod Works Best for Copper?
For copper-to-copper brazing, filler metals such as Dynaflow, Stay-Silv 5, and Stay-Silv 15 are generally the best choices because they are formulated for strong bonding and reliable capillary flow in copper joints.
In practical filler metal selection, these rods support clean wetting and durable seams when brazing copper pipe and fittings.
Phosphorus-bearing alloys like Safety-Silv 45 and Safety-Silv 56 suit ferrous metals better, yet they should be avoided on copper-to-copper work because brittleness can reduce joint integrity.
Rods are commonly supplied in 1/16 inch to 1/8 inch diameters, with rod, wire, or coil forms chosen according to joint size and access.
When flux is used, it helps protect the surfaces and guides flow.
Joint heating should reach roughly 1300°F to 1500°F so the alloy melts and is drawn through the gap by capillary action, preserving the freedom of a properly sealed system.
Which Flux Should You Use on Copper?
For copper brazing, a phosphorus-based flux such as Stay-Silv white flux is commonly used to improve filler-metal flow and limit oxidation.
Flux selection should match the copper alloy and joint conditions, with application limited to a complete, even coating on freshly cleaned surfaces just before heating.
Application by brush or dipping is preferred, while excess flux inside refrigeration lines should be avoided to prevent contamination.
Flux Types for Copper
Choosing the correct flux for copper brazing depends on the filler metal, joint conditions, and service temperature. Boric acid remains a common choice because it suppresses oxidation and supports filler flow at elevated heat.
Stay-Silv Flux is formulated for silver brazing yet performs effectively on copper, delivering strong wetting and stable coverage. High-temperature flux is selected where the joint must endure intense brazing heat without breakdown, preserving bonding quality and limiting scale formation.
Water-soluble flux offers practical cleanup, since residue can be removed with water after brazing, reducing corrosion risk. In some copper work, flux may be unnecessary when phosphorus-containing filler metals are used.
Each option serves a defined function, allowing the brazing process to remain controlled, efficient, and technically sound.
Matching Flux to Alloy
Selecting the correct flux for copper brazing depends on the filler metal and the alloy being joined. A compatible flux such as Stay-Silv White Flux is commonly chosen for copper and copper alloys because it limits oxidation and supports smooth filler flow.
Flux is required whenever surface cleanliness must be preserved during heating; without it, oxide films impede bonding. The filler alloy must be matched carefully, since each system has specific requirements and the chemicals are compatible only when the metals and flux formulation align.
Phosphorus-bearing alloys should be excluded on copper joints because brittleness can result under stress. Flux residues should not be ignored, as they indicate where cleanup will be needed after brazing.
Proper selection gives the joint integrity needed for free, reliable work.
Applying Flux Correctly
After matching the flux to the alloy, the next step is correct application on the copper joint.
For copper brazing, applying flux is often unnecessary when a phosphorus-copper filler is used, because phosphorus promotes wetting and reduces oxidation. When a separate flux is required, Stay-Silv white flux is the appropriate choice for copper; it shields the joint and supports stronger bonding.
Before application, clean the copper surfaces thoroughly to remove oils, oxides, and debris. Flux should be brushed onto both mating surfaces, ensuring full coverage without excess buildup. It should be applied immediately before heating, since premature drying reduces protection.
Precise coverage preserves joint integrity and enables a controlled, reliable brazing process for those seeking independent, high-performance work.
How to Prep Copper Pipe Ends
Copper pipe ends should be cut square with a tube cutter or hacksaw, then deburred to remove any edge irregularities that could disrupt assembly.
The joint surfaces must be cleaned with a stainless steel wire brush or emery cloth to eliminate oil, grease, and oxidation.
Proper fitting and roundness should be verified before flux is applied immediately prior to brazing.
Cutting And Deburring
A tube cutter should be used to produce a clean, square cut on copper pipe, reducing debris and improving joint quality.
In cutting and deburring, the objective is precision: burrs must be removed with a deburring tool, file, or sharp scraper so they do not obstruct the braze path. Pipe ends should remain round and true; a sizing tool may be applied when needed to restore geometry and preserve capillary action.
Clean joint surfaces are essential, so oil, grease, oxide, rust and scale must be removed with a stainless steel wire brush or emery cloth. The surfaces should then be wiped with a dry cloth immediately before brazing to limit recontamination.
This disciplined preparation supports strong, reliable joints and gives the installer control over the process.
Cleaning And Fitting
Clean, square pipe ends are essential for a dependable brazed joint, and they should be produced with a tube cutter or hacksaw before assembly. After cutting, burrs are removed so the pieces seat without distortion. During cleaning and fitting, a stainless steel wire brush or emery cloth is used to strip oil, grease, and oxide from both surfaces.
| Step | Purpose | Result |
|---|---|---|
| Clean | Remove contamination | Bright metal |
| Fit | Hold 0.0015 inch clearance | Capillary action |
| Flux | Place flux on the joint | Oxidation control |
The ends should fit snugly, since excess gap weakens flow and bond formation. Flux on the joint is applied immediately before assembly, preserving active surfaces for brazing and supporting a strong, liberated connection.
How to Choose the Right Clearance
To achieve a strong brazed copper joint, the clearance must be controlled with precision, since capillary action depends on a gap that is neither too wide nor too tight. The ideal clearance between the base metals is about 0.0015 inches, or 0.038 mm, a dimension that supports filler flow while preserving joint strength.
Strong brazed copper joints depend on precise clearance, where capillary action thrives in a carefully controlled gap.
Wider gaps weaken the bond; narrower gaps can block the alloy and prevent full penetration. For tubular parts, a slight slip fit is usually sufficient, because it permits alignment and maintains the needed space for capillary action.
For flat parts, metal-to-metal contact is acceptable, provided surface roughness assists wetting and flow. When dissimilar metals are joined, the joint designer must account for thermal expansion, since metals expand at different rates during heating and cooling.
Careful clearance selection supports durable, independent, and reliable brazed connections.
How to Assemble Copper Pipe Joints
Copper pipe joints are assembled by first cutting the pipe squarely with a pipe cutter and removing all burrs with a deburring tool to produce a clean, accurate fit. The end surfaces are then prepared to accept the fitting without distortion, allowing disciplined workmanship and practical self-reliance. Apply flux to both the pipe end and the fitting socket, covering all contact surfaces evenly. Insert the pipe fully while preserving proper alignment and a small clearance, near 0.0015 inch, so capillary action can occur later with reliability.
| Step | Purpose | Result |
|---|---|---|
| Cut | Square end | Clean seat |
| Flux | Prevent oxidation | Protected joint |
| Assemble | Align parts | Clear path |
This sequence reduces rework, supports durable joints, and gives the assembler control over the process.
How to Set the Torch Flame
The torch flame should be set to a neutral condition, with oxygen and acetylene balanced and the acetylene pressure typically near 14–15 psi.
The torch valve is opened about 3/4 turn, then the oxygen flow is adjusted gradually until a clear inner cone of roughly 1/2 inch forms.
During brazing, the flame characteristics are monitored continuously, and any hissing sound or color shift is corrected promptly to maintain stable heating.
Neutral Flame Setup
A neutral flame is established by adjusting the acetylene and oxygen valves until the torch produces a balanced blue flame with a clearly defined inner cone, neither oxidizing from excess oxygen nor carburizing from excess acetylene. For copper brazing, the neutral flame supports ideal heating efficiency and uniform heat distribution, preserving joint integrity and free work. The acetylene valve should open first; oxygen is then introduced gradually. The inner cone should remain about 1/8 inch to 1/4 inch long.
| Indicator | Meaning |
|---|---|
| Blue, balanced flame | Neutral condition |
| Defined inner cone | Proper heat focus |
| Color or size change | Recheck settings |
During brazing, the flame should be observed continuously, as variation in appearance signals the need for correction.
Flame Adjustment Tips
With a neutral flame already established, torch setup can be refined by balancing oxygen and acetylene to maintain a stable blue cone of roughly 1 inch in length for efficient heating.
These flame adjustment tips begin with opening the acetylene valve first, then introducing oxygen to preserve control and reduce flashback risk. Delivery pressures near 14–15 psi acetylene and 2–3 psi oxygen support consistent combustion.
The neutral flame should remain sharp, quiet, and free of excess carbon. During brazing, the torch must move in steady passes so the joint area receives uniform heat without localized overheating.
Flux behavior serves as a temperature indicator; when it turns fluid and transparent, the assembly has reached a suitable brazing condition. Such disciplined setup grants precise, liberated control.
How to Braze Copper Pipe Step by Step
Start by cutting the copper pipe squarely with a pipe cutter, then deburr the cut ends to remove sharp edges and create a clean, smooth joint. Freedom from defects begins with clean joint surfaces, so each piece should be brushed with emery cloth or a wire brush until oil, grease, and oxide are removed.
Next, apply the flux to both mating faces; a suitable flux, such as Stay-Silv white flux, shields the metal from oxidation and supports capillary flow.
- Align the pipe and fitting precisely.
- Heat the joint evenly with a neutral torch flame until brazing temperature is reached, about 1300°F to 1500°F.
- Touch the brazing rod to the joint and let molten filler draw through by capillary action.
After cooling naturally, remove residual flux with hot water or a wire brush. This final cleaning preserves joint integrity and leaves the copper ready for service.
When to Use Torch, Induction, or Furnace
Selecting the appropriate brazing method depends on joint geometry, production volume, and heat-control requirements.
For irregular parts, repair work, and low-volume assembly, torch brazing is the most adaptable option. It uses a direct flame at roughly 1300°F to 1500°F, giving the operator freedom to localize heat and guide filler metal by capillary action without melting the base metal.
Induction brazing is better for small, standardized joints where rapid, uniform heating is needed. Its electromagnetic field removes the open flame, improving indoor safety and repeatability.
Furnace brazing suits batch production and critical assemblies that demand controlled atmosphere conditions. By limiting oxidation and contamination, it supports stronger, more consistent joints.
Cost and skill also matter: torch brazing has lower setup expense but requires advanced manual control, while induction brazing and furnace brazing demand higher initial investment yet offer safer, more liberated production workflows.
How to Clean a Brazed Copper Joint
A clean copper surface is essential for producing a sound brazed joint. Before heating, operators should clean the copper surfaces with a stainless steel wire brush or emery cloth to remove any oil, grease, or oxide contamination.
A clean copper surface is essential for producing a sound brazed joint.
If scale, rust, or heavy films remain, a degreasing solvent or acid pickle solution may be applied. The joint should be brazed immediately after preparation to prevent recontamination, since even trace residue can weaken the bond.
- Mechanically abrade all mating areas until bright metal appears.
- Degrease severe contamination, then dry the part completely.
- After brazing, quench in hot water, about 120°F or hotter, to dissolve flux residues; if needed, brush lightly while immersed.
This sequence preserves joint integrity and supports liberated, efficient workmanship. Cleanliness is not cosmetic; it is structural, and it governs the durability of copper brazing.
Frequently Asked Questions
How to Braze Step by Step?
To braze step by step, one first gathers the tools required: torch, brazing rod, flux, brush, and cleaning cloth.
Safety precautions include gloves, eye protection, and ventilation.
Copper surfaces are cut square, deburred, and cleaned.
Flux is applied, then the joint is heated evenly with proper brazing techniques.
When flux turns clear, filler is introduced. Capillary action draws it in.
The joint cools naturally, then is cleaned.
Do You Need Flux to Braze Copper to Copper?
Absolutely, yes. In copper-to-copper brazing, flux is generally required; otherwise oxidation can undermine the joint.
A skilled technician selects proper flux types, such as copper-rated formulations, after careful joint preparation and applies disciplined heat control so filler metal wicks smoothly by capillary action.
When conditions are exceptionally clean and controlled, flux may be omitted, but that is the exception.
For reliable, liberated performance, flux remains the standard.
What Are Common Brazing Mistakes?
Common brazing mistakes include poor joint preparation techniques, incorrect flux application tips, inadequate brazing temperature control, excessive filler metal, and flawed joint design.
Contaminants or oxide layers reduce capillary action and weaken bonds. Too little flux permits oxidation; too much can hinder flow. Heating below brazing temperature prevents proper filler melting.
Tight control of clearance and cleanliness supports strong, reliable joints and frees the process from avoidable failure.
Why Isn’t My Brazing Rod Sticking to Copper Pipe?
The brazing rod is not sticking because the joint likely lacks sufficient heat, cleanliness, or compatibility; not merely because the rod is defective.
Proper copper surface preparation, including removal of oil and oxidation, is essential before fluxing. Effective heat application techniques must bring the joint to brazing temperature, while brazing rod compatibility with copper and correct joint clearance guarantee capillary flow.
When these conditions align, the connection bonds with disciplined reliability.
Conclusion
Copper brazing joins clean, well-fitted parts with controlled heat, proper filler metal, and the correct flux. When rod selection, joint clearance, and flame adjustment are matched to the tube size and service conditions, the result is a durable, leak-resistant bond. Whether using a torch, induction unit, or furnace, disciplined preparation remains the name of the game. Final cleaning confirms sound wetting and removes residue, completing a reliable copper joint.