Aluminum brazing joins aluminum parts without melting the base metal, using a lower-melting filler that wets the joint and, in a close-fitting joint, can flow by capillary action. Good results depend on matching the filler and flux to the alloy, removing oil and oxide, controlling joint clearance, and heating the aluminum rather than simply melting the rod with the flame.
Quick Answer
For reliable aluminum brazing, use a filler and flux designed for your alloy, clean the joint thoroughly, keep the fit close and uniform, and heat both parts evenly. Apply filler to the hot joint rather than melting it directly with the torch. Stop heating as soon as the filler wets and flows through the joint.
Key Takeaways
- Under the AWS definition, true brazing uses filler with a liquidus above 840°F (450°C); some products sold as “brazing rods” melt below that threshold.
- Aluminum’s oxide film interferes with wetting, so surface preparation and the correct flux system are critical.
- Joint clearance must suit the filler system; a press fit can block capillary flow, while an excessive gap reduces capillary action.
- Flux behavior is product-specific. Do not assume every aluminum flux bubbles or turns clear at the same temperature.
- Choose TIG when you need a fusion weld or when the service requirements call for welding rather than a brazed joint.
How Aluminum Brazing Works
)
In brazing, the filler melts while the aluminum base material remains solid. The American Welding Society defines brazing as joining with a filler metal whose liquidus is above 840°F (450°C) but below the solidus of the base materials.
That definition matters with aluminum because many retail products use the word “brazing” loosely. A low-temperature aluminum repair rod can be useful, but its operating temperature and joint behavior may differ greatly from a conventional aluminum-silicon brazing alloy.
For a close-fitting lap or socket joint, molten filler can be pulled through the space by capillary action. Successful flow requires clean metal, adequate heat, a compatible filler and flux system, and a gap that is neither sealed shut nor excessively wide.
Aluminum oxide makes the process harder. Miller notes that aluminum oxide melts at roughly 3,600°F while the underlying aluminum melts at about 1,200°F, so trying to overcome oxide simply by adding more heat can destroy the part. The better approach is cleaning plus the correct flux or oxide-control method.
A practical brazing sequence is:
- Identify the aluminum alloy when possible and choose a compatible filler and flux.
- Degrease the joint and remove loose or heavy oxide.
- Fit and support the parts with the recommended joint clearance.
- Apply flux if the filler system requires it.
- Heat both parts evenly until the joint reaches the filler system’s working range.
- Touch filler to the heated joint and let the hot metal melt and draw it into the seam.
- Stop heating once adequate flow is complete, then cool and clean the joint as the flux manufacturer specifies.
Choose the Right Aluminum Brazing Rod
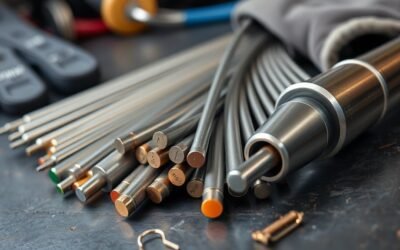
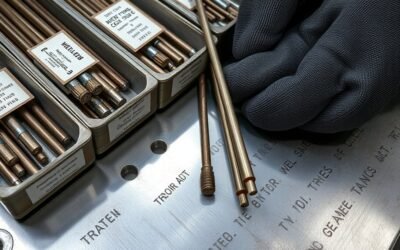
The right rod depends on the base alloy, joint design, service temperature, required strength, and whether the product uses separate flux. Do not choose a rod only because its package says “aluminum brazing.” Check its actual melting or working temperature and instructions.
| Filler type or example | Published temperature | What to know |
|---|---|---|
| Conventional Al-Si brazing filler | Often above the AWS 840°F brazing threshold | Common for true aluminum brazing; filler and flux must match the alloy and process. |
| Hobart 770206 | 700°F melting point | Manufacturer describes it as a low-temperature, self-fluxing aluminum and magnesium repair rod. |
| Bernzomatic AL3 | 720–750°F working temperature | Sold as an aluminum brazing and welding rod, but its listed working range is below the AWS brazing threshold. |
The Hobart 770206 product information lists a 700°F melting point and calls the rod self-fluxing. The Bernzomatic AL3 specification lists a 720–750°F working temperature.
By contrast, Lucas-Milhaupt’s Handy Alumibraze 302 technical data gives a 1,070°F solidus, 1,080°F liquidus, and a brazing range of 1,080–1,120°F. This illustrates why the rod’s data sheet matters more than the marketing name.
When Flux Is Essential for Aluminum Brazing
Flux is normally needed for conventional torch brazing in air because aluminum rapidly forms a tough oxide film that blocks wetting. Flux dissolves or disrupts that oxide and helps protect the freshly exposed surface while the filler flows.
However, a separate flux is not universal. Some low-temperature rods are self-fluxing, and industrial controlled-atmosphere processes use different oxide-control methods. Follow the exact filler and flux system rather than adding an unrelated plumbing or general-purpose flux.
Solvay’s NOCOLOK aluminum brazing flux information explains that its fluoride-based flux becomes active when molten, helps remove the oxide barrier, and leaves a mainly water-insoluble residue that does not normally require removal. Other flux chemistries can have different post-braze cleaning requirements.
Flux also has a limited active temperature window. Once overheated or exhausted, it may stop protecting the joint effectively. Use the manufacturer’s stated behavior and working range rather than relying on one visual cue for every product.
Prep Aluminum for a Strong Braze
Good preparation gives the filler a clean surface to wet. Oil, grease, oxide, paint, and shop contamination can all stop filler from spreading through the joint.
Warning: Brazing is hot work. Remove nearby combustibles, provide appropriate ventilation, wear suitable eye, hand, and skin protection, and never heat a part while flammable solvent vapors remain. OSHA also prohibits hot work on inadequately cleaned containers that may hold flammable or toxic residues.
The OSHA welding, cutting, and brazing requirements address fire prevention, ventilation, protective equipment, and hot work on used containers.
- Degrease first. Remove oil, cutting fluid, fingerprints, and dirt with a suitable residue-free cleaner. Let volatile cleaner evaporate completely before bringing a flame near the work.
- Remove oxide and coatings. Use a dedicated stainless steel brush, suitable abrasive, carbide tool, or the preparation method specified for the filler system.
- Keep the cleaned surfaces clean. Avoid touching the faying surfaces with bare hands after preparation.
- Check joint fit. The parts should have a close, uniform clearance that lets the molten filler move through the joint.
- Apply the specified flux. Cover the areas that need wetting without assuming that more flux is always better.
For Handy Alumibraze 302, Lucas-Milhaupt specifies a joint clearance of 0.002–0.006 inch for good capillary flow and warns against press fits. That number is product-specific, so use the clearance recommended for your own filler and process rather than treating it as universal.
Clean metal, the correct clearance, and a compatible flux system matter more than simply adding more heat.
Heat the Joint, Not the Rod
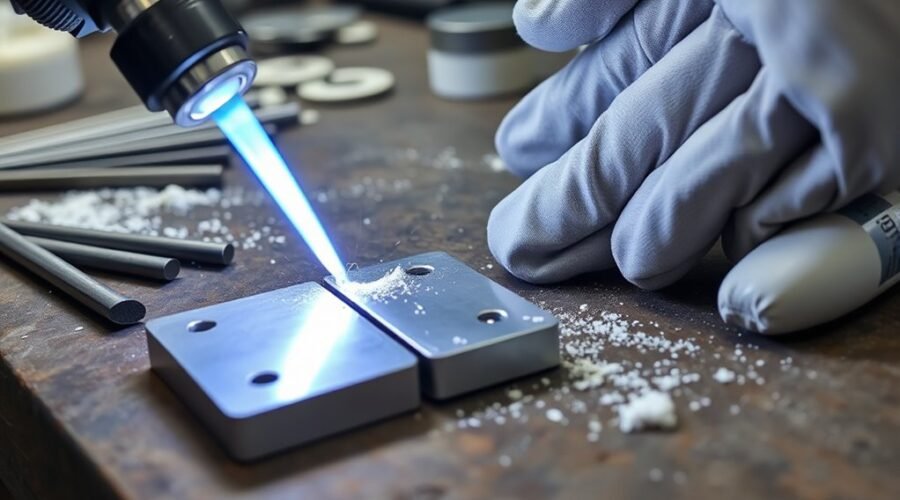
Heat the aluminum until the joint itself can melt and wet the filler. If you point the flame mainly at the rod, the filler can melt into a blob while the base material remains too cold for proper bonding.
Move the flame across both parts instead of parking it in one spot. Aluminum conducts heat quickly, so a thicker member often needs more heat than a thin member to bring both sides of the joint into the same working range.
| Technique | Why it matters |
|---|---|
| Heat both parts | Promotes even wetting across the whole joint. |
| Keep the flame moving | Reduces local overheating and burn-through. |
| Touch filler to the work | Confirms that the base metal, not just the flame, is hot enough to melt the filler. |
| Remove heat after flow | Limits unnecessary heating of the aluminum and flux. |
A smooth filler bead sitting on top of the metal is not proof of a sound braze. For a capillary joint, the important sign is that the filler wets the aluminum and is drawn into the joint rather than remaining as a separate lump.
Watch the Flux to Know When to Braze
Flux can provide useful visual feedback, but its behavior depends on the specific formulation. Treat the manufacturer’s instructions as the temperature guide, not a generic rule that every flux must bubble and become glassy at one fixed temperature.
Use Flux as a Product-Specific Temperature Gauge
Many aluminum brazing fluxes change appearance as they become active. When that change occurs within the product’s specified working range, it tells you the joint is approaching the point where filler should wet and flow.
Watch the entire joint, not just the hottest point under the torch. A small area of active flux does not prove that both pieces have reached an even brazing temperature.
Do Not Treat Bubbling or Glassy Flux as a Universal Rule
The original “bubble, then glassy clear” rule is too broad for every aluminum brazing product. Some fluxes liquefy or turn clearer; others behave differently, and self-fluxing rods may provide no separate flux pool to watch.
If your product specifies a particular visual cue, use it. Otherwise, rely on the filler system’s documented temperature range and on whether the hot base metal can make the filler wet and flow.
Feed Filler During the Active Flow Window
Once the joint reaches the correct temperature, add filler without continuing to soak the assembly in unnecessary heat. The filler should spread smoothly over clean metal and, in a capillary joint, draw into the gap.
If the filler refuses to wet, stop and diagnose the problem. Continuing to increase the temperature can melt or sag the aluminum while leaving the original contamination or oxide problem unsolved.
Feed Filler Metal Into the Joint Cleanly
Touch the filler to the heated aluminum at the joint edge. The base metal should supply enough heat to melt the filler, which helps you avoid depositing molten rod onto a joint that is still too cold.
Feed only enough filler to fill the designed joint and form the required fillet. Excess filler on the outside does not compensate for poor penetration into the faying surfaces.
Touch the rod to the hot joint. If only the torch can keep the filler molten, the joint itself may not yet be ready.
After flow is complete, remove the heat and allow the assembly to solidify without disturbing the joint. Clean flux residue according to the flux manufacturer’s instructions. Do not assume every residue should be burned away, left in place, or washed with water; the correct treatment depends on the flux chemistry.
Why Aluminum Brazing Joints Fail
Most brazing problems come from poor wetting, incorrect temperature, unsuitable joint clearance, contamination, or an incompatible filler/flux combination. Looking at how the filler behaves often points to the cause.
| Symptom | Likely causes | What to correct |
|---|---|---|
| Filler balls up or rolls off | Joint too cold, oxide or contamination, wrong flux | Reclean, verify flux compatibility, and heat the base metal evenly. |
| Filler stays on the surface | Poor wetting or unsuitable joint fit | Check surface preparation and joint clearance. |
| Aluminum sags or begins to melt | Excessive or concentrated heat | Stop heating and use broader, more even heat on the next attempt. |
| Joint looks filled but breaks easily | Filler formed an external fillet without adequate wetting or penetration | Recheck cleaning, joint design, clearance, and filler compatibility. |
A gap that is too tight can stop filler from entering the joint, while a wide gap reduces capillary action and may require a different filler technique or joint design. Burrs, distorted edges, and uneven heating can also leave unfilled areas.
Do not judge joint quality only by appearance. A smooth outer fillet can hide incomplete penetration, trapped contamination, or poor bonding between the filler and base metal.
When TIG Welding Is the Better Choice
TIG welding is the better process when the job requires fusion of the aluminum base metal, a qualified welding procedure, or a weld design intended for structural service. Brazing remains useful where a lower-temperature joining process, thin parts, close-fitting assemblies, or certain repair situations make it appropriate.
TIG for Precision Aluminum
TIG gives the operator direct control over the arc, puddle, and filler addition. On aluminum, AC TIG is commonly used because the electrode-positive portion of the AC cycle helps remove surface oxide while the electrode-negative portion supplies penetration.
Miller’s aluminum TIG guidance also stresses cleaning the metal before welding rather than relying on the arc alone to deal with contamination and oxide.
TIG requires a suitable power source, shielding gas, tungsten, filler selection, and more operator skill than many torch-applied repair rods. It is therefore not automatically the simplest choice for every small aluminum repair.
Do Not Assume TIG Always Means Less Warping
TIG and brazing affect aluminum differently. TIG intentionally melts the base metal and creates a fusion weld, while brazing keeps the base metal below its solidus and melts only the filler.
That does not mean either process always creates the stronger joint or less distortion. Joint strength and dimensional change depend on the alloy, temper, joint geometry, heat input, filler, procedure, and service load.
Choose TIG when the design calls for a fusion weld or when a welding code, engineering specification, or qualified repair procedure requires it. Choose brazing only where the joint design and service conditions are appropriate for a brazed connection.
Frequently Asked Questions
Should You Use Flux When Brazing Aluminum?
Yes, conventional aluminum torch brazing in air normally uses a flux designed for the filler and base alloy. The flux helps remove the oxide barrier and protect the surface while filler flows. A separate flux may not be needed with a self-fluxing repair rod or a process specifically designed to work without one.
What Is the Best Brazing Flux for Brazing Aluminum?
There is no single best aluminum brazing flux for every alloy and filler. Use a flux specifically approved for the aluminum alloy, filler metal, and heating process you are using. Also follow its working-temperature and residue-cleaning instructions because fluoride, chloride, and self-fluxing systems can behave differently.
Is Aluminum Brazing as Strong as Welding?
Aluminum brazing cannot be assigned one fixed strength relative to welding. A brazed joint can be strong when properly designed, but it does not fuse the base metal as TIG or MIG welding does. For structural work, use the joining process, joint design, filler, and procedure required by the applicable engineering specification.
Why Is My Aluminum Brazing Not Sticking?
Aluminum brazing usually fails to stick because the surface is oxidized or contaminated, the joint is too cold, the filler or flux is incompatible, or the joint clearance is wrong. If the rod melts into a ball instead of wetting the metal, stop and correct the preparation and heat rather than simply melting more filler.
Conclusion
Reliable aluminum brazing comes from matching the filler and flux to the alloy, preparing clean surfaces, maintaining the intended joint clearance, and heating the aluminum evenly enough for the filler to wet and flow. Do not judge the process by the rod’s marketing name alone; use its actual temperature and application data, and switch to TIG when the design requires a fusion weld.
Sources
- American Welding Society Brazing & Soldering Manufacturers Committee: Definition of brazing and the 840°F (450°C) liquidus threshold.
- Lucas-Milhaupt Handy Alumibraze 302 Technical Data Sheet: Filler temperature range, joint clearance, cleaning, and joint-design guidance.
- Hobart 770206 Aluminum Rod: Self-fluxing designation and 700°F melting point.
- Bernzomatic AL3 Aluminum Brazing and Welding Rods: Published 720–750°F working temperature.
- Solvay NOCOLOK Flux Powders: Aluminum brazing flux behavior, oxide control, and residue characteristics.
- OSHA 29 CFR 1910.252: Fire prevention, ventilation, PPE, and other hot-work safety requirements.
- Miller AC Balance Control for TIG Aluminum: Aluminum oxide behavior, pre-cleaning, and AC TIG cleaning action.