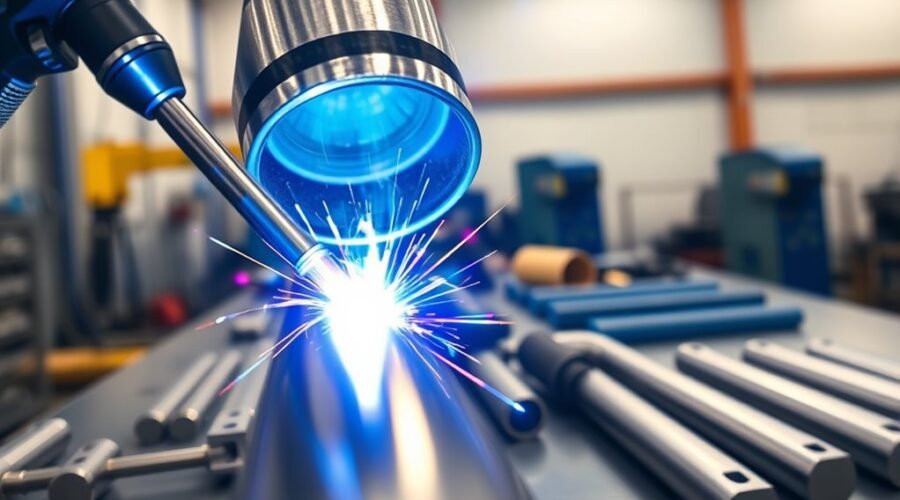
Welding titanium is mainly a cleanliness and shielding challenge. The metal can produce strong, corrosion-resistant welds with TIG/GTAW, but the hot weld and heat-affected zone must stay protected from air until they cool. Reliable results depend on clean parts, DCEN polarity, controlled heat, suitable filler, and complete inert-gas coverage.
Quick Answer
To weld titanium reliably, use TIG/GTAW on DCEN with clean base metal and filler, 100% argon shielding, and protection for the hot root and cooling bead. Keep the arc short, follow a qualified WPS for gas quality and flow, and treat blue, gray, or white discoloration as a warning that shielding or cleanliness needs attention.
Last checked: September 28, 2026. Dates and figures were verified against official sources.
At a Glance
| Difficulty | Advanced; titanium is highly sensitive to contamination while hot |
| Tools Needed | DC TIG/GTAW power source, gas lens or suitable large cup, 100% argon, purge or trailing shielding as required, and dedicated titanium preparation tools |
Key Takeaways
Key Takeaways
- Use 100% argon and protect the torch side, cooling bead, and exposed root for as long as the metal remains reactive.
- Prepare titanium with clean, dedicated tools and approved nonchlorinated solvent; do not use ordinary steel brushes or steel wool.
- Use DCEN for TIG welding titanium and keep the arc short to reduce heat spread and atmospheric exposure.
- Silver and straw colors indicate better shielding. Blue, gray, white, or chalky deposits call for closer inspection and often rework under the applicable WPS.
- Choose filler, purge limits, gas flow, and acceptance criteria from the qualified procedure or governing specification rather than relying on one universal setting.
What Makes Titanium Hard to Weld
)
Titanium is difficult to weld because it reacts readily with oxygen, nitrogen, and hydrogen when it is hot. If the weld pool or recently solidified metal loses inert-gas protection, those elements can enter the metal and reduce ductility and toughness.
The challenge is therefore not simply titanium’s melting temperature. You must control the entire hot zone, including the molten pool, adjacent heat-affected area, cooling bead, and the root when it is exposed on the back of the joint.
Fit-up also matters. Wide or uneven gaps demand more filler and heat, increasing the time that the joint remains at reactive temperatures. Accurate alignment and consistent joint geometry make heat input easier to control.
Surface contamination creates another failure path. Oil, moisture, oxide, grinding debris, and particles transferred from carbon-steel tools can all interfere with a clean titanium weld.
Do not apply carbon-steel MIG shielding practice to titanium. A 75/25 argon/CO2 mix may be used for other welding processes, but carbon dioxide is reactive and is not an appropriate titanium TIG shielding gas. Qualified titanium procedures may instead call for argon, helium, or an argon-helium blend.
Set Up Shielding Gas for Titanium
Use 100% argon as the normal starting point for titanium TIG welding, then follow the gas grade, flow, cup, purge, and trailing-shield requirements in the WPS. Coverage matters more than simply turning the flowmeter higher, because excessive flow can create turbulence that pulls room air into the shielding envelope.
Miller’s titanium tube-and-pipe guidance recommends 100% argon and emphasizes complete backside purging for tube and pipe. It also notes that demanding applications may specify very high gas purity and very low residual oxygen before welding starts.
For general fabrication, the correct torch flow depends on cup size, gas lens, torch geometry, drafts, and joint shape. TIMET’s titanium fabrication guide reports about 20 CFH as a satisfactory torch flow in its example practice, while also directing welders to follow equipment recommendations and avoid excessive flow.
| Parameter | Target | Effect |
|---|---|---|
| Shielding gas | 100% argon unless the WPS specifies otherwise | Limits oxygen and nitrogen pickup |
| Torch flow | Follow the WPS and torch setup; about 20 CFH is a common reference point | Maintains coverage without unnecessary turbulence |
| Coverage | Torch, cooling bead, and backside as required | Protects titanium while it remains hot and reactive |
| Monitoring | Leak checks and purge-oxygen limits specified by the procedure | Confirms the purge is suitable before welding |
Use purge dams or other backing arrangements where they help contain shielding gas around the root. A trailing shield can extend protection behind the torch on longer beads or heavier sections.
The power source still needs stable TIG control even if it offers other processes. Features described as multi-process capability are secondary to reliable DC TIG performance, suitable gas control, and a torch setup that can maintain complete shielding.
Prepare Titanium Parts for Welding
Titanium parts should reach the welding bench clean, dry, accurately fitted, and isolated from carbon-steel contamination. Prepare the joint immediately before welding when practical, and handle cleaned surfaces with clean gloves rather than bare hands.
Remove burrs and heavy oxide with dedicated tools suitable for titanium. Clean stainless-steel brushes, carbide files, or other dedicated mechanical tools may be used when the procedure allows them. Do not use ordinary carbon-steel brushes or steel wool because embedded particles can contaminate the joint.
After mechanical preparation, wipe the joint and filler with an approved nonchlorinated solvent such as acetone or methyl ethyl ketone using a clean, lint-free cloth. Let the solvent evaporate fully before striking an arc. Keep moisture, oil, marking compounds, shop dust, and dirty gloves away from the prepared surfaces.
Warning: Do not use chlorinated cleaning solvents around welding, and control titanium grinding dust and fine particles as combustible material. Use suitable ventilation, PPE, housekeeping, and fire precautions for the work area.
Fit the joint closely enough to hold alignment without forcing the welder to bridge avoidable gaps. If the root will be exposed to air while hot, arrange backing gas or a purge before welding starts.
The same fundamentals matter when comparing TIG welder selection criteria: stable low-amperage control, reliable gas timing, high-frequency or suitable noncontact starting, and dependable DC output are more relevant to titanium than extra process labels.
How to Read Titanium Weld Color
Titanium weld color is a fast visual clue to how much oxygen reached the hot surface, but it is not a complete mechanical test. In general, bright silver and light straw indicate better shielding, while progressively darker colors show increasing surface oxidation.
Color limits are not universal. Section thickness, alloy, service condition, the applicable WPS, and governing code determine whether a particular shade is acceptable. For structural titanium, AWS D1.9/D1.9M:2015 contains fabrication and inspection requirements that should be applied where that code governs the work.
- Silver: the preferred appearance and a strong sign that shielding remained effective.
- Light to dark straw or brown: increasing surface oxidation; many procedures permit some of these colors, but acceptance must follow the applicable specification.
- Purple or blue: greater oxygen exposure. Do not assume these colors are automatically acceptable or automatically rejectable without the procedure’s limits.
- Gray, chalky, or white: severe oxidation and a strong indication that the affected material needs evaluation and usually removal before rework.
Inspect both the face and the penetration side. A clean-looking face does not prove that the root was protected if the backside purge failed.
Advice about flux-cored wire chemistry applies to a different welding process; flux does not replace the inert shielding required for titanium TIG welding.
Choose the Right TIG Technique
TIG/GTAW is the standard manual process for high-quality titanium work because it gives precise control of the arc, filler, and shielding envelope. Use DC electrode negative, maintain a compact arc, and keep the filler tip inside the shielding zone while it is hot.
TWI’s titanium GTAW guidance recommends DC negative polarity, a gas lens or suitable large cup, high-purity inert shielding, and an arc kept as short as practical. High-frequency or lift-arc starting can also reduce the risk of contaminating the tungsten through scratch starting.
Choose filler from the qualified procedure rather than assuming the base-metal grade must always be duplicated. Matching filler is common, but the correct classification depends on the alloy and required weld properties. AWS A5.16/A5.16M:2023 is the current AWS specification covering titanium and titanium-alloy welding electrodes and rods.
Feed the rod smoothly into the leading edge of the puddle without removing its hot end from the shielding envelope. If the filler tip becomes oxidized or contaminated, stop and remove the affected end before continuing.
Keep the torch angle modest enough to preserve gas coverage. Excessive torch angle can stretch the arc and expose the hot pool to room air. Stable hand position, steady travel, and consistent filler placement matter more than rapid manipulation.
For operators still learning the controls, guidance on basic welder process controls can help explain machine functions, but titanium should be practiced only after the welder can maintain stable TIG arc length and gas coverage consistently.
Control Heat Input and Arc Length
Heat input should be only high enough to obtain full fusion and the required penetration. Too much heat enlarges the hot zone and extends the time titanium remains vulnerable to atmospheric contamination; too little can cause incomplete fusion.
Balance amperage, arc length, joint fit-up, filler addition, and travel speed rather than treating any one setting as universal. A qualified WPS remains the correct source for production values because material grade, thickness, joint design, torch setup, and position all change the required settings.
Machine features such as pulse control or high-frequency starting may help with arc control when the procedure permits them. Those are examples of TIG machine controls, but they do not replace correct shielding and preparation.
Heat Input Control
Control heat by using the minimum practical amperage for sound fusion and by moving steadily enough to avoid lingering in one area. A single heat-input figure cannot be transferred safely from one titanium procedure to another without considering voltage, current, travel speed, efficiency, thickness, and joint geometry.
| Control | Better Practice | Effect |
|---|---|---|
| Arc length | Keep it short and stable | Concentrates the arc and improves shielding control |
| Amperage | Use only what is needed for reliable fusion | Limits unnecessary heat and burn-through risk |
| Travel speed | Move steadily; avoid dwelling | Reduces local heat accumulation |
| Pulse control | Use when the WPS allows and it improves puddle control | Can help manage average heat and bead placement |
| Cooling protection | Maintain post-flow and trailing coverage as required | Prevents oxidation after the arc stops |
Do not deliberately slow down just to make the bead look wider. Excessive dwell can increase heat input, enlarge the heat-affected zone, and make discoloration more likely.
Short Arc Length
A short TIG arc improves both heat control and shielding on titanium. TWI gives a practical rule of keeping arc length as short as possible, typically around one to one-and-a-half times the tungsten electrode diameter.
A longer arc raises arc voltage and spreads the heat over a wider area. It can also move the puddle farther from the most effective part of the shielding envelope, increasing the chance of oxidation.
Keep the tungsten clean and correctly prepared for DC TIG. If it touches the puddle or filler, stop, correct the electrode condition, and clean any contaminated weld area before continuing.
Avoid Contamination and Oxidation
Preventing contamination is easier than repairing a contaminated titanium weld. Keep dedicated tools, clean gloves, dry gas lines, clean filler, protected joint surfaces, and adequate shielding together as one controlled system.
AWS G2.4/G2.4M:2021 provides dedicated guidance for fusion welding titanium and titanium alloys, including equipment, preparation, techniques, inspection, and repair. Use the job’s governing code and qualified WPS whenever their requirements are more specific than general shop guidance.
Guidance about low-hydrogen stick electrodes applies to steel SMAW and should not be transferred to titanium TIG practice.
Clean Joint Preparation
Mechanical and solvent cleaning serve different purposes. Mechanical preparation removes scale, oxide, and burrs; solvent cleaning removes oil and residue that could enter the weld pool.
| Control | Purpose |
|---|---|
| Mechanical preparation | Use dedicated carbide tools or a clean stainless-steel brush as permitted; avoid ordinary steel tools and steel wool |
| Solvent cleaning | Use an approved nonchlorinated solvent on a clean lint-free cloth, then let the surface dry completely |
After cleaning, protect the joint from fingerprints, bench dirt, moisture, and grinding debris. Reclean any area that is handled or contaminated before welding.
Shielding Gas Coverage
Titanium needs protection beyond the molten puddle. The recently solidified bead and heat-affected zone remain reactive while hot, so torch shielding may need support from a trailing shield and backside purge.
For tube and pipe, the root is normally purged because it cannot be allowed to oxidize on the inside surface. For plate or open joints, use whatever backing arrangement the qualified procedure requires to keep the hot underside away from air.
Before welding, check hoses, fittings, torch parts, seals, and purge dams for leaks. More flow is not automatically better; turbulence or drafts can disturb an otherwise adequate inert-gas blanket.
Color As Quality Check
Use weld color as an early warning system rather than the only acceptance test. A bright surface indicates stronger atmospheric protection, while darker or powdery oxides point toward increasing contamination.
- Silver is the preferred appearance.
- Straw and brown show increasing oxidation and must be judged against the applicable procedure.
- Purple and blue require closer review because they indicate greater oxygen exposure.
- Gray, white, or chalky surfaces indicate severe oxidation and normally require corrective action.
- Inspect the root as well as the face whenever the joint is full penetration.
If an unexpected color appears, stop before continuing the entire joint. Check purge quality, torch coverage, drafts, flow, joint cleanliness, and heat input so the cause is corrected rather than buried under another pass.
Inspect Titanium Welds
Start titanium weld inspection with the cooled surface, root, bead profile, and heat tint. Look for oxidation, cracks, porosity, undercut, incomplete fusion, arc strikes, tungsten contamination, and any evidence that shielding was lost during cooling.
Visual inspection is only the first level. Depending on the service and governing procedure, liquid penetrant testing, radiography, macro examination, or other nondestructive examination may be required to detect defects that are not visible from the surface.
Evaluate weld color under consistent lighting after the metal has cooled. true-color helmet optics may help you see the weld area during fabrication, but final color acceptance should not depend only on the appearance through a welding lens.
Note: For pressure, aerospace, medical, structural, or other safety-critical work, use the qualified welding procedure and inspection standard required by the job. Have a qualified welding professional approve any deviation or repair procedure.
Fix Common Titanium Welding Problems
Most titanium TIG problems trace back to shielding loss, contamination, poor fit-up, or unstable arc technique. Do not weld over a suspect area and hope the next pass will hide it; identify the cause, remove unacceptable material as the procedure requires, and restore clean shielding before rework.
If titanium shows unexpected discoloration or contamination, correct the shielding and cleanliness problem before adding more weld metal.
- Blue, gray, or chalky color: check for gas leaks, drafts, inadequate trailing coverage, weak back purging, excessive arc length, or excessive heat. Rework the affected area according to the WPS.
- Porosity: inspect the gas system for leaks or contamination, then verify that the base metal and filler are clean and dry.
- Cracking: stop and evaluate filler selection, joint restraint, contamination, fit-up, and heat input. Do not simply remelt the crack.
- Tungsten inclusion or contamination: stop, recondition or replace the electrode, remove contamination from the joint, and restart with a noncontact arc-start method where available.
- Root discoloration: check purge volume, leaks, dam placement, purge time, and whether the root remained shielded during cooling.
Consistent setup matters more than the number of processes a machine can perform. Multi-process welder features can be useful in a general shop, but titanium quality still depends on stable DC TIG output, clean gas delivery, correct shielding, and disciplined preparation.
Frequently Asked Questions
What Is 2T and 4T on a Titanium Welder?
2T and 4T are torch-trigger control modes, not titanium-specific settings. In 2T, you normally hold the trigger while welding; 4T lets the machine latch the welding sequence for longer runs and use additional start or stop steps, depending on the welder. Choose the mode that fits your torch control and qualified procedure.
What Two Metals Cannot Be Welded Together?
There is no universal pair of metals that can never be joined. Aluminum and copper are difficult to fusion weld because brittle intermetallic compounds can form, but TWI has demonstrated laser-welded Al-Cu joints; solid-state processes can also be used for suitable applications.
Do You Weld Titanium With AC or DC?
Titanium is normally TIG welded with direct current electrode negative, or DCEN. Unlike aluminum, titanium does not need AC oxide-cleaning action; use DCEN together with a clean tungsten, stable short arc, and the shielding arrangement required by the welding procedure.
What Color Is Titanium When It Burns?
Burning titanium can produce an intense or dazzling white light; this is different from the straw, blue, or gray oxide colors seen on an overheated weld. Published titanium-combustion research reports dazzling white light during burning, so titanium fires require appropriate metal-fire precautions rather than ordinary weld-color interpretation.
Conclusion
Successful titanium welding comes from controlling contamination before, during, and after the arc. Prepare the joint with dedicated tools, use DCEN TIG with correct filler and 100% argon shielding, protect the hot root and cooling bead, then inspect both weld color and physical defects against the applicable WPS or code before putting the joint into service.
Sources
- Miller Electric — Best Practices for Welding Titanium Tube & Pipe: cleaning, shielding, purging, gas quality, and weld-color guidance.
- TIMET — Titanium Design and Fabrication: GTAW polarity, gas flow, torch setup, cleaning, trailing shielding, and heat protection.
- TWI — Welding of Titanium and Its Alloys, Part 2: DCEN GTAW, arc length, gas lens use, backing gas, filler handling, and shielding practice.
- AWS G2.4/G2.4M:2021: fusion-welding guidance for titanium and titanium alloys.
- AWS A5.16/A5.16M:2023: titanium and titanium-alloy welding electrode and rod classifications.
- AWS D1.9/D1.9M:2015: structural titanium welding requirements and inspection provisions.
- TWI — Dissimilar Laser Welding of Aluminium and Copper Alloys: evidence that aluminum-copper joints can be produced with specialized welding processes.
- Titanium Combustion Research: observed intense white light during titanium-alloy burning.