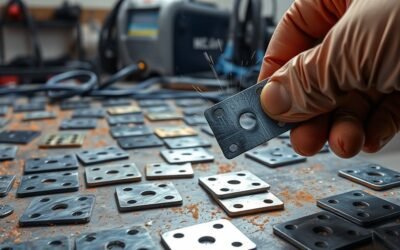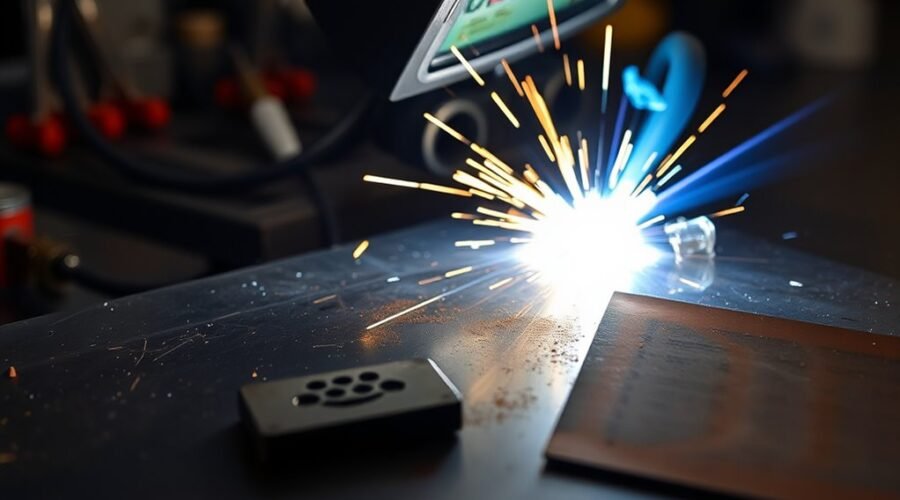
Welding burn-through happens when the base metal melts completely through and leaves a hole. It is especially common on thin sheet when heat input is too high, travel speed is too slow, or a joint gap leaves too little metal to absorb the arc. Preventing it means controlling machine settings, fit-up, travel speed, filler size, weld sequence, and heat buildup rather than relying on one adjustment alone.
Quick Answer
To prevent welding burn-through, start with settings matched to the metal thickness, keep joint gaps small, use a steady travel speed, and avoid holding the arc in one spot. On thin sheet, smaller filler wire, short welds, pulsed or short-circuit processes, and a copper or aluminum backing bar can provide additional heat control.
Key Takeaways
- Burn-through occurs when the weld pool melts completely through the base metal.
- Excessive current or voltage, slow travel, large joint gaps, and repeated heating of the same area are common causes.
- Thin sheet has less material available to absorb and spread welding heat, so the usable parameter window is smaller.
- Tight fit-up, smaller filler material, controlled travel speed, short weld sequences, and backing bars can reduce the risk.
- There is no single welding process that always burns through first; actual risk depends on the process mode, settings, material, thickness, and technique.
At a Glance
| Time Required | About 5–15 minutes to check fit-up, clean the joint, set the machine, and make test welds before starting the finished joint. |
| Difficulty | Moderate. Thin sheet leaves little margin between adequate fusion and excessive melting. |
| Tools Needed | Welder, correct filler/electrode, clamps, cleaning tools, proper PPE, and optionally a copper or aluminum backing/chill bar. |
| Cost | No special purchase is normally required beyond normal welding equipment and PPE; optional backing material adds only the cost of the copper or aluminum bar or plate. |
Warning: Welding exposes you to hot metal, ultraviolet radiation, electrical hazards, fumes, sparks, and fire risk. Wear suitable welding PPE, provide adequate ventilation or fume extraction, remove or protect combustible materials, and follow the welder manufacturer’s instructions. OSHA identifies burns, eye damage, electric shock, UV radiation, and welding fumes among the major hazards of welding operations.
What Is Welding Burn-Through
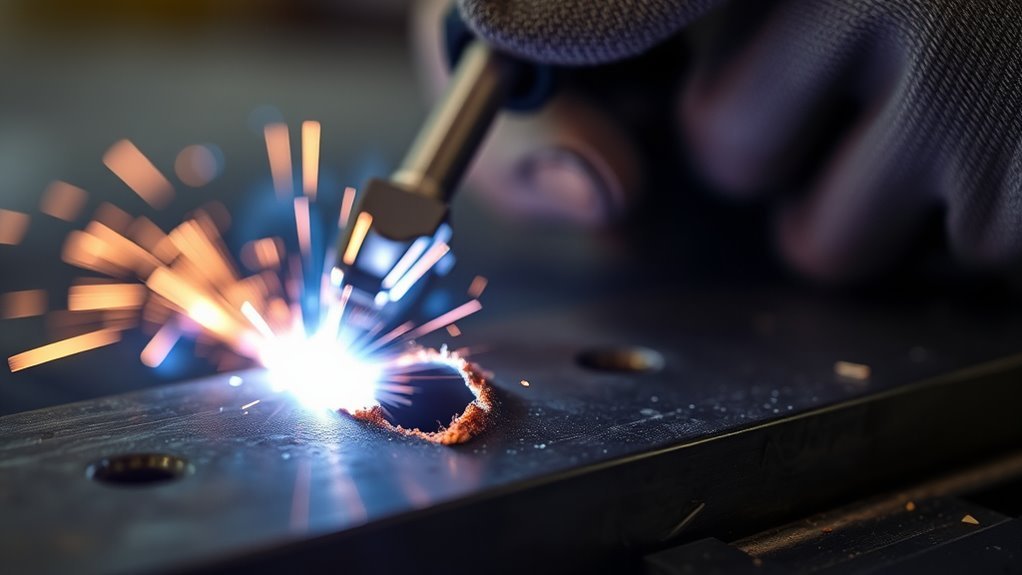
Welding burn-through, also called melt-through in general shop usage, occurs when the molten weld pool penetrates completely through the base metal and leaves an unwanted opening.
The defect is especially common on light-gauge material because there is less metal available to absorb and conduct heat away from the weld zone. Miller notes that burn-through is particularly common when MIG welding thin material and identifies excessive heat as its primary cause.
Burn-through is different from normal root penetration. A sound weld may penetrate through a joint as required by its design, but uncontrolled burn-through removes base metal, enlarges the root opening, and can leave an irregular hole, excessive reinforcement, distortion, or insufficient joint cross-section.
Typical warning signs include an unusually large or fluid weld pool, rapidly widening joint edges, a glowing area ahead of the puddle, a sudden loss of support under the arc, or repeated holes appearing at tack welds and joint gaps.
Why Welding Burn-Through Happens
Burn-through usually develops when the energy delivered to a small area exceeds what the joint can absorb while maintaining its shape. The most important contributors are excessive welding parameters, slow travel, thin material, excessive joint gaps, repeated heating of one location, and an unsuitable technique or filler size.
Welding current, arc voltage, and travel speed are fundamental arc-welding variables used to evaluate welding heat input. See TWI’s guidance on measuring arc-welding parameters.
Excess Heat Input
Too much heat is the most direct cause of welding burn-through. Depending on the process, excessive current, voltage, wire-feed speed, or time spent over the same area can enlarge the molten pool until the base metal can no longer support it.
Travel speed also matters. Moving too slowly keeps the arc over the same section longer and increases the energy applied per unit length. Moving faster can reduce heat accumulation, but excessive speed creates its own problems, including poor fusion, undercut, or an undersized bead. The goal is therefore the fastest stable travel speed that still produces the required fusion and bead profile.
- Reduce excessive current, voltage, or wire-feed speed according to the welding process.
- Avoid dwelling or weaving unnecessarily on thin sheet.
- Spread welds around the part when possible instead of repeatedly heating one small area.
- Allow cooling time between short welds when distortion or burn-through begins to increase.
For MIG welding, Miller specifically identifies voltage or wire-feed speed that is too high and travel speed that is too slow as common causes of excessive heat and burn-through. See Miller’s MIG weld-defect guidance.
Poor Joint Fit-Up
Poor fit-up can turn otherwise reasonable welding parameters into a burn-through problem. A large root gap leaves less solid metal beneath the arc, forcing the operator to bridge the opening with molten filler while the unsupported edges continue to heat.
The effect is especially severe on very thin sheet. Miller’s sheet-metal guidance notes that even a relatively small unwanted gap can invite burn-through because the gap itself cannot absorb heat.
Misalignment can create the same problem by placing more of the arc on one thin edge than the other. Uneven material thickness also requires the welder to direct more heat toward the thicker member and protect the thinner edge.
- Clamp parts securely before welding.
- Keep the joint gap consistent with the approved joint design or procedure.
- Correct misalignment instead of trying to fill it with excessive weld metal.
- Use tack welds to hold thin parts in position before completing the joint.
High Amperage and Slow Travel Speed
High amperage can increase melting rate and penetration, while excessive voltage can broaden and destabilize the arc depending on the process. In constant-voltage MIG welding, wire-feed speed is closely related to welding current, so an unnecessarily high wire-feed setting can also contribute to burn-through.
Slow travel compounds the problem because the arc spends more time over each section of the joint. The weld pool becomes larger and more fluid, distortion increases, and thin edges may collapse into the puddle.
Do not solve this by simply welding as fast as possible. Excessive travel speed can produce poor tie-in or lack of fusion. Instead, reduce excessive electrical parameters first and then use a steady travel speed that keeps the puddle small while preserving fusion.
Burn-through prevention is a balance: use enough heat for fusion, but not so much energy in one location that the joint loses its ability to support the weld pool.
Fix Fit-Up, Cleaning, and Arc Length
Good fit-up gives the weld pool solid edges to bridge. Clean metal helps the arc and molten pool behave predictably. Consistent arc length, contact-tip-to-work distance, or electrode stickout then helps the machine operate within the range for which its settings were selected.
These controls work together, but they do not have equal importance. When burn-through is occurring, first check material thickness, joint gap, machine settings, travel speed, and accumulated heat before treating arc length as the only cause.
Joint Fit-Up
Accurate joint fit-up is one of the most effective protections against burn-through on thin metal. Parts should be aligned, supported, and clamped so that the joint opening remains consistent while welding.
Clean the weld area of oil, paint, rust, heavy scale, moisture, and other contaminants appropriate to the material. Contamination is more commonly associated with unstable welding, porosity, inclusions, and poor fusion than with direct burn-through, but an erratic arc or dirty joint makes precise heat control more difficult.
A backing or chill bar can provide additional support. Copper and aluminum are commonly used because they conduct heat away from the weld area quickly and can help support the molten pool when used appropriately.
- Maintain a consistent joint gap.
- Clamp thin sheet so the edges cannot move apart while heating.
- Clean the weld zone before striking the arc.
- Use a suitable backing/chill bar when the joint allows access from the back.
Arc Length and Stickout Control
Arc length should remain consistent and appropriate for the welding process. There is no universal rule that simply making the arc shorter always prevents burn-through.
With TIG and stick welding, changing arc length changes arc voltage, heat distribution, stability, and bead characteristics. With MIG and flux-cored welding, contact-tip-to-work distance and electrode stickout also affect current and wire heating.
An excessively long or inconsistent arc can become unstable and make penetration harder to control. An excessively short arc can cause sticking, tungsten contamination in TIG, or unstable transfer depending on the process.
Use the torch, gun, or electrode position recommended for the process and maintain it consistently. If the joint is still burning through, reduce excessive heat input or improve fit-up rather than trying to correct the entire problem by arc-length changes alone.
How Burn-Through Risk Varies by Welding Process
No welding process universally burns through thin metal faster than every other process. Risk depends on transfer mode, amperage, voltage, travel speed, electrode or wire size, material, thickness, joint geometry, and operator technique.
| Process | Burn-Through Considerations | Useful Thin-Metal Controls |
| MIG / GMAW | Excessive voltage, wire-feed speed/current, or slow travel can quickly overheat sheet metal. | Short-circuit transfer where appropriate, small-diameter wire, correct voltage/WFS, fast stable travel, short welds, and backing bars. |
| TIG / GTAW | Provides precise control, but excessive amperage or dwelling in one place can still open a hole rapidly. | Appropriate electrode/filler size, amperage control, pulsed TIG where suitable, straight travel, and controlled filler addition. |
| Flux-Cored / FCAW | Many FCAW wires and operating ranges are intended for thicker material and can be less forgiving on light-gauge stock. | Use only a wire and parameter range approved for the thickness; maintain appropriate travel speed and avoid excessive weaving. |
| Stick / SMAW | Electrode size and minimum practical amperage can make very thin sheet difficult to weld without excessive melting. | Use an appropriate small electrode, correct amperage, steady arc length, short welds, and a process better suited to thin stock when necessary. |
For automotive-style sheet metal, Miller recommends processes such as short-circuit MIG, TIG, and pulsed TIG because they provide useful heat control when correctly set up. See Miller’s current sheet-metal welding guidance.
Set Your Machine to Prevent Burn-Through
Machine settings should start with the manufacturer’s chart, welding procedure, or tested settings for the exact material, thickness, joint, wire/electrode, shielding gas, and welding position. Avoid copying a single amperage number from another job because the correct setting changes with the entire setup.
- Confirm material thickness. Measure it instead of estimating when possible.
- Select the appropriate filler or electrode size. Smaller MIG wire generally offers better control on light-gauge sheet because less heat is required to melt it.
- Use the machine’s recommended starting parameters. Set voltage, amperage, or wire-feed speed according to the process.
- Make a test weld on matching scrap. Use the same joint orientation and fit-up as the finished piece.
- Watch the puddle size. If the edges disappear or the puddle rapidly opens, stop and reduce heat before continuing.
- Adjust one variable at a time. Small changes make it easier to identify what solved the problem.
For MIG welding, Miller recommends using the smallest practical wire diameter for light-gauge sheet and specifically lists approximately 0.023- or 0.024-inch wire for many sheet-metal applications. The exact choice still depends on the machine, material, joint, and procedure.
Pro Tip: Keep a piece of scrap from the same material beside the job. When the part becomes progressively hotter or settings change, make another test weld before returning to a visible or critical joint.
How to Weld Thin Metal Without Burn-Through
Thin-metal welding works best when heat is managed before the arc starts rather than after a hole appears.
- Clean the joint. Remove coatings and contaminants using a method suitable for the material.
- Correct the fit-up. Keep gaps even and as small as the joint design permits.
- Clamp and tack the parts. Tack welds prevent sheet edges from opening as they expand from heat.
- Select suitable filler metal. Avoid unnecessarily large wire, rod, or electrode sizes.
- Start with conservative settings. Follow the welder manufacturer’s parameter chart or approved procedure.
- Use a small, controlled puddle. Avoid excessive weaving or dwelling.
- Use short welds when the joint allows. Skip to another part of the joint and let the first area cool rather than concentrating heat continuously.
- Add a chill bar when practical. Copper or aluminum backing can absorb heat and support the molten pool.
- Recheck settings as the part heats up. A long panel that was stable at the first tack may become easier to burn through after repeated welding.
Miller recommends distributing heat with intermittent or skip-welding techniques when appropriate and using the fastest travel speed that maintains the required bead profile. This helps reduce both burn-through and distortion.
Note: Aluminum conducts heat rapidly but also has a relatively low melting temperature compared with steel. It may initially require substantial heat and then become increasingly prone to overheating as the surrounding material warms. Stainless sheet, by contrast, tends to retain heat in the weld area more readily. In either case, use settings and procedures appropriate to the specific alloy.
Quick Fixes for Burn-Through Holes
When a burn-through hole appears, stop welding instead of continuing to feed metal into an unstable opening. Let the area cool enough to regain control of the joint and inspect how much base metal has been lost.
For a small hole in noncritical sheet-metal work, remove contamination, slag, oxide, and loose or severely thinned edges. If access allows, place a suitable backing plate or copper chill bar behind the opening. Reduce excessive heat, make small controlled deposits around the sound edge, and gradually close the opening rather than holding the arc in its center.
Build a small burn-through repair from sound metal toward the center. Do not chase the edge of a growing hole with a long, continuous arc.
If the affected area is large, heavily distorted, cracked, or thinned beyond useful material, cutting out the damaged section and fitting replacement material can produce a more controllable repair than repeatedly filling the opening.
Warning: Do not treat a visually filled hole as proof that a structural weld has been restored. Load-bearing structures, pressure-containing equipment, vehicle safety components, regulated work, and code-governed welds may require an approved repair procedure, qualified personnel, and specified inspection or testing.
After a noncritical repair cools, inspect the area for cracks, remaining holes, undercut, lack of fusion, excessive distortion, and obvious thinning. Where the service requires more than visual acceptance, use the inspection method specified by the applicable drawing, procedure, code, or engineer.
Proven Ways to Prevent Burn-Through
Burn-through prevention comes from controlling the complete welding setup rather than making a single adjustment after the metal fails.
- Match settings to thickness: Start with the machine manufacturer’s chart or approved welding procedure.
- Improve fit-up: Correct unwanted gaps and misalignment before welding.
- Use suitable filler size: Smaller wire or filler can improve control on light-gauge sheet when appropriate.
- Control travel speed: Move quickly enough to limit heat buildup but not so fast that fusion suffers.
- Avoid unnecessary weaving: Straight, controlled movement generally limits dwell time on thin material.
- Use short sequences: Skip or stitch around the part where the joint design permits.
- Let hot sections cool: Heat accumulation can make later welds burn through even when the original settings worked.
- Use backing or chill bars: Copper or aluminum can help absorb heat and support the puddle where joint access permits.
- Keep technique consistent: Stable torch angle, arc length, or stickout makes machine adjustments more predictable.
- Test before the finished joint: Matching scrap reveals whether settings are too hot without damaging the workpiece.
The basic objective is simple: achieve the required fusion while keeping the molten pool small enough for the remaining base metal to support it. Once fit-up, settings, travel, filler size, and weld sequence work together, burn-through becomes much easier to control.
Frequently Asked Questions
How Do You Prevent Burn-Through When Welding?
Use welding parameters matched to the material thickness, correct excessive joint gaps, keep travel speed steady, avoid unnecessary dwell time, and control accumulated heat. On thin sheet, smaller filler wire, short weld sequences, pulsed or short-circuit techniques where appropriate, and a copper or aluminum chill bar can also help.
How Do You Stop Welders From Getting Burned?
Prevent personal burns by wearing suitable welding gloves, flame-resistant protective clothing, eye and face protection, and footwear; controlling sparks and hot metal; and using screens and safe work practices. OSHA also requires protection against welding radiation, electrical hazards, fumes, and fire hazards. A welding helmet alone does not provide complete body protection.
Why Do Welders Drink Milk After Welding?
Drinking milk after welding is a longstanding shop tradition, but milk is not a recognized substitute for controlling welding-fume exposure. Welding fumes are primarily an inhalation hazard. Use adequate ventilation or local exhaust, appropriate respiratory protection when required, and material-specific exposure controls. Seek medical advice if symptoms such as fever, breathing difficulty, chest tightness, or significant cough occur after fume exposure.
How Long Does a Welder’s Burn Take to Go Away?
Healing time depends on the type and depth of the injury. Minor superficial thermal burns may improve within days and commonly heal within about one to two weeks, while deeper burns can take substantially longer and may require professional treatment. Burns that are deep, worsening, infected, larger than the person’s palm, or located on the face, hands, feet, genitals, or major joints should receive medical evaluation. Eye pain or vision problems after arc exposure also require prompt medical advice.
Can You Fill a Burn-Through Hole With More Weld?
A small hole in noncritical sheet metal can often be closed by allowing the area to cool, cleaning it, reducing excessive heat, supporting the back where possible, and making small deposits from sound metal toward the center. Large, cracked, severely thinned, structural, or code-governed areas may require removal and replacement instead of simply adding weld metal.
Does Copper Backing Help Prevent Burn-Through?
Yes, when the joint and procedure allow it. A copper backing or chill bar can support the molten pool and draw heat away from thin sheet. Aluminum backing can also be used in suitable applications. Backing does not correct excessively high parameters or poor fit-up, so those conditions still need to be addressed.
Conclusion
Welding burn-through is usually a heat-control and fit-up problem rather than an unavoidable defect. Start with parameters suited to the metal thickness, keep gaps consistent, choose an appropriate filler size, maintain a stable travel speed, and prevent heat from accumulating in one location. On thin sheet, short weld sequences and a copper or aluminum backing bar can add useful control. If a hole does occur, stop, cool the area, and repair from sound metal instead of continuing to overheat an unstable edge.
Sources
- Occupational Safety and Health Administration — Welding, Cutting, and Brazing: Hazards and Solutions — welding fumes, UV radiation, burns, electrical hazards, and PPE.
- OSHA 29 CFR 1910.252 — General Welding Requirements — fire prevention, PPE, ventilation, and welding-workplace controls.
- Miller — Successfully Welding Sheet Metal With MIG and TIG — thin-sheet fit-up, small wire, travel speed, skip welding, and backing/chill bars.
- Miller — Troubleshooting Common MIG Weld Defects — burn-through causes and parameter corrections.
- NIOSH — Welding Fumes — welding-fume exposure routes, symptoms, and occupational health information.
- American Burn Association — Burn First Aid — minor-burn care and circumstances that warrant professional evaluation.