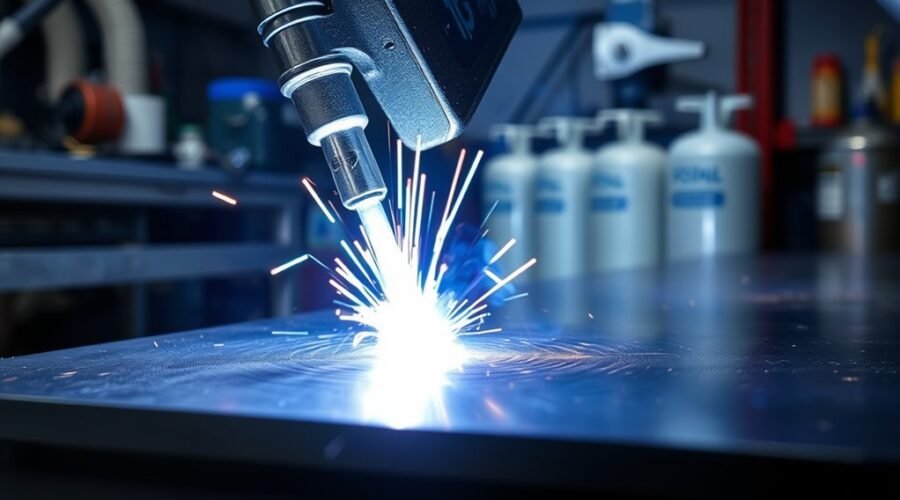
Pulse MIG welding, also called pulsed GMAW or GMAW-P, controls metal transfer by repeatedly switching between a high peak current and a lower background current. This gives welders spray-like droplet transfer at a lower average current than conventional spray transfer, helping control heat, spatter, puddle size, and distortion across aluminum, stainless steel, carbon steel, and other suitable alloys.
Quick Answer
Pulse MIG welding alternates between peak current that transfers molten wire and background current that keeps the arc stable. Compared with conventional spray transfer, it can lower average heat input, reduce spatter, improve puddle control, and make out-of-position welding easier while still providing spray-like fusion.
Key Takeaways
- Peak current transfers the wire droplet; background current keeps the arc lit with less energy between pulses.
- Pulse MIG can reduce spatter and average heat input compared with conventional spray transfer.
- It is especially useful for aluminum, stainless steel, visible welds, heat-sensitive parts, and many out-of-position joints.
- Very thin sheet is not automatically a pulse-MIG job; short-circuit or specialized low-heat modes may be better for some applications.
- Pulse parameters are machine-, wire-, gas-, and material-specific, so generic peak-current or frequency numbers should not replace the welder’s program chart or an approved WPS.
- Double pulse is different from standard pulse and is commonly used when additional heat cycling or a pronounced ripple appearance is desired.
At a Glance
| Time Required | About 10–20 minutes for initial setup and test welds; production welding time depends on the joint. |
| Difficulty | Intermediate; synergic machines reduce setup work, but technique and joint preparation still matter. |
| Tools Needed | Pulse-capable MIG welder, correct wire and shielding gas, suitable feeder/gun, welding PPE, clamps, cleaning tools, and matching test material. |
| Cost | Varies widely by welder, gun, feeder, gas, wire, and duty-cycle requirements; there is no universal machine price or amperage class. |
Warning: Pulse MIG still produces intense arc radiation, hot metal, sparks, gases, and welding fumes. Use the correct helmet, eye and skin protection, gloves, fire precautions, and ventilation or local exhaust. Never rely on milk or another food or drink to protect you from welding fumes. Follow your employer’s exposure-control program and applicable OSHA requirements, especially when welding stainless, galvanized, coated, or confined-space work.
How Pulse MIG Welding Works

Pulse MIG uses an electronically controlled waveform rather than holding the welding current at one steady level. During the peak portion of the waveform, current rises high enough to detach molten filler metal from the wire. The power source then drops to a lower background current that keeps the arc established until the next pulse.
In a properly tuned program, the goal is commonly one controlled droplet per pulse without repeatedly short-circuiting the wire into the puddle. This provides many of the fusion and arc-stability benefits associated with spray transfer while reducing the average current compared with a continuously operating spray arc.
That lower average energy can make the puddle easier to manage, reduce distortion, and lower burn-through risk in suitable applications. It does not guarantee freedom from porosity, cracking, or lack of fusion. Those defects also depend on shielding gas, material cleanliness, filler selection, joint design, travel technique, fit-up, and the actual welding procedure.
The main advantage of pulse MIG is controlled spray-like metal transfer at a lower average current than conventional spray transfer—not simply “less heat” under every possible setting.
Modern synergic pulse machines simplify this process. After the operator selects the correct material, wire diameter, shielding gas, and pulse program, changing wire feed speed can automatically alter several hidden waveform parameters to keep metal transfer stable. More advanced systems may also expose peak current, background current, pulse width, frequency, arc-control, or waveform settings.
When to Use Pulse MIG Welding
Pulse MIG is most useful when you need spray-like fusion but want more control over average current and weld-puddle size. It is widely used for aluminum and stainless steel, and suitable pulse programs are also available for carbon steel, high-strength steel, nickel alloys, and other materials.
| Application | Why Pulse Can Help | Important Limitation |
|---|---|---|
| Aluminum fabrication | Stable spray-like transfer, low spatter, good puddle control, and lower average current than conventional spray. | Cleanliness, wire feeding, correct filler alloy, and shielding gas remain critical. |
| Stainless steel | Helps control heat and distortion while maintaining productive wire-fed welding. | Use the correct filler, gas, and qualified procedure for the grade and service. |
| Out-of-position welds | A smaller, more controllable puddle can make vertical and overhead work easier than conventional spray. | Position capability depends on the program, joint, wire, and procedure. |
| Thin or heat-sensitive parts | Controlled average current can reduce warping and burn-through compared with conventional spray. | Very thin sheet may still favor short-circuit or a specialized low-heat process. |
| Visible production welds | Stable transfer can reduce spatter and post-weld cleanup. | Bead appearance does not prove adequate fusion or penetration. |
For thick material welded flat or horizontally, conventional spray transfer can still be an efficient choice when maximum deposition is the priority. Pulse MIG should therefore be selected because it fits the joint and procedure—not simply because the machine offers a pulse button.
Pulse MIG vs. Short Circuit and Spray Transfer
Short-circuit, pulse, and conventional spray transfer each have a useful operating range. Pulse does not replace the other modes in every application.
| Characteristic | Short Circuit | Pulse MIG | Conventional Spray |
|---|---|---|---|
| Metal transfer | Wire repeatedly contacts the puddle. | Controlled spray-type droplets during current peaks. | Continuous fine-droplet spray transfer. |
| Typical heat behavior | Well suited to low-current work and thin material. | Lower average current than comparable conventional spray operation. | Generally higher current and a more fluid puddle. |
| Spatter | Can be moderate if poorly tuned. | Usually low with the correct program and technique. | Low when a stable spray transfer is maintained. |
| Position capability | Commonly used in all positions. | Suitable for many out-of-position applications. | Normally best suited to flat and horizontal work because of the fluid puddle. |
| Best fit | Thin sheet, root work, gap tolerance, lower-current applications. | Broad thickness range, aluminum, stainless, positional work, low-spatter production. | Thicker material and productive in-position welding. |
One important caution is fusion. Short-circuit transfer can be excellent when properly applied, but using it on material or joints that require more energy than the procedure provides can increase the risk of incomplete fusion. Pulse gives the operator access to spray-type transfer over a wider practical operating range, but the finished weld still has to meet the applicable procedure and inspection requirements.
Pulse MIG vs. Double Pulse
Standard pulse MIG and double pulse are related but different. Standard pulse rapidly alternates peak and background current to control individual droplet transfer. Double pulse adds a slower secondary modulation that alternates between higher- and lower-energy pulse conditions.
That additional cycle can change puddle behavior, overall heat distribution, bead width, and ripple spacing. On aluminum, double-pulse or manufacturer-specific processes such as Pulse-on-Pulse are often used to create a more pronounced, regularly rippled bead that can resemble the appearance associated with TIG welding.
Note: Do not copy a double-pulse frequency, low-current percentage, or pulse waveform from another welder and assume it will work on yours. Control names and ranges vary by manufacturer, model, wire, gas, and programmed waveform.
Key Pulse MIG Settings to Dial In
The correct controls depend heavily on whether the machine uses a synergic pulse program or allows full manual waveform adjustment.
1. Material, Wire, and Gas Program
Start by selecting a program that matches the base/filler material, wire diameter, and shielding gas. A pulse waveform developed for aluminum wire and argon is not interchangeable with a carbon-steel or stainless program using a different gas blend.
2. Wire Feed Speed
Wire feed speed controls how much filler wire is delivered. On many synergic pulse machines, increasing wire feed speed also tells the power source to increase the programmed welding output and alter the internal pulse waveform. It therefore acts as one of the main controls for deposition and welding current.
3. Arc Length, Trim, or Voltage Adjustment
Many synergic machines provide a trim or arc-length control instead of asking the operator to set every voltage or waveform variable manually. Too short an arc can produce a harsh arc or unwanted contact with the puddle. Too long an arc can reduce control and change bead shape. Start near the machine’s recommended neutral value and make small adjustments on a test coupon.
4. Arc Control or Dynamics
Depending on the welder, an arc-control setting may change pulse frequency, background behavior, arc stiffness, or another part of the programmed waveform. The same control name does not necessarily perform the same function on every machine, so check the operating manual before adjusting it aggressively.
5. Peak Current, Background Current, Frequency, and Pulse Width
These parameters create the pulse waveform. Many synergic welders manage them automatically. Machines intended for advanced procedure development may let the user edit them directly. If those controls are available, use the manufacturer’s procedure guidance or a qualified WPS rather than relying on generic internet values.
6. Start, Crater, Burnback, and End Controls
Hot-start or run-in functions can help stabilize arc initiation. Crater-fill and downslope functions can reduce an abrupt termination at the end of the weld. Burnback controls how the wire behaves as the arc stops. These features are useful, but their names and ranges differ between power sources.
Pro Tip: Change one setting at a time on scrap that matches the real material, thickness, joint, wire, and position. Record the successful program, wire feed speed, trim, gas, CTWD, and travel technique so the result can be repeated.
How to Set Up and Use a Pulse MIG Welder
Step 1: Review the Procedure and Safety Requirements
For critical, structural, pressure, or code-controlled work, begin with the applicable WPS rather than developing settings from appearance alone. Inspect the work area for fire hazards and make sure fume controls, shielding screens, PPE, and cylinder handling practices are appropriate.
Step 2: Prepare the Base Metal
Remove oil, grease, moisture, paint, oxide, and other contamination as appropriate for the material. Aluminum requires especially careful cleaning. Use tools dedicated to aluminum where cross-contamination is a concern, and prepare the joint and fit-up before striking the arc.
Step 3: Install the Correct Wire, Feeder Setup, and Gas
Use the filler metal and shielding gas specified for the application. Aluminum commonly uses pure argon for many MIG applications and benefits from aluminum-compatible feeding components such as U-groove drive rolls and suitable liners. A spool gun or push-pull gun may be appropriate when reliable feeding of soft aluminum wire is difficult over a conventional gun cable.
Step 4: Select the Matching Pulse Program
Choose the program for the material, wire diameter, and gas you are actually using. On a synergic machine, this selection establishes the waveform family from which the power source calculates peak current, background current, frequency, and other variables.
Step 5: Enter the Recommended Starting Output
Set wire feed speed, material thickness, amperage, or the primary output control specified by the machine. Leave trim or arc length close to the recommended starting point unless the manufacturer or WPS specifies otherwise.
Step 6: Make a Test Weld
Use scrap with the same material, thickness, joint type, and orientation as the actual job. Maintain a consistent contact-tip-to-work distance, torch angle, and travel speed. Listen and watch for a stable arc rather than trying to force the arc to match a particular sound from a different machine.
Step 7: Inspect and Adjust
Evaluate bead profile, tie-in at the toes, penetration or fusion evidence, undercut, porosity, spatter, distortion, and any acceptance criteria required by the job. Adjust in small steps. For critical work, visual appearance alone is not enough to establish weld quality.
Step 8: Save or Record the Successful Procedure
If the welder supports job memories, store the program. Otherwise record the machine mode, wire, gas, wire feed speed, trim, material thickness, position, CTWD, and any start/crater settings needed to reproduce the weld.
Common Pulse MIG Problems and Fixes
| Problem | Likely Causes | What to Check |
|---|---|---|
| Excessive spatter or harsh arc | Wrong pulse program, wrong gas, poor CTWD, incorrect trim, feeding problems, worn contact tip. | Verify material/wire/gas program first, then inspect feeding and return settings toward the recommended baseline. |
| Burn-through or excessive distortion | Excessive average heat, slow travel, poor fit-up, oversized wire or unsuitable process for the thickness. | Increase travel speed where appropriate, improve fit-up, reduce output using the correct program, or consider a lower-heat transfer mode. |
| Lack of fusion | Output too low, excessive travel speed, poor joint preparation, wrong torch angle, unsuitable program. | Confirm the procedure and joint prep, then verify that the selected output provides adequate fusion for the joint. |
| Porosity | Contamination, moisture, drafts, gas leaks, poor gas coverage, dirty aluminum oxide or hydrocarbons. | Clean the joint, inspect hoses and connections, protect the arc from drafts, and verify the correct shielding gas and flow. |
| Inconsistent aluminum wire feeding | Wrong drive rolls or liner, excessive drive-roll pressure, tight cable bends, unsuitable gun system. | Use aluminum-compatible feeding components and consider a spool or push-pull gun when needed. |
| Arc changes as the gun moves | Changing CTWD, poor work connection, feeding resistance, inconsistent torch angle. | Maintain consistent gun position, inspect the work lead, and correct feeding or consumable problems. |
How to Choose a Pulse MIG Welder
Do not choose a pulse MIG welder from amperage alone. A 300- or 400-amp industrial machine may be appropriate for high-duty production, but it can be unnecessary for lighter fabrication. Match the power source and feeding system to the work you actually expect to do.
Output Range and Duty Cycle
Confirm that the machine can cover the current, voltage, wire-feed, and duty-cycle requirements of your typical material thicknesses and production schedule. High sustained output matters more in continuous industrial welding than in occasional short welds.
Available Pulse Programs
Check whether the machine has developed programs for the materials, wire diameters, and gas combinations you intend to run. A long feature list is less useful than having the correct waveform for your actual consumables.
Synergic and Manual Control
Synergic controls make everyday setup easier because the machine coordinates multiple pulse variables as the operator changes wire feed speed or trim. Advanced manual waveform control is valuable when a welding engineer or experienced operator needs to develop specialized procedures, but it is not necessary for every shop.
Aluminum Feeding Support
If aluminum is a major part of your work, check compatibility with U-groove drive rolls, appropriate liners, spool guns, or push-pull systems. Reliable feeding can matter as much as the power source itself.
Input Power
Confirm that the shop electrical service can support the machine at the output you expect to use. Industrial three-phase machines and portable single-phase welders serve very different operating environments.
Gun and Cooling Requirements
Choose an air-cooled or water-cooled gun based on actual amperage, duty cycle, wire type, ergonomics, and production time rather than simply assuming that every pulse application requires water cooling.
Procedure Memory, Service, and Consumables
Job memories can improve repeatability when operators switch between products. Also consider local service support, replacement contact tips and liners, feeder availability, software support, and the cost of compatible guns and accessories.
Frequently Asked Questions
When should you use pulse MIG?
Use pulse MIG when you want controlled spray-type transfer with lower average current than conventional spray, especially for aluminum, stainless steel, visible welds, many out-of-position joints, and applications where spatter or distortion must be controlled. Very thin sheet may still be better suited to short-circuit or another low-heat process.
What are the disadvantages of pulse MIG welding?
Pulse-capable equipment usually costs more than a basic CV MIG welder, and results depend on using the correct material, wire, gas, and waveform program. Advanced machines can also create more setup choices to understand. Repairs, specialized feeders, push-pull guns, and water-cooled equipment can increase system cost in demanding applications.
Why do welders drink milk after welding?
Some welders drink milk because of an old belief that it protects against metal fumes, but milk does not prevent welding-fume exposure or metal fume fever. Fumes enter through the respiratory system, so protection comes from controlling exposure with suitable ventilation, local exhaust, work practices, and respiratory protection where required—not from drinking milk.
How do you use a pulse MIG welder?
Select the correct material, wire diameter, shielding gas, and pulse program; enter the manufacturer’s recommended starting output; then make a test weld on matching scrap. Maintain consistent CTWD, torch angle, and travel speed. Inspect fusion, bead shape, porosity, spatter, and distortion before making small adjustments and recording the final procedure.
Does pulse MIG eliminate spatter?
No. A correctly programmed pulse process can produce very low spatter, but the wrong waveform, gas, wire, CTWD, trim setting, contaminated material, or feeding problem can still cause spatter.
Is double pulse the same as pulse MIG?
No. Standard pulse controls individual droplet transfer by alternating peak and background current. Double pulse adds a slower modulation between different pulse-energy levels, which can further influence heat distribution, puddle behavior, and bead-ripple appearance.
Conclusion
Pulse MIG welding combines spray-type metal transfer with tighter control over average current, puddle behavior, and spatter. That makes it especially useful for aluminum, stainless steel, heat-sensitive parts, visible production welds, and many out-of-position applications. Its biggest advantage, however, comes from using the correct program rather than chasing generic pulse numbers.
Match the waveform to the material, wire diameter, and shielding gas, establish settings on representative test material, and verify fusion instead of judging the weld by appearance alone. When the procedure, feeding system, and technique are right, pulse MIG can provide an effective balance of productivity, heat control, low cleanup, and repeatability.
Sources
- Miller Electric — Which Welding Process Should I Use for Manufacturing? — pulse, short-circuit, and spray-transfer applications and limitations.
- ESAB — Pulse MIG on Aluminium with Warrior Edge — pulse waveform behavior, aluminum setup, synergic controls, and feeding guidance.
- Fronius — RCU 5000i Operating Instructions — machine-specific pulse parameters and waveform-control examples.
- OSHA — 29 CFR 1910.252 Welding, Cutting, and Brazing — welding PPE, ventilation, fumes, and confined-space safety requirements.
- Cancer Council Australia — Does Drinking Milk Protect You From Toxic Welding Fumes? — evidence addressing the welding-milk myth.